
Chris Grigsby
Welcome to this page. It's free.

Exploring Application Security: Hands-On with 6 SCA, SAST, and DAST Tools
After completing my Offensive Security Certified Professional (OSCP) certification in November, I decided it would be fun and educational to study more of the defensive side of cybersecurity. I completed both Security Engineer and DevSecOps paths on TryHackMe and then decided it was time to get my hands dirty with some Free Open-Source Software (FOSS) tools and test them myself.
I have discussed the topic of Application Security in previous posts, but I have decided to provide a more complete overview by testing a variety of tools against only one vulnerable application. In this case I will be using the Generic-University application which I found in OWASP’s Vulnerable Web Applications directory. I have used other applications before, but they are either in written about very frequently like Juice Shop, or ultimately more structured learning tools like WebGoat. Helpfully, there is also an official docker image, so it should be easy to stand up and test against.
Purpose
The purpose of this post is to use the Generic-University application to perform three types of application security testing:
- Software Composition Analysis (SCA)
- Static Analysis Security Testing (SAST)
- Dynamic Analysis Security Testing (DAST)
For each one of these sections I intend to use one FOSS tool and one tool commercial tool (which has a free tier or trial). I will discuss each of those in more detail in their relevant sections.
Initial Setup
Much of the initial setup will be dependent on the operating system (OS) in use. I will be using Kali Linux in a virtual machine with a ARM host machine. I imagine this will be simpler with a AMD architecture, but it should be simple enough as it is.
The setup involves downloading the application for SCA and SAST and then running it for the DAST section. To download the source code, simply run git clone https://github.com/InsiderPhD/Generic-University.git.
To download and run the application there are two options - by running the application through PHP Artisan or by using Docker.
- For Artisan the are explicit steps to download and run on the repo itself.
- For Docker, there are even simpler instructions in the dockerhub documentation.
Note: I actually ran into a couple issues with these options personally. The Docker image is designed for an x64 machine, and I had some dependency issues when trying to use Artisan. These should be simple enough to solve, but over the course of writing this post, I realized that Generic-University is a room on TryHackMe, which I already have a subscription to! So I simply stood it up there, and used a VPN to access it.
Software Composition Analysis (SCA)
SCA is the practice of analyzing third-party and open-source components of software applications for known vulnerabilities. In some cases this can include making sure that we are complying with licenses and legal obligations, but in this case we will be focusing on the dependencies of the Generic-University application, meaning libraries and frameworks.
Note that SCA can only check for known vulnerabilities. SCA tools keep a database of vulnerabilities and check the components of the code that we provide against them, so there is no way to detect unknown vulnerabilities. That said, it’s a great start to quickly weed out any components that should be updated or removed.
For the purposes of this post, I will be using OWASP Dependency-Check as a FOSS tool and Snyk as a commercial tool to perform SCA.
OWASP Dependency-Check Setup
Per their website:
Dependency-Check is a Software Composition Analysis (SCA) tool that attempts to detect publicly disclosed vulnerabilities contained within a project’s dependencies. It does this by determining if there is a Common Platform Enumeration (CPE) identifier for a given dependency. If found, it will generate a report linking to the associated CVE entries.
As I said, it only checks for known vulnerabilities against a database, such as NIST’s National Vulnerability Database (NVD), so it can’t alert the user to zero-days or anything like that.
Note that because the scanner uses an existing database to check code against, you must either download the full database (not small) or use an API key. If you wish to use an API key, you can request one here.
You can download the latest release from the GitHub page here. You can also run wget https://github.com/jeremylong/DependencyCheck/releases/download/v8.4.3/dependency-check-$releaseNumber-release.zip. In my case the release is 11.1.1. Then you can run unzip dependency-check-$releaseNumber-release.zip, and we’re off. The most basic usage is ./dependency-check.sh --project "MyProject" --scan /path/to/your/project.
In my case the full command is ./dependency-check/bin/dependency-check.sh --project "Generic-University" --scan Generic-University --nvdApiKey $myAPIKey --out DC_Generic_University.
OWASP Dependency-Check Results
After a couple minutes we see that an html file has been written to DC_Generic_University/dependency-check-report.html.
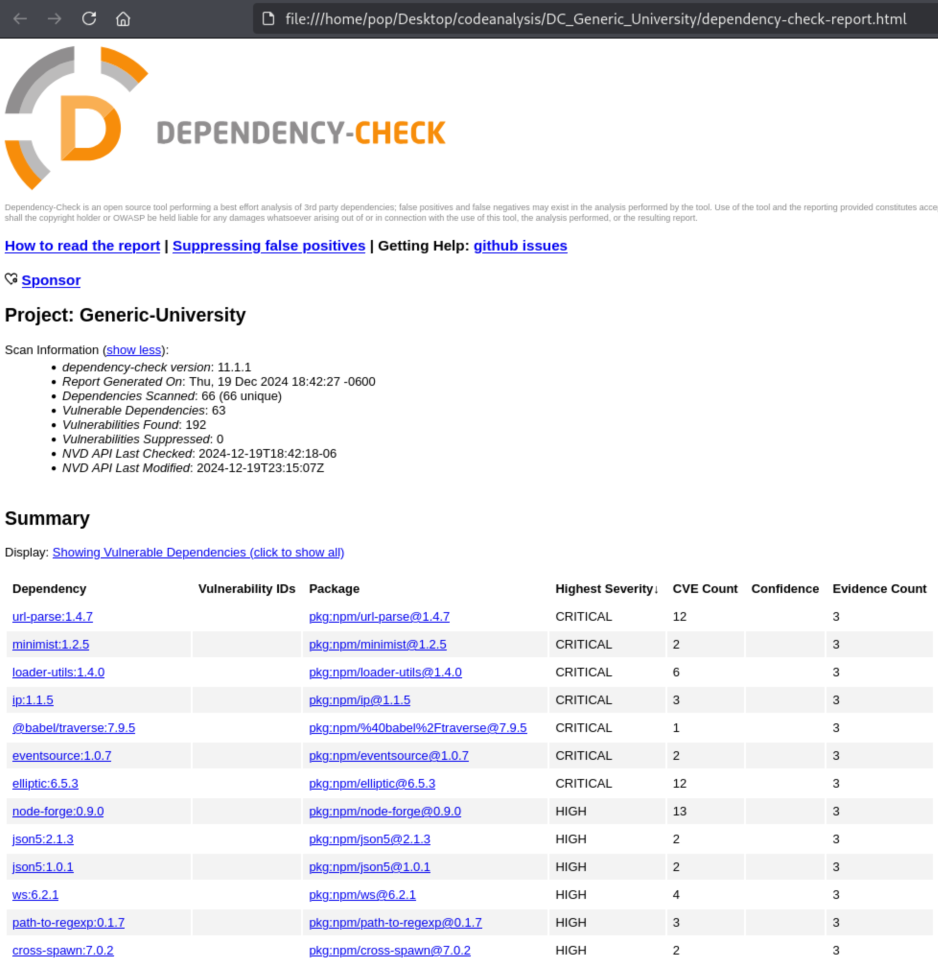
It looks pretty serious. There are 7 Critical or 41 High Vulnerabilities listed. We can click into each one of these and find out information (though this is a static page, so clicking one simply scrolls us down).
url-parse:1.4.7 Vulnerability
The first Critical vulnerability listed is for a dependency called url-parse:1.4.7 from the package pkg:npm/url-parse@1.4.7. If we click it, we can see the File Path, Evidence (if expanded), and the Published Vulnerabilities:
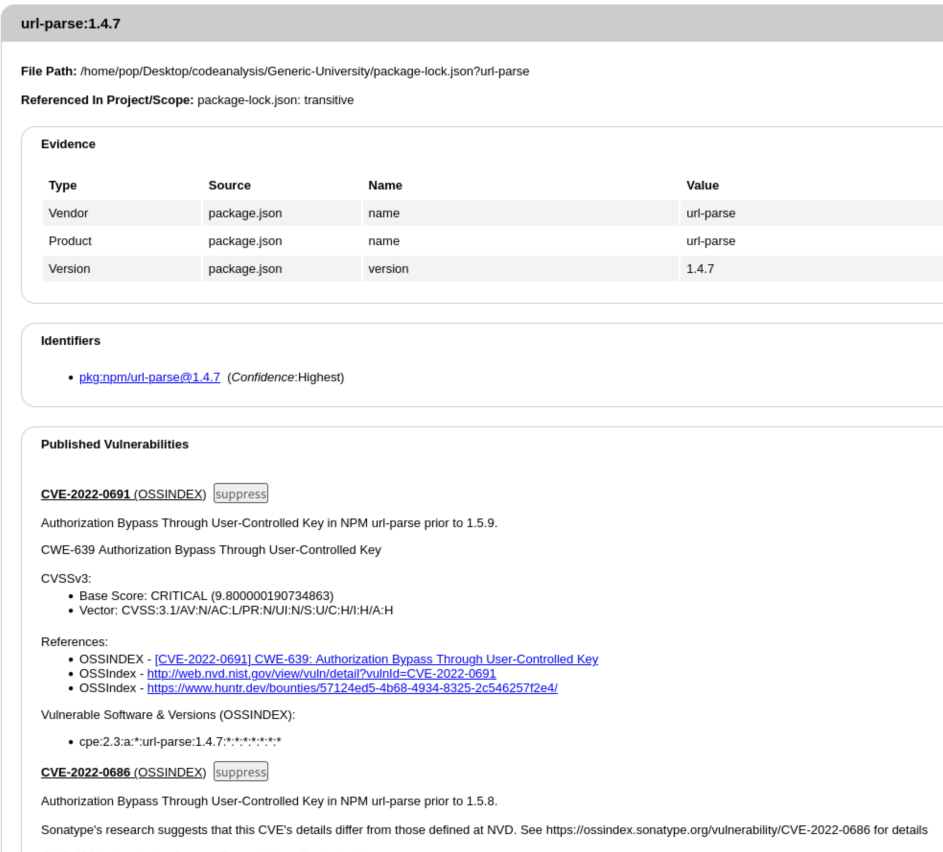
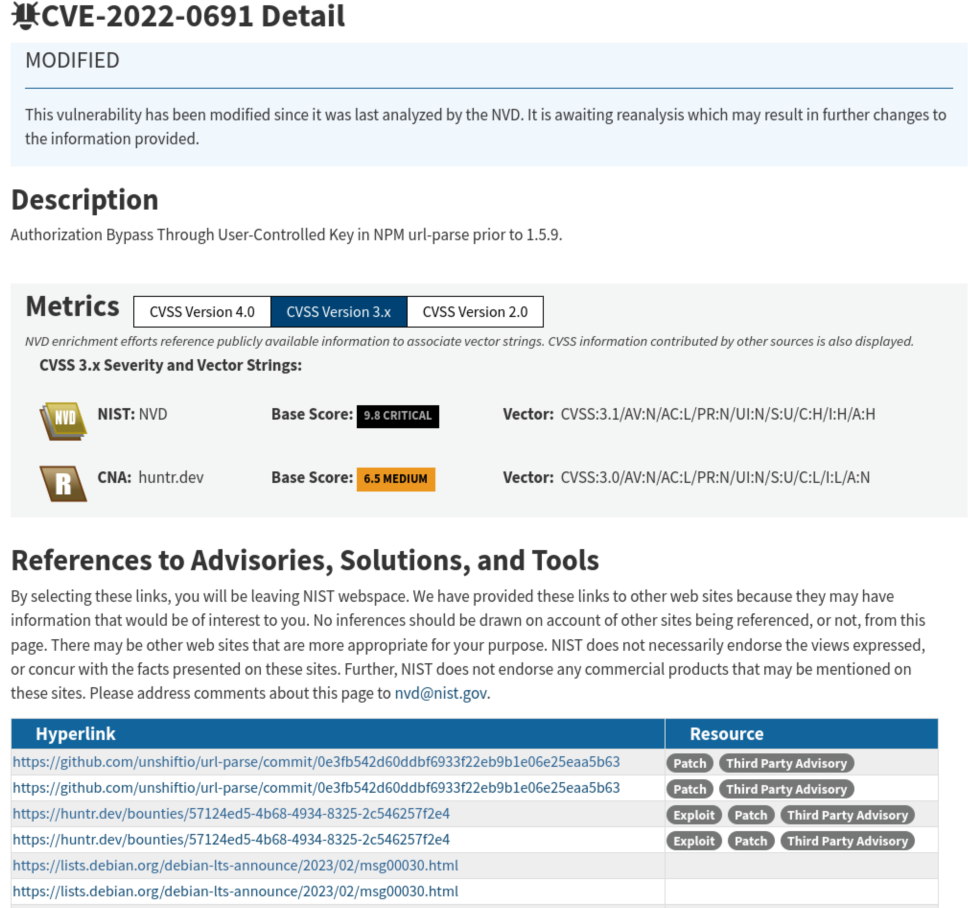
There are a 12 known vulnerabilities listed, but if we look through them, we can see that several of them are just the same issue for different applications. We can also see this listing in the National Vulnerability Database (NVD):
It’s worth noting that CVE-2022-0691 is not the only CVE for this library. If we scroll down, we can also see that CVE-2022-0686, CVE-2021-3664, CVE-2021-27515, CVE-2022-0512, CVE-2022-0639 are others listings in NVD, though they are only considered to be Medium vulnerabilities.
Remediation
In any case, we can click into pretty much any of the advisories linked in this section, such as this one and see that the issue pertains to versions prior to url-parse 1.5.8, and that the vulnerability is patched in 1.5.8. The solution therefore is to simply update the component.
Because of the nature of SCA checking for known vulnerabilities in components, the remediation for any vulnerability found is likely to be the same: update the version of the affected component.
Snyk Setup
For a commercial tool, I will be trying Snyk. We used it at a former employer, and I saw them at RSA one year with some pretty cool branding. That is where I learned that their logo/mascot is named Patch the Doberman. Idk, I like dogs, so it makes sense to give a shot.
I’ll note that they also have a SAST tool called Snyk Code, but we’ll be using Snyk Open Source for SCA.
To get started, you’ll need to create an account with a few options like OAuth with GitHub or Google, Bitbucket, Azure AD, or Docker ID.
Then you select where the code is that you want to scan: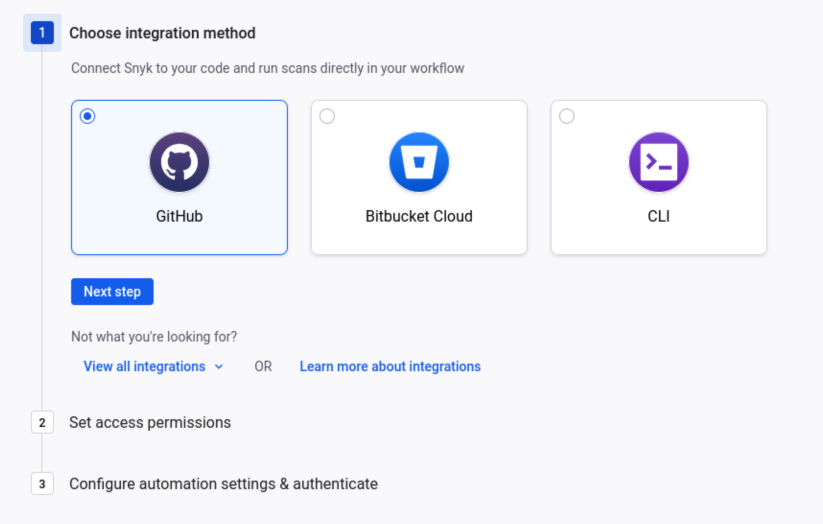 I’m choosing GitHub because I’m using an open-source project with no concerns about leakage and because the default Linux CLI tool is for AMD machines, so it might take some configuring to figure out. If you go that route, you’ll also have to pick which repositories (public or private) that Snyk will have access to. Then just select which features to enable:
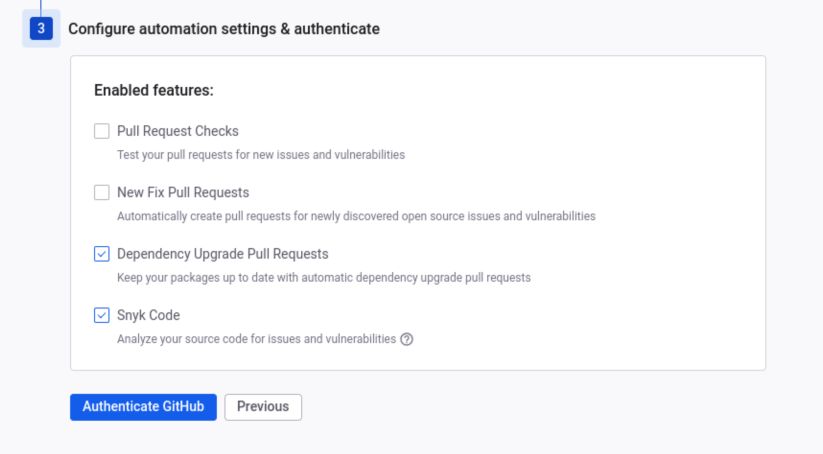
I decided to keep the Dependency Upgrade Pull Requests and Snyk Code features on to see what they look like. Next you’ll authenticate one last time and be brought to a dashboard that looks like this:
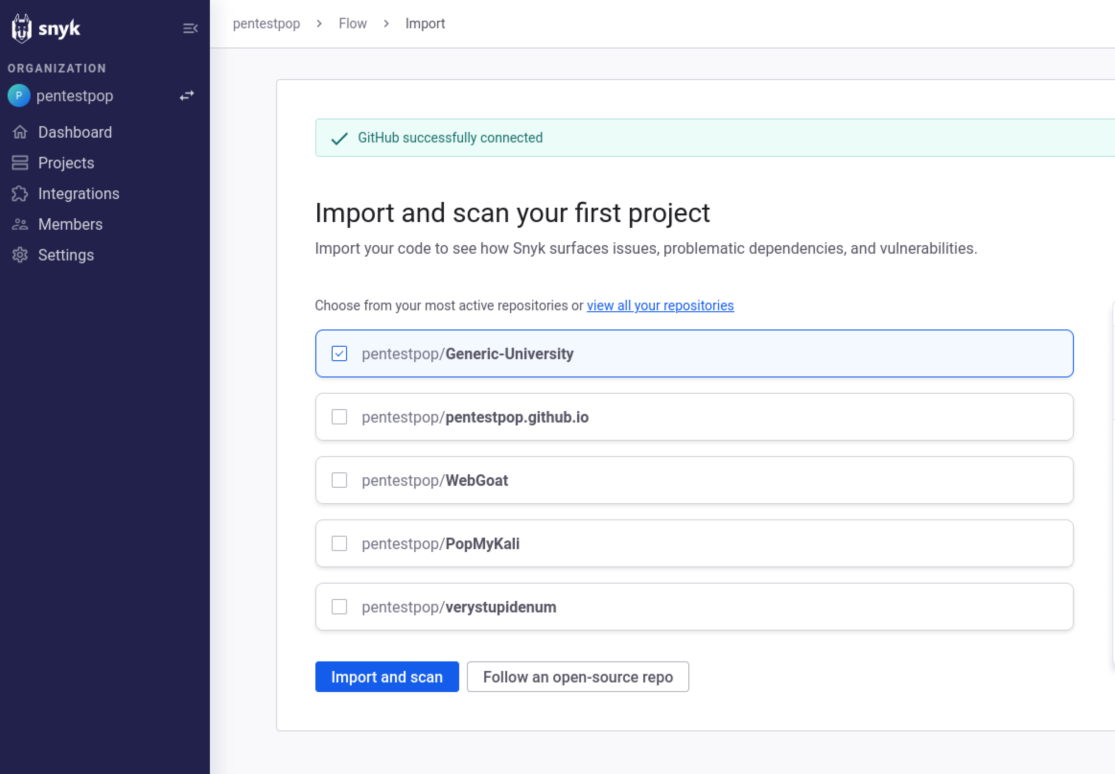
I’ll note that I could have just created an account and clicked Follow an open-source repo and probably selected the same application, but here we are. I select my Generic-University repository and click Import and scan.
Snyk Results
And we get this:
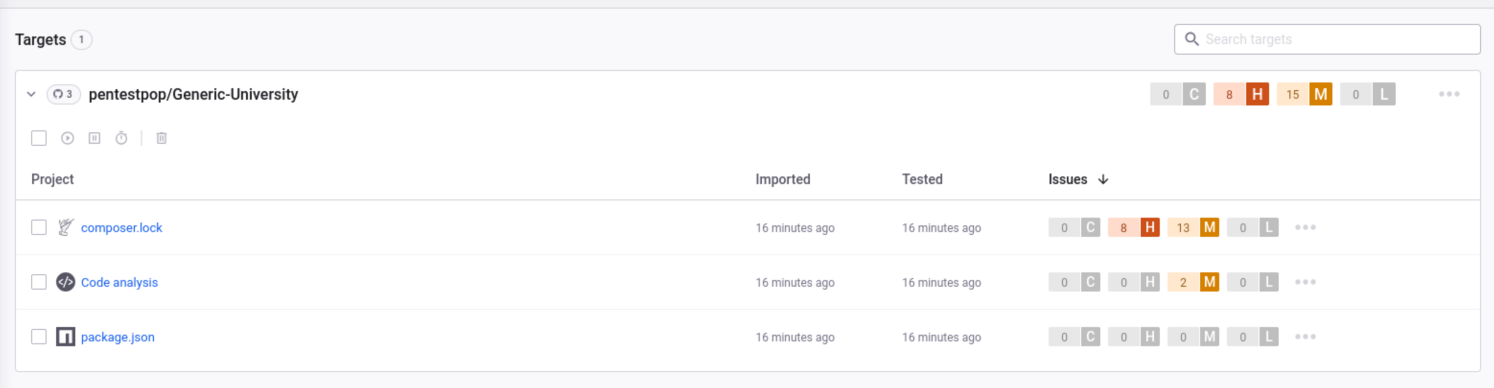
The first thing that I notice is that we have only 0 Critical and 8 High Vulnerabilities listed rather than 7 and 41 coming from OWASP Dependency-Check. The next thing I notice is that there seems to be very little overlap at all. It isn’t as if the same vulnerabilities exist but with different scoring. There are a few different reasons why that could be the case, and it might be a mixture of them.
One, Dependency-Check and Snyk use different databases to check pacakges against. Dependency-Check uses the NVD, and Snyk uses their own database. Two, Snyk may be able to eliminate certain false positives that Dependency-Check cannot. I believe that it may be a little bit more advanced given that it is primarily a commercial tool. A third reason could be that the free version of Snyk simply doesn’t have the same capabilities as the paid version. For example, the free version has neither open-source license compliance nor application asset discovery. Regardless, I decide to look into the results from Snyk to see what’s there.
Laravel/Framework Vulnerability
The composer.lock project is the project with all 8 High Vulnerabilities so it makes sense to start with that. The highest scored vulnerability appears to be a SQL Injection vulnerability with the Laravel Framework introduced in laravel/framework@7.26.1.
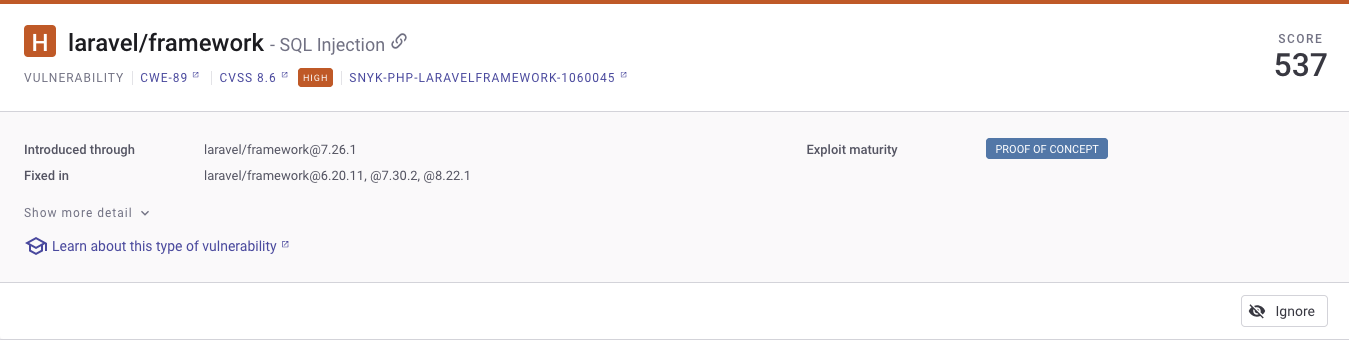
Snyk links to the Common Weakness Enumeration (CWE) page which gives us more information about “Improper Neutralization of Special Elements used in an SQL Command (‘SQL Injection’).” If we click Show More Detail, we predictably get more detail.
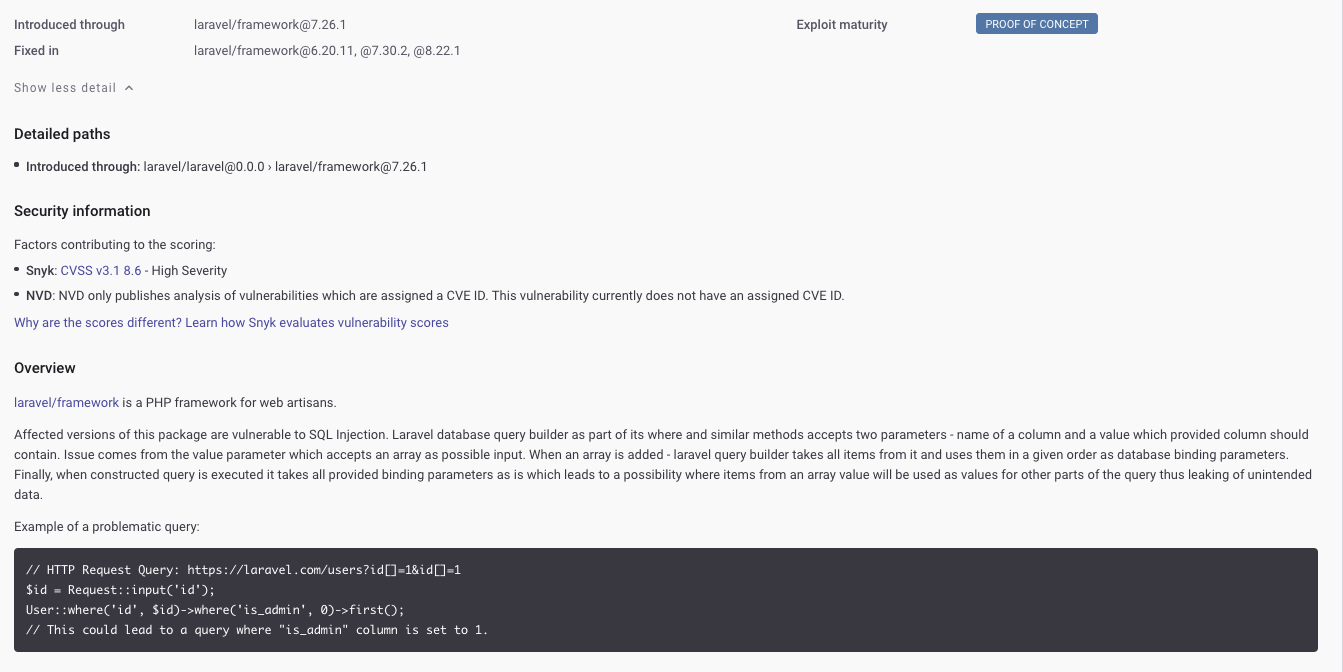
We can see that there is no NVD score for this vulnerability because “NVD only publishes analysis of vulnerabilities which are assigned a CVE ID.” That could be why it doesn’t show in the Dependency-Check results.
It also shows this Proof of Concept example of a problematic query using this framework:
// HTTP Request Query: https://laravel.com/users?id[]=1&id[]=1
$id = Request::input('id');
User::where('id', $id)->where('is_admin', 0)->first();
// This could lead to a query where "is_admin" column is set to 1.
Remediation
Snyk explicitly notes that this SQL Injection vulnerability is fixed in laravel/framework@6.20.11, @7.30.2, @8.22.1, so the framework should simply be upgraded. This guidance is listed in Snyk’s own vulnerability database page for this vulnerability. Looking through the other vulnerabilities listed, most of the guidance is simply to upgrade the dependency involved. This make sense for the purposes of SCA, because the goal is to check dependencies for known vulnerabilities. If they exist, they should be resolved in the next patch and upgraded.
SCA and devDependencies
It concerns me a little bit that there are so many differences between the results of the two tools, and I tried to find out more. It turns out that this is because of differences in how these tools treat something called devDependencies. See the Generic-University file package.json:
{
    "private": true,
    "scripts": {
        "dev": "npm run development",
        "development": "cross-env NODE_ENV=development node_modules/webpack/bin/webpack.js --progress --hide-modules --config=node_modules/laravel-mix/setup/webpack.config.js",
        "watch": "npm run development -- --watch",
        "watch-poll": "npm run watch -- --watch-poll",
        "hot": "cross-env NODE_ENV=development node_modules/webpack-dev-server/bin/webpack-dev-server.js --inline --hot --config=node_modules/laravel-mix/setup/webpack.config.js",
        "prod": "npm run production",
        "production": "cross-env NODE_ENV=production node_modules/webpack/bin/webpack.js --no-progress --hide-modules --config=node_modules/laravel-mix/setup/webpack.config.js"
    },
    "devDependencies": {
        "axios": "^0.19",
        "bootstrap": "^4.0.0",
        "cross-env": "^7.0",
        "jquery": "^3.2",
        "laravel-mix": "^5.0.1",
        "lodash": "^4.17.19",
        "popper.js": "^1.12",
        "resolve-url-loader": "^2.3.1",
        "sass": "^1.20.1",
        "sass-loader": "^8.0.0",
        "vue": "^2.5.17",
        "vue-template-compiler": "^2.6.10"
    }
}
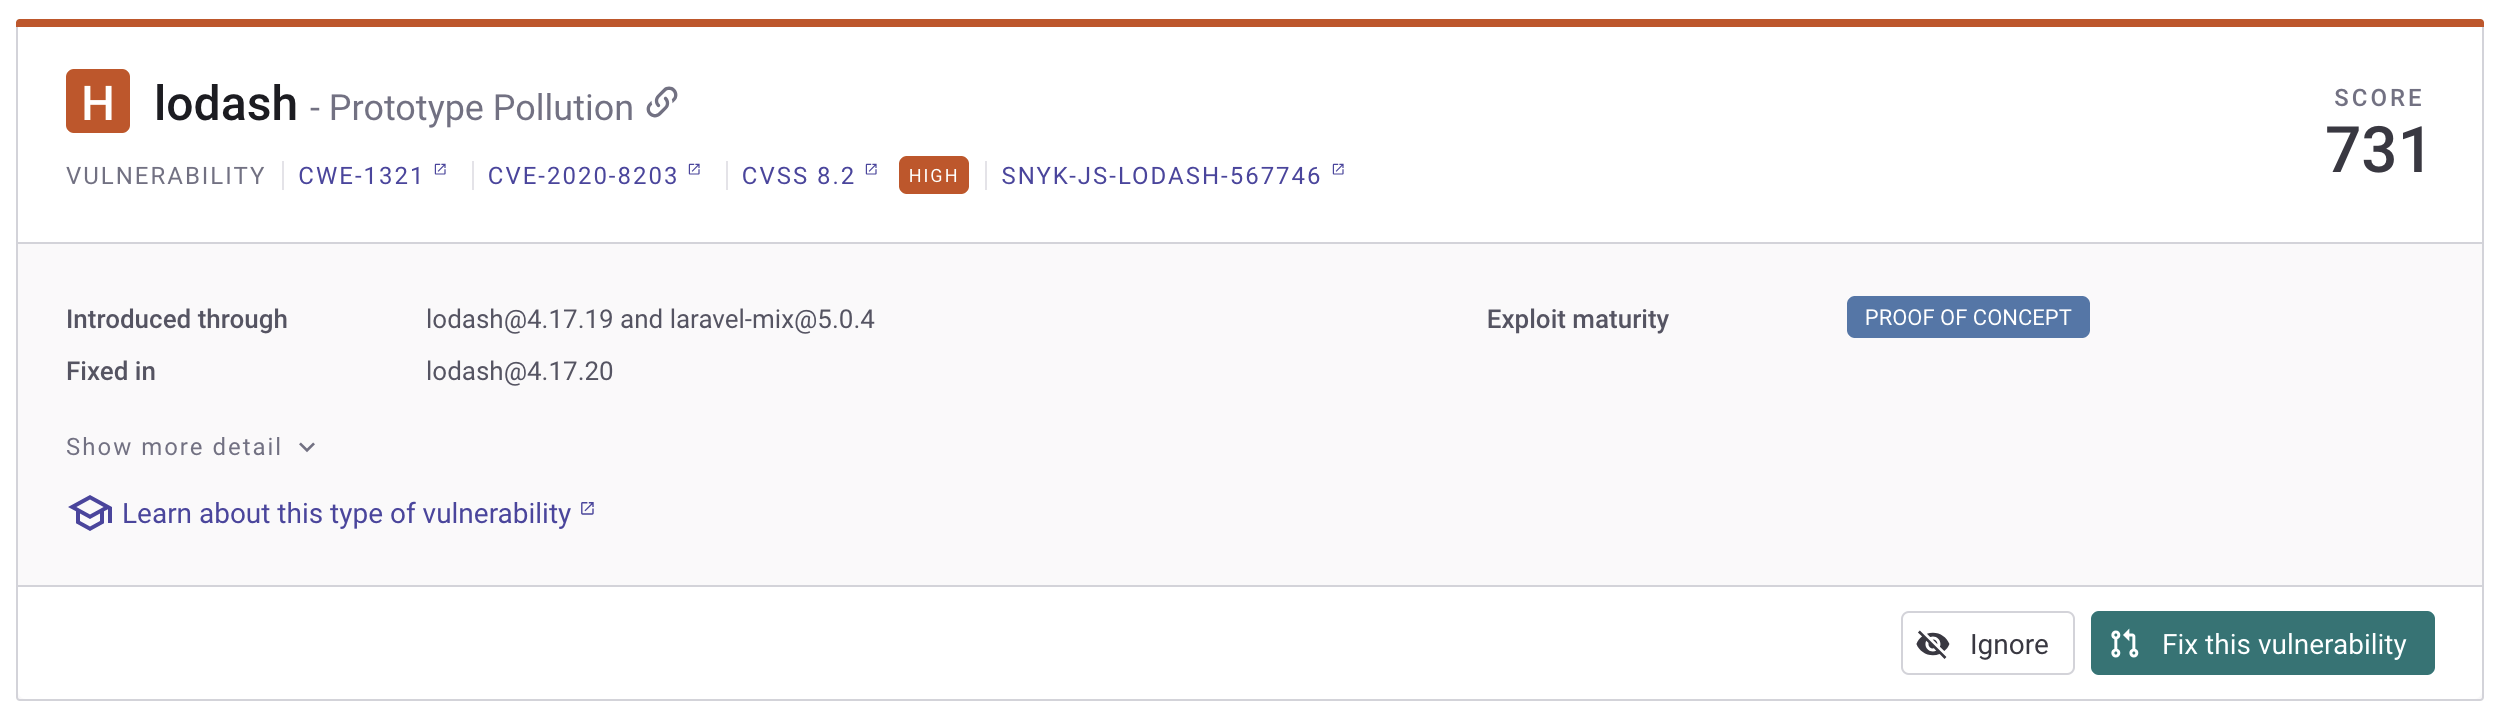
Development dependencies (devDependencies) are packages that are only needed during development, like testing frameworks, build tools, or compilation tools. They shouldn’t be installed in production environments. For example, they may need to be there to build the application, but not to run it. By default, Dependency-Check still scans these, and it includes a High Vulnerability for lodash 4.17.19 seen in the JSON file above. Snyk however, does not include devDependencies by default, largely to reduce noise. When I go to Settings -> Snyk Open Source and turn on Scan Dev Dependencies, the results change significantly.
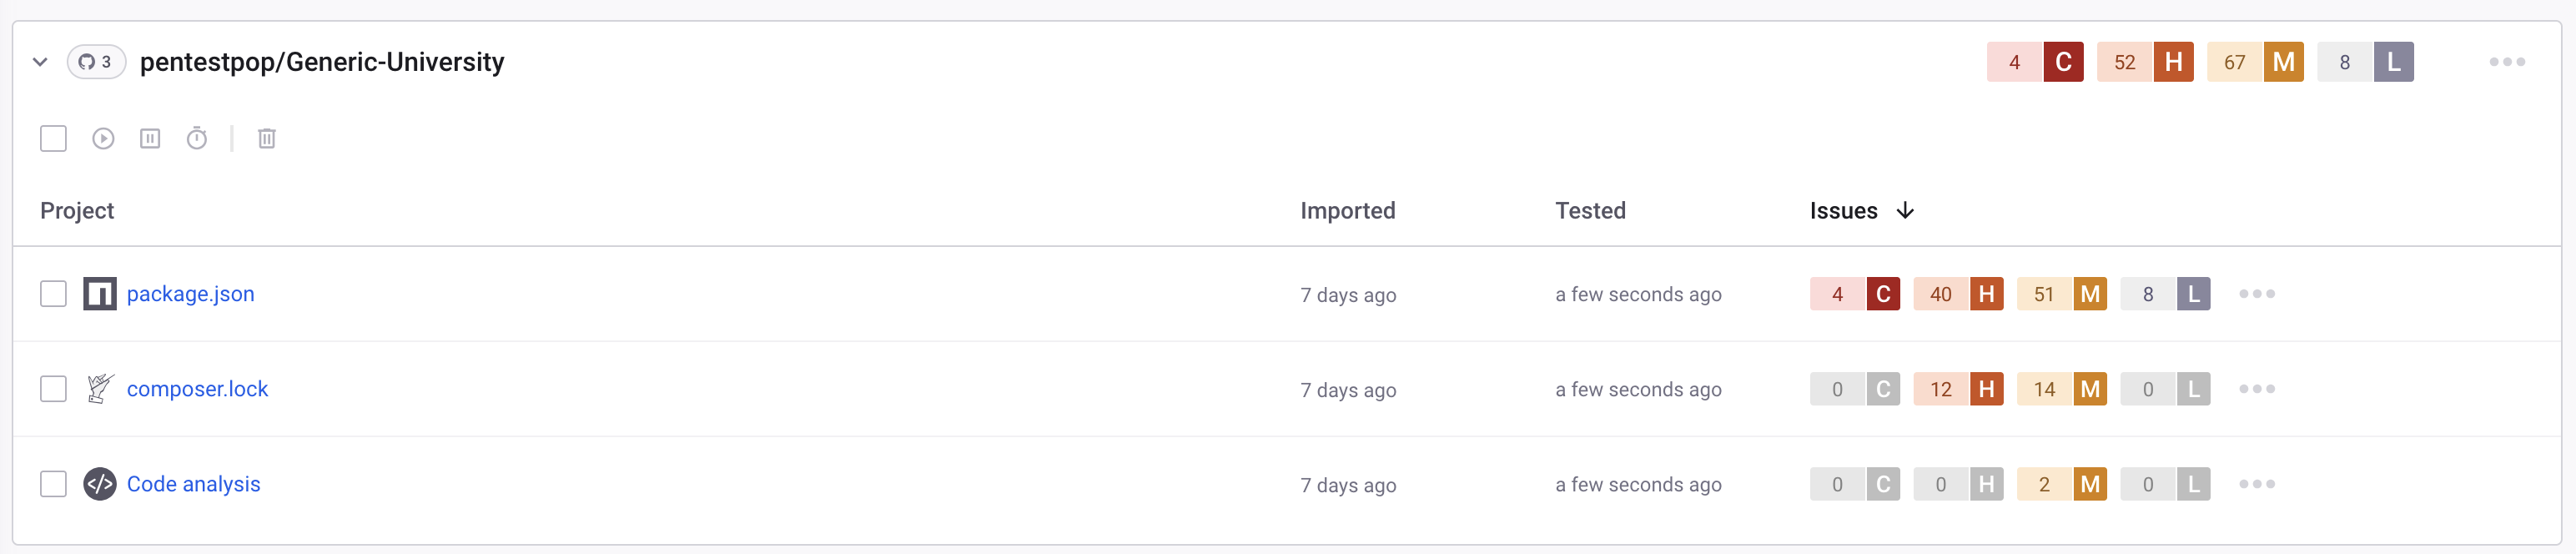
Where there were 0 vulnerabilities listed in package.json, now there are 4 Critical and 40 High, including the lodash vulnerability listed:
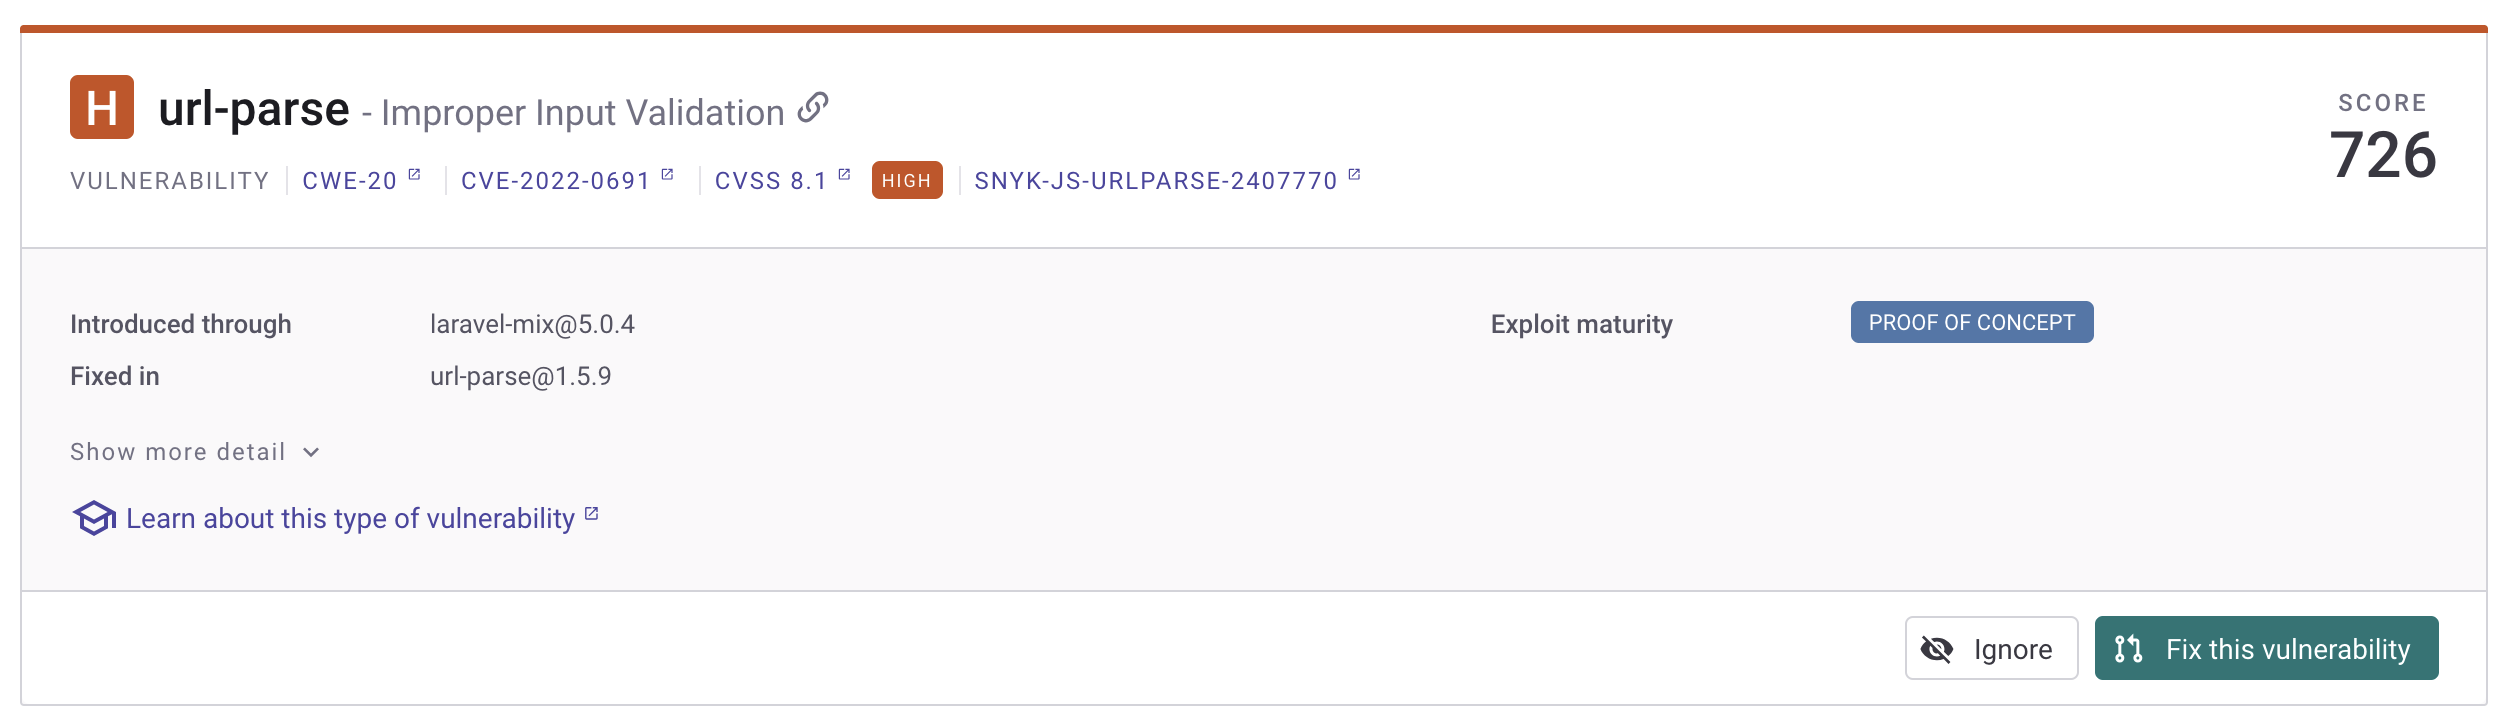
And the url-parse vulnerability we first discussed in the Dependency-Check section.
If we want to exclude the devDependencies from Dependency-Check, we need to create a suppression.xml file and run it with the flag --suppression suppression.xml.
Dependency-Check and Snyk
Ultimately it took me a long time to realize what was going on with the discrepancies between the two tools, but it sounds like they are both able to be useful. Snyk might be a little bit more in-depth as it has more vulnerabilities to check against, and you can suppress false positives more simply rather than creating a suppression file and manually adding packages to it, but Dependency-Check is pretty thorough, and it’s FOSS if that matters to you.
Static Application Security Testing (SAST)
I touched on SAST in a previous blog post, but I want to revisit it again with this new application. To be clear, SAST involves scanning the application’s codebase without running it to look for vulnerabilities like hardcoded credentials, insecure coding practices, input validation flaws, or other vulnerabilities visible in the code. SCA checks the what the code is comprised of, and SAST checks how it is comprised. Consider the analogy of a building - SCA would be concerned with the quality of the materials, and SAST would be concerned with how the materials are built together so that the structure is sound. Simple enough.
I’ll be using SonarQube as a FOSS tool and Coverity by BlackDuck as a commercial tool, again with a free version.
SonarQube Setup
From SonarQube’s website:
Sonar’s static application security testing (SAST) engine detects security vulnerabilities in your code so they can be eliminated before you build and test your application.
There are a few different ways to stand up the website, but I’ll be using Docker as it’s pretty simple. It does assume you already have Docker installed, but that’s quick. The steps are:
- Pull the SonarQube Docker image. This is done with
docker pull sonarqube::community. - Create the
docker-compose.ymlfile. This file tells docker what to do with the image. Mine looks like this: ```yml services: sonarqube: image: sonarqube:community ports:- “9000:9000” environment:
- SONAR_JDBC_URL=jdbc:postgresql://db:5432/sonar
- SONAR_JDBC_USERNAME=sonar
- SONAR_JDBC_PASSWORD=sonar volumes:
- sonarqube_data:/opt/sonarqube/data
- sonarqube_extensions:/opt/sonarqube/extensions
- sonarqube_logs:/opt/sonarqube/logs depends_on:
- db db: image: postgres:13 environment:
- POSTGRES_USER=sonar
- POSTGRES_PASSWORD=sonar
- POSTGRES_DB=sonar volumes:
- postgresql:/var/lib/postgresql
- postgresql_data:/var/lib/postgresql/data
volumes: sonarqube_data: sonarqube_extensions: sonarqube_logs: postgresql: postgresql_data:
3. Starting the Docker image. Note that this must be done from the same directory where you have created your `docker-compose.yml` file. The command is: `docker-compose up -d`.
4. That should be enough, but I couldn't get it working this time around. After asking my robot friend Claude, it turns out I needed these settings for whatever reason:
```yml
# Increase virtual memory
sudo sysctl -w vm.max_map_count=524288
sudo sysctl -w fs.file-max=131072

# Make settings permanent
echo "vm.max_map_count=524288" | sudo tee -a /etc/sysctl.conf
echo "fs.file-max=131072" | sudo tee -a /etc/sysctl.conf
- After that, you should be able to access the application on localhost:9000 in your browser, or which ever port you selected in the
.ymlfile.
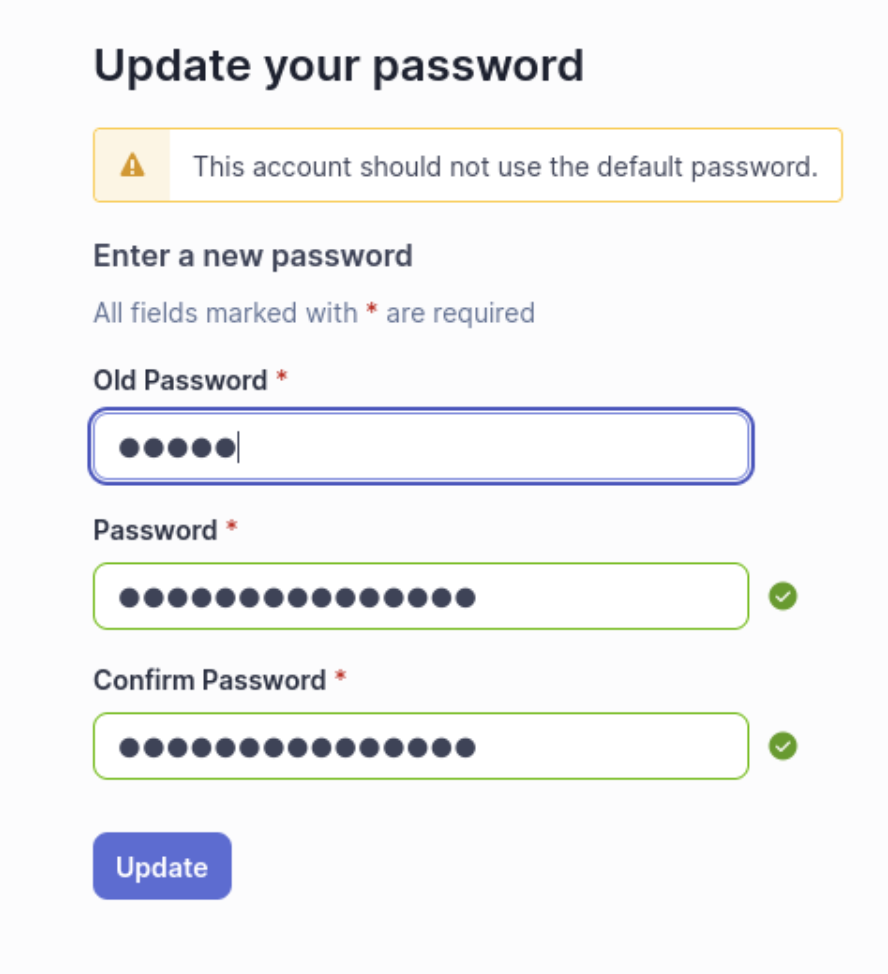
The default credentials are admin:admin, but you’ll be prompted to change them upon login.
The next few steps to import and run a project are relatively self-explanatory, but I can include some screenshots.
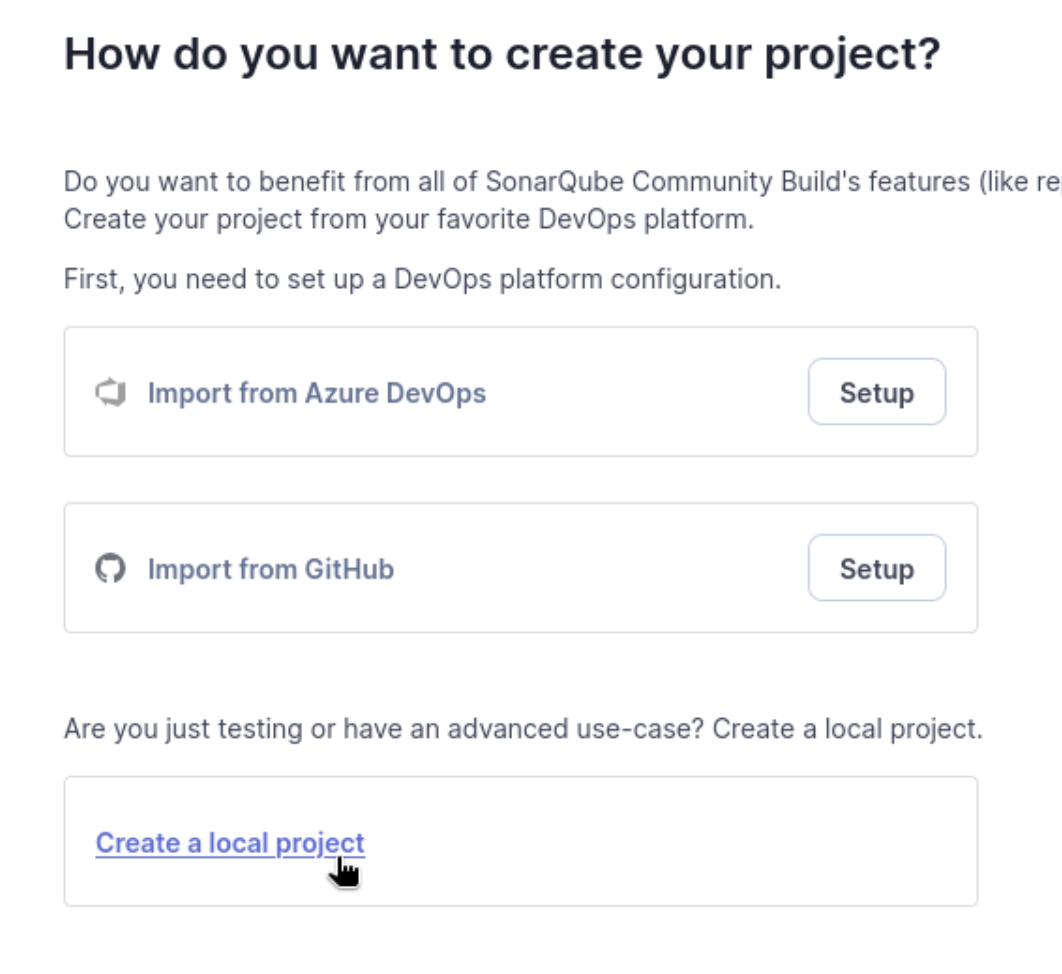
Choose a DevOps platform or use a local project - I’m creating a local project:
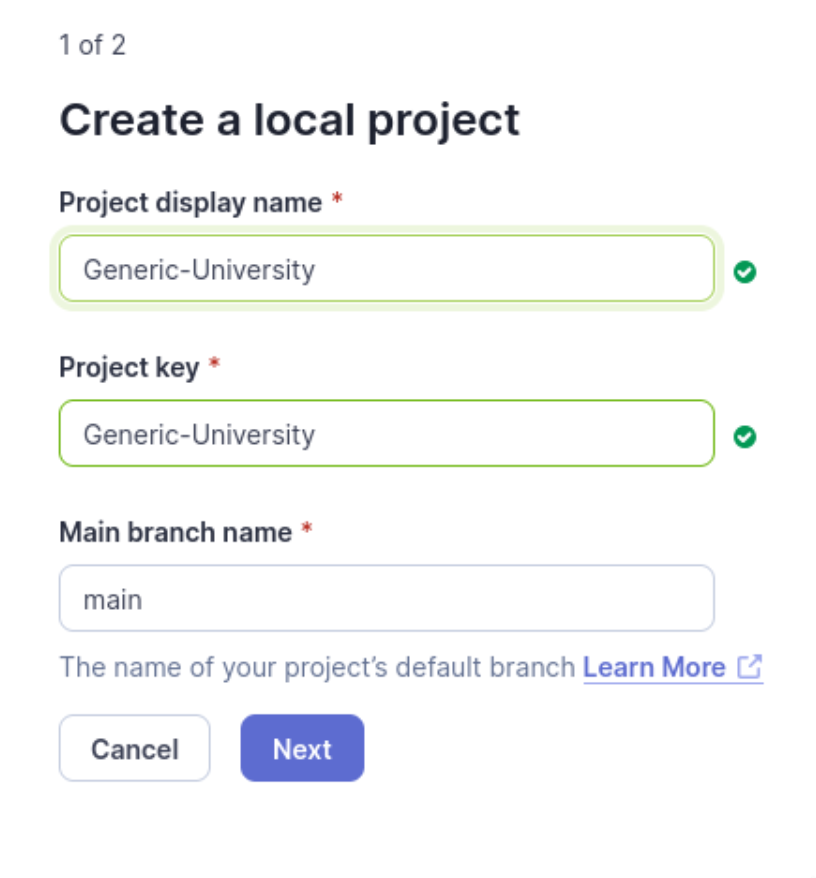
Name the project:
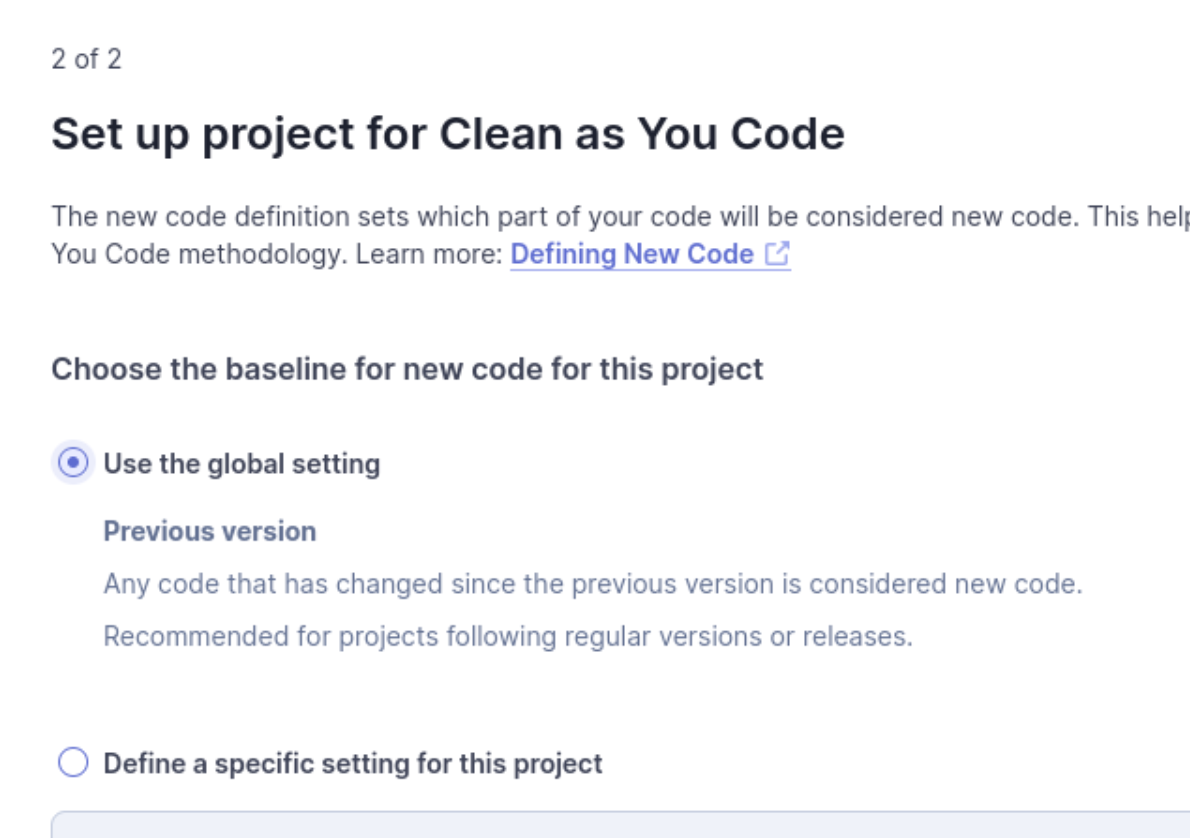
Select settings - I’ll use a default.
Select an analysis method - again I’ll use local.
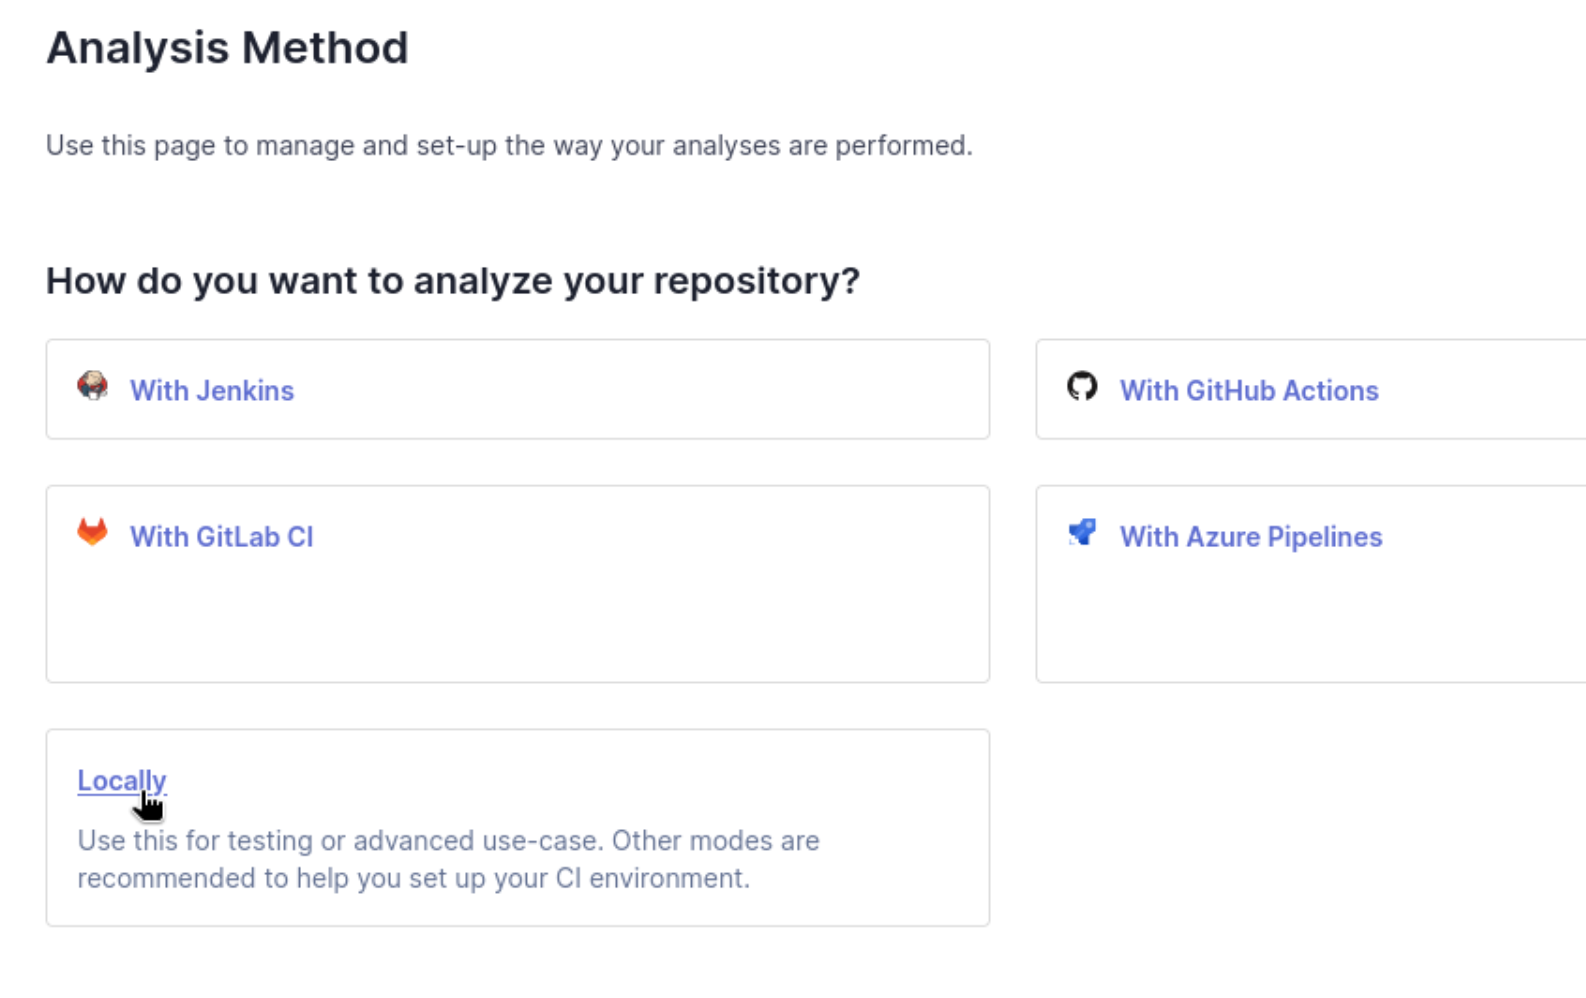
If it’s local, you’ll need to create a token:
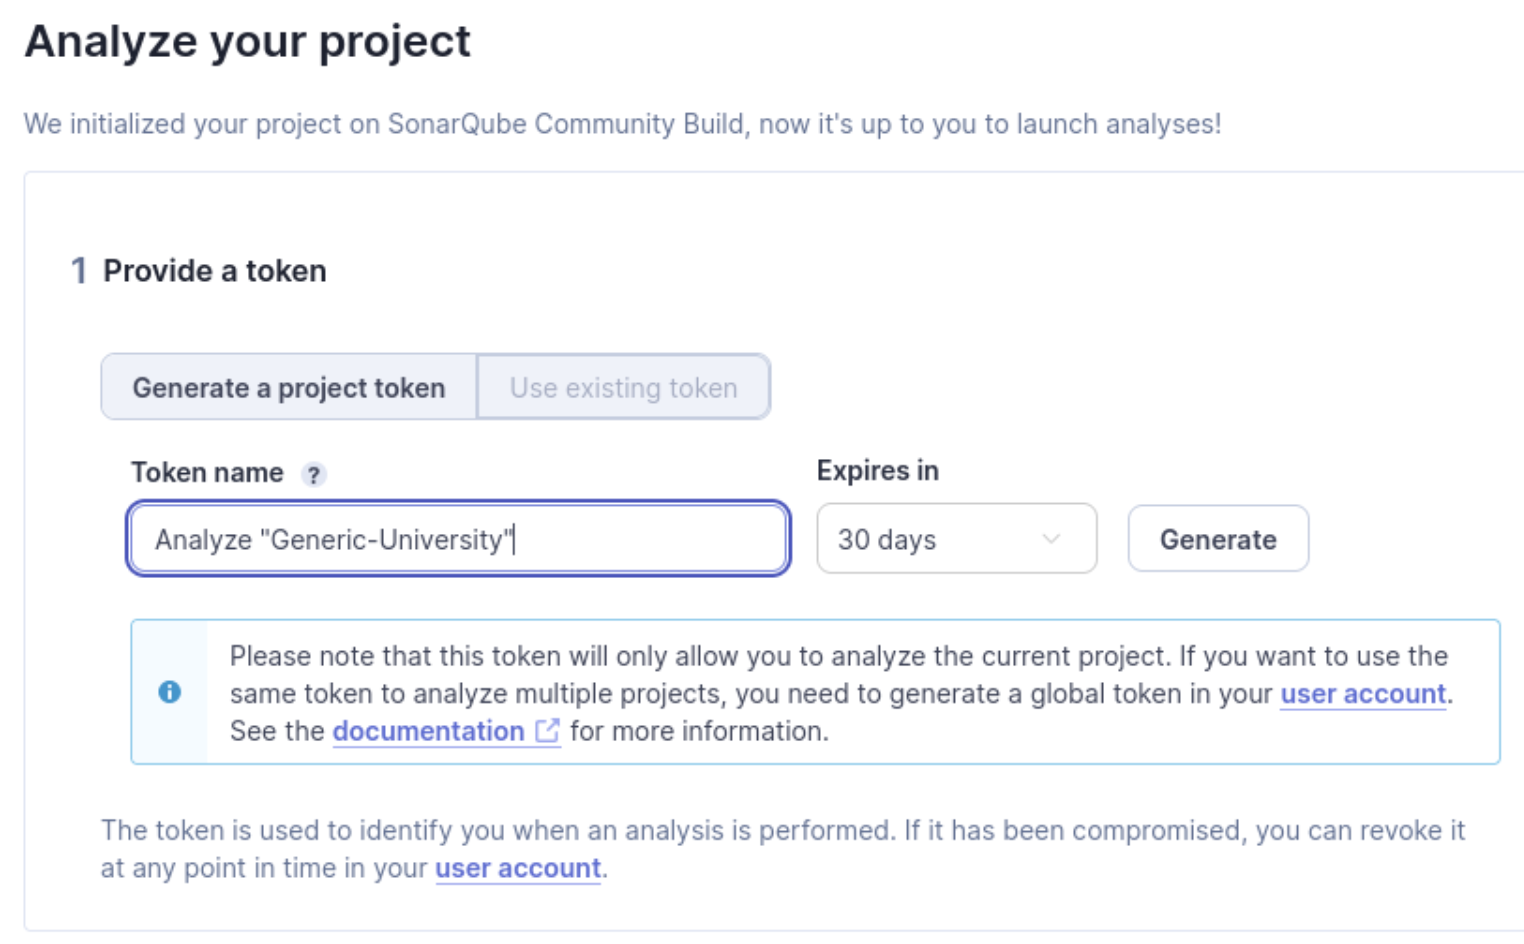
After generating a token, it will print to the screen and you’ll press continue. Then you select your project. For Generic-University, we need to use Other because it is a PHP project. We know this because of the composer.json file (and the GitHub page says it’s 83.0% PHP). When selected, SonarQube will print the commands needed, along with the token:
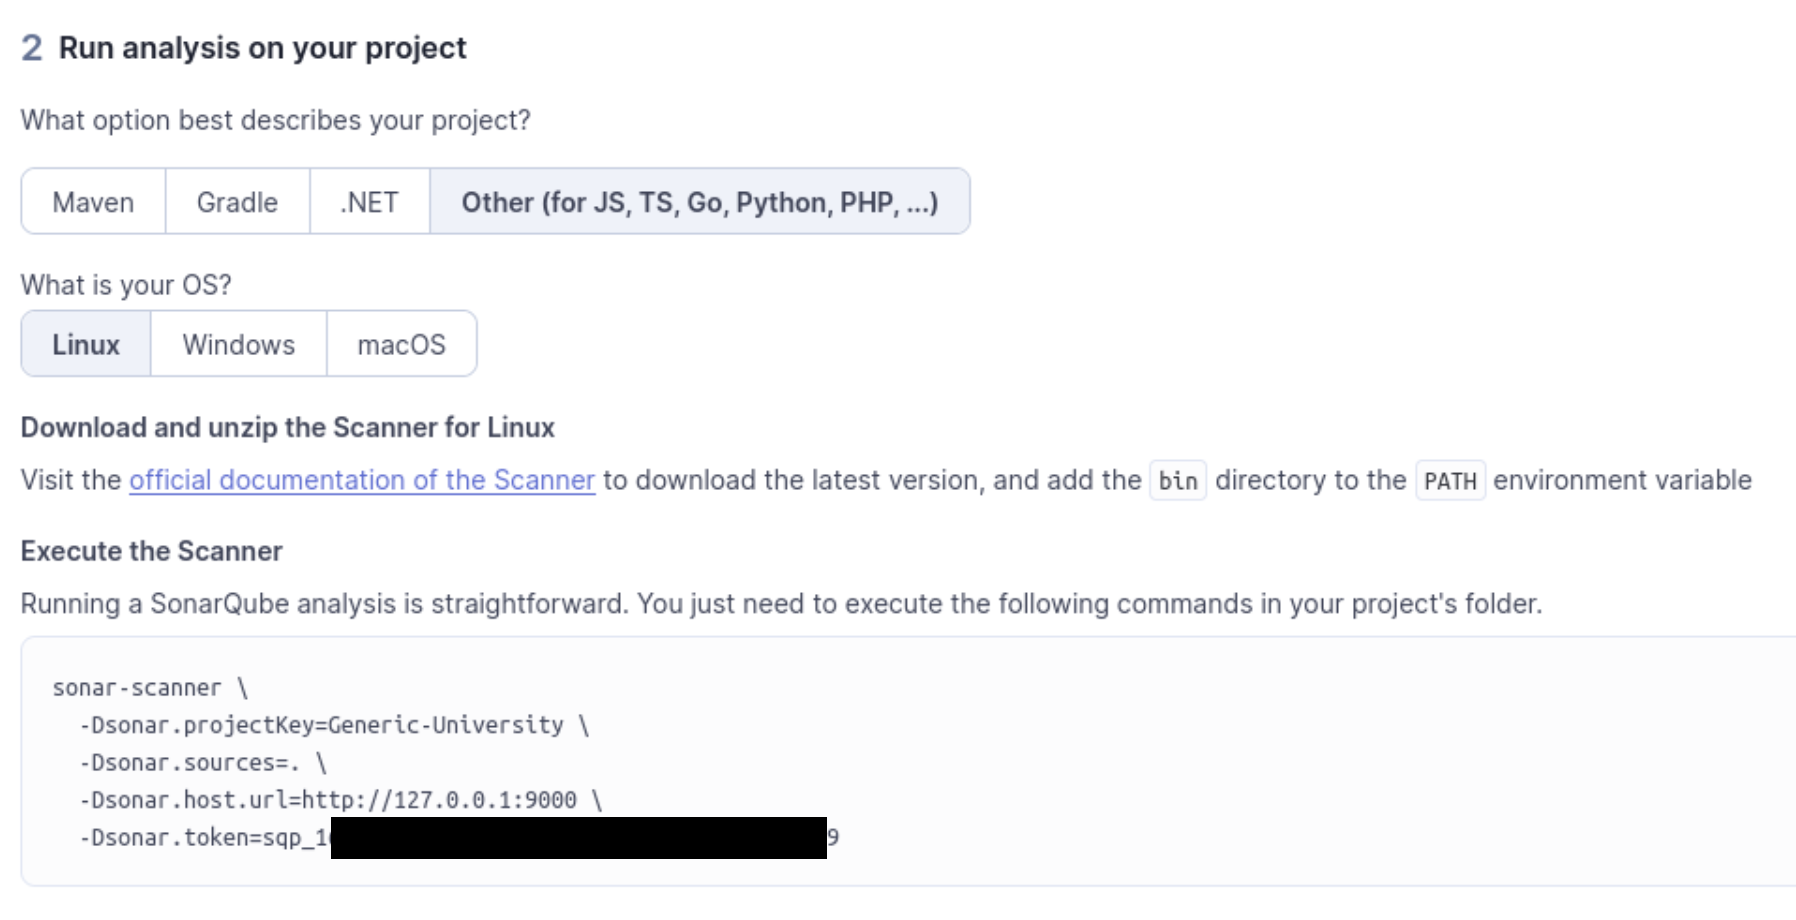
Note that the scanner must be downloaded with different instructions depending on your OS. Downloads and instructions are here. Note that there is a required sonar-project.properties file which must be in the target repo. Then run these commands in the terminal, and view the results.
SonarQube Results
After you run the command, the results should automatically populate on localhost:9000:
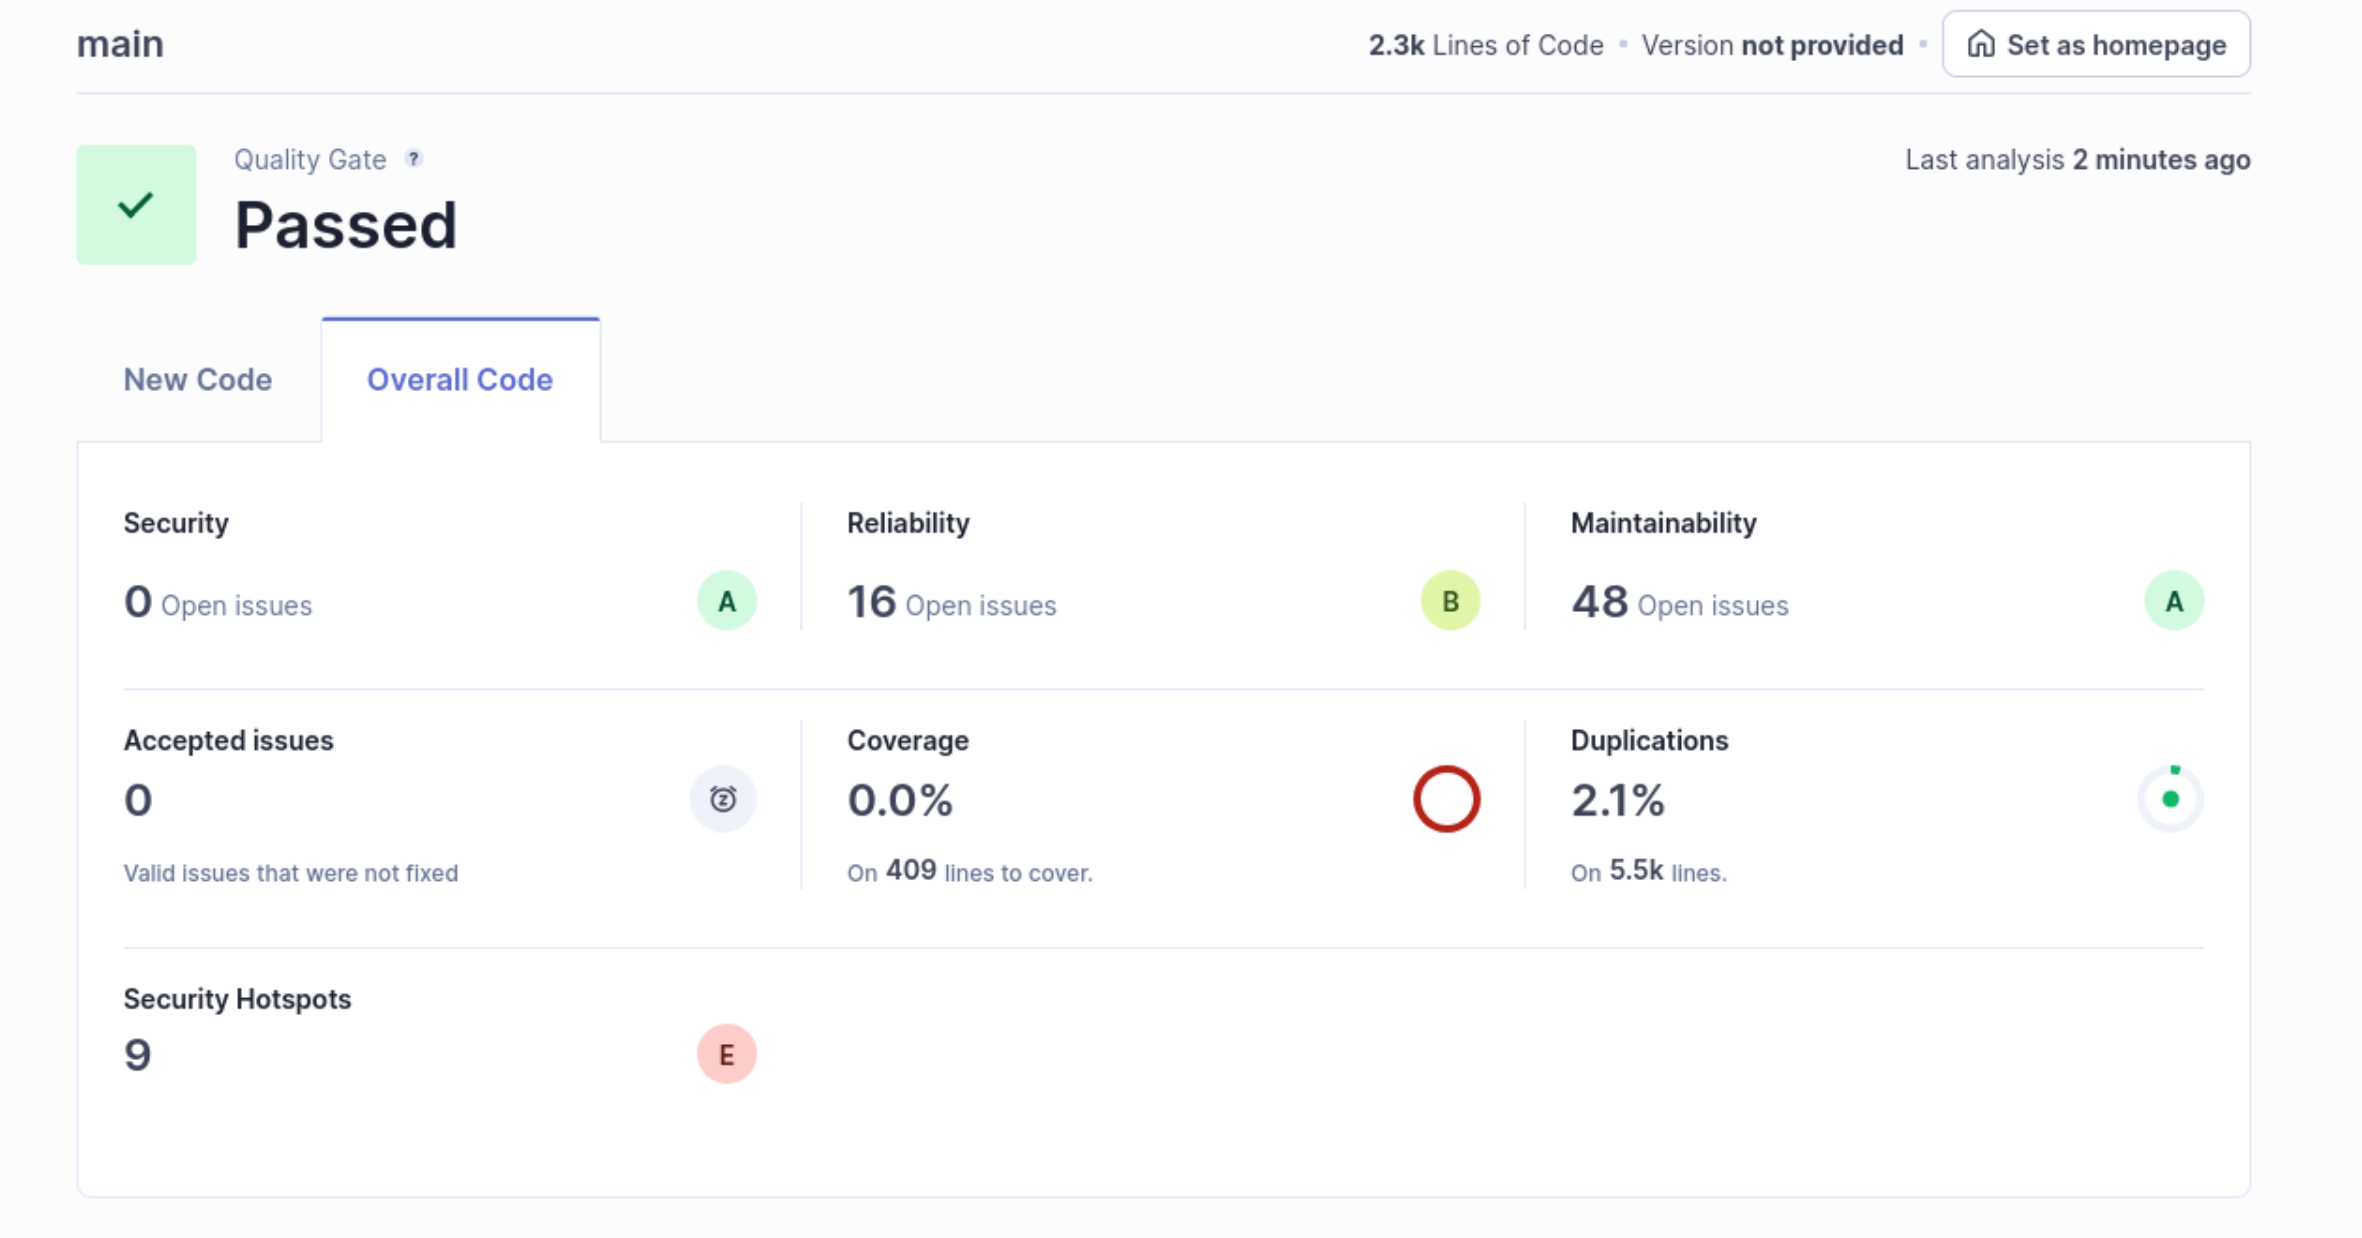
Interestingly, we see no Security Issues with this tool, though again, it is checking for something different than the SCA tools. We can also take a look at the Security Hotspots to see if there is anything interesting in there. Note that the difference between Security Issues and Security Hotspots is the context. Per this community post: “If whether or not it’s actually a problem depends on context, then that’s a Security Hotspot. If it’s always a problem, regardless of context, then that’s a Vulnerability.”
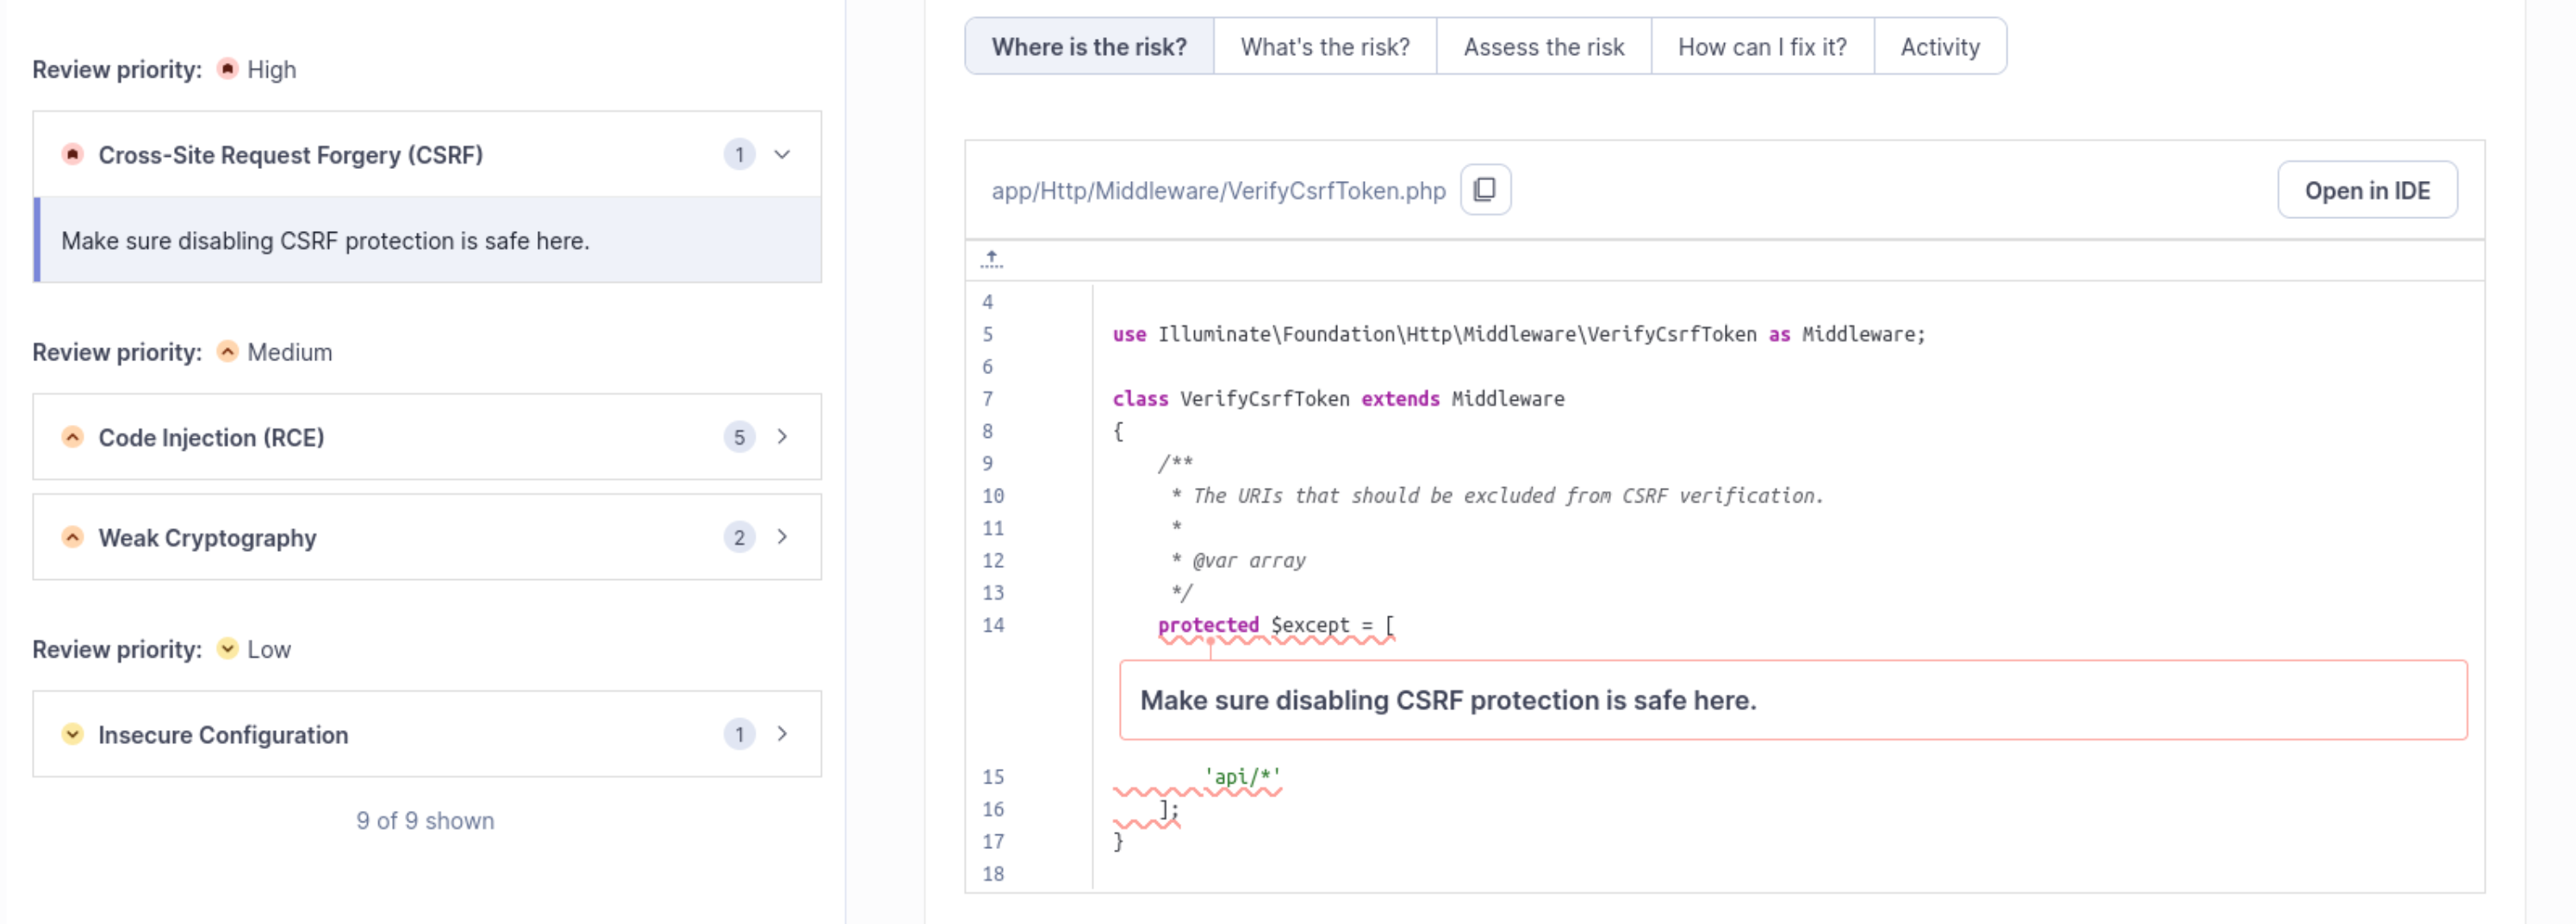
CSRF HotSpot
We see only one High Priority HotSpot, and it’s related to the CSRF vulnerability. We can see in the above screenshot that SonarQube is flagging a code snippet in app/Http/Middleware/VerifyCsrfToken.php in the Where's The Risk? section. If we check What is the Risk?, we can see a description:
A cross-site request forgery (CSRF) attack occurs when a trusted user of a web application can be forced, by an attacker, to perform sensitive actions that he didn’t intend, such as updating his profile or sending a message, more generally anything that can change the state of the application.
SonarQube also includes guidance on how to think about whether the vulnerability is a false or true positive in the Assess The Risk section:
Ask Yourself Whether
- The web application uses cookies to authenticate users.
- There exist sensitive operations in the web application that can be performed when the user is authenticated.
- The state / resources of the web application can be modified by doing HTTP POST or HTTP DELETE requests for example.

There is a risk if you answered yes to any of those questions.
Let’s take a look at the code:
use Illuminate\Foundation\Http\Middleware\VerifyCsrfToken as Middleware;

class VerifyCsrfToken extends Middleware
{
    /**
     * The URIs that should be excluded from CSRF verification.
     *
     * @var array
     */
    protected $except = [
'api/*'
    ];
}
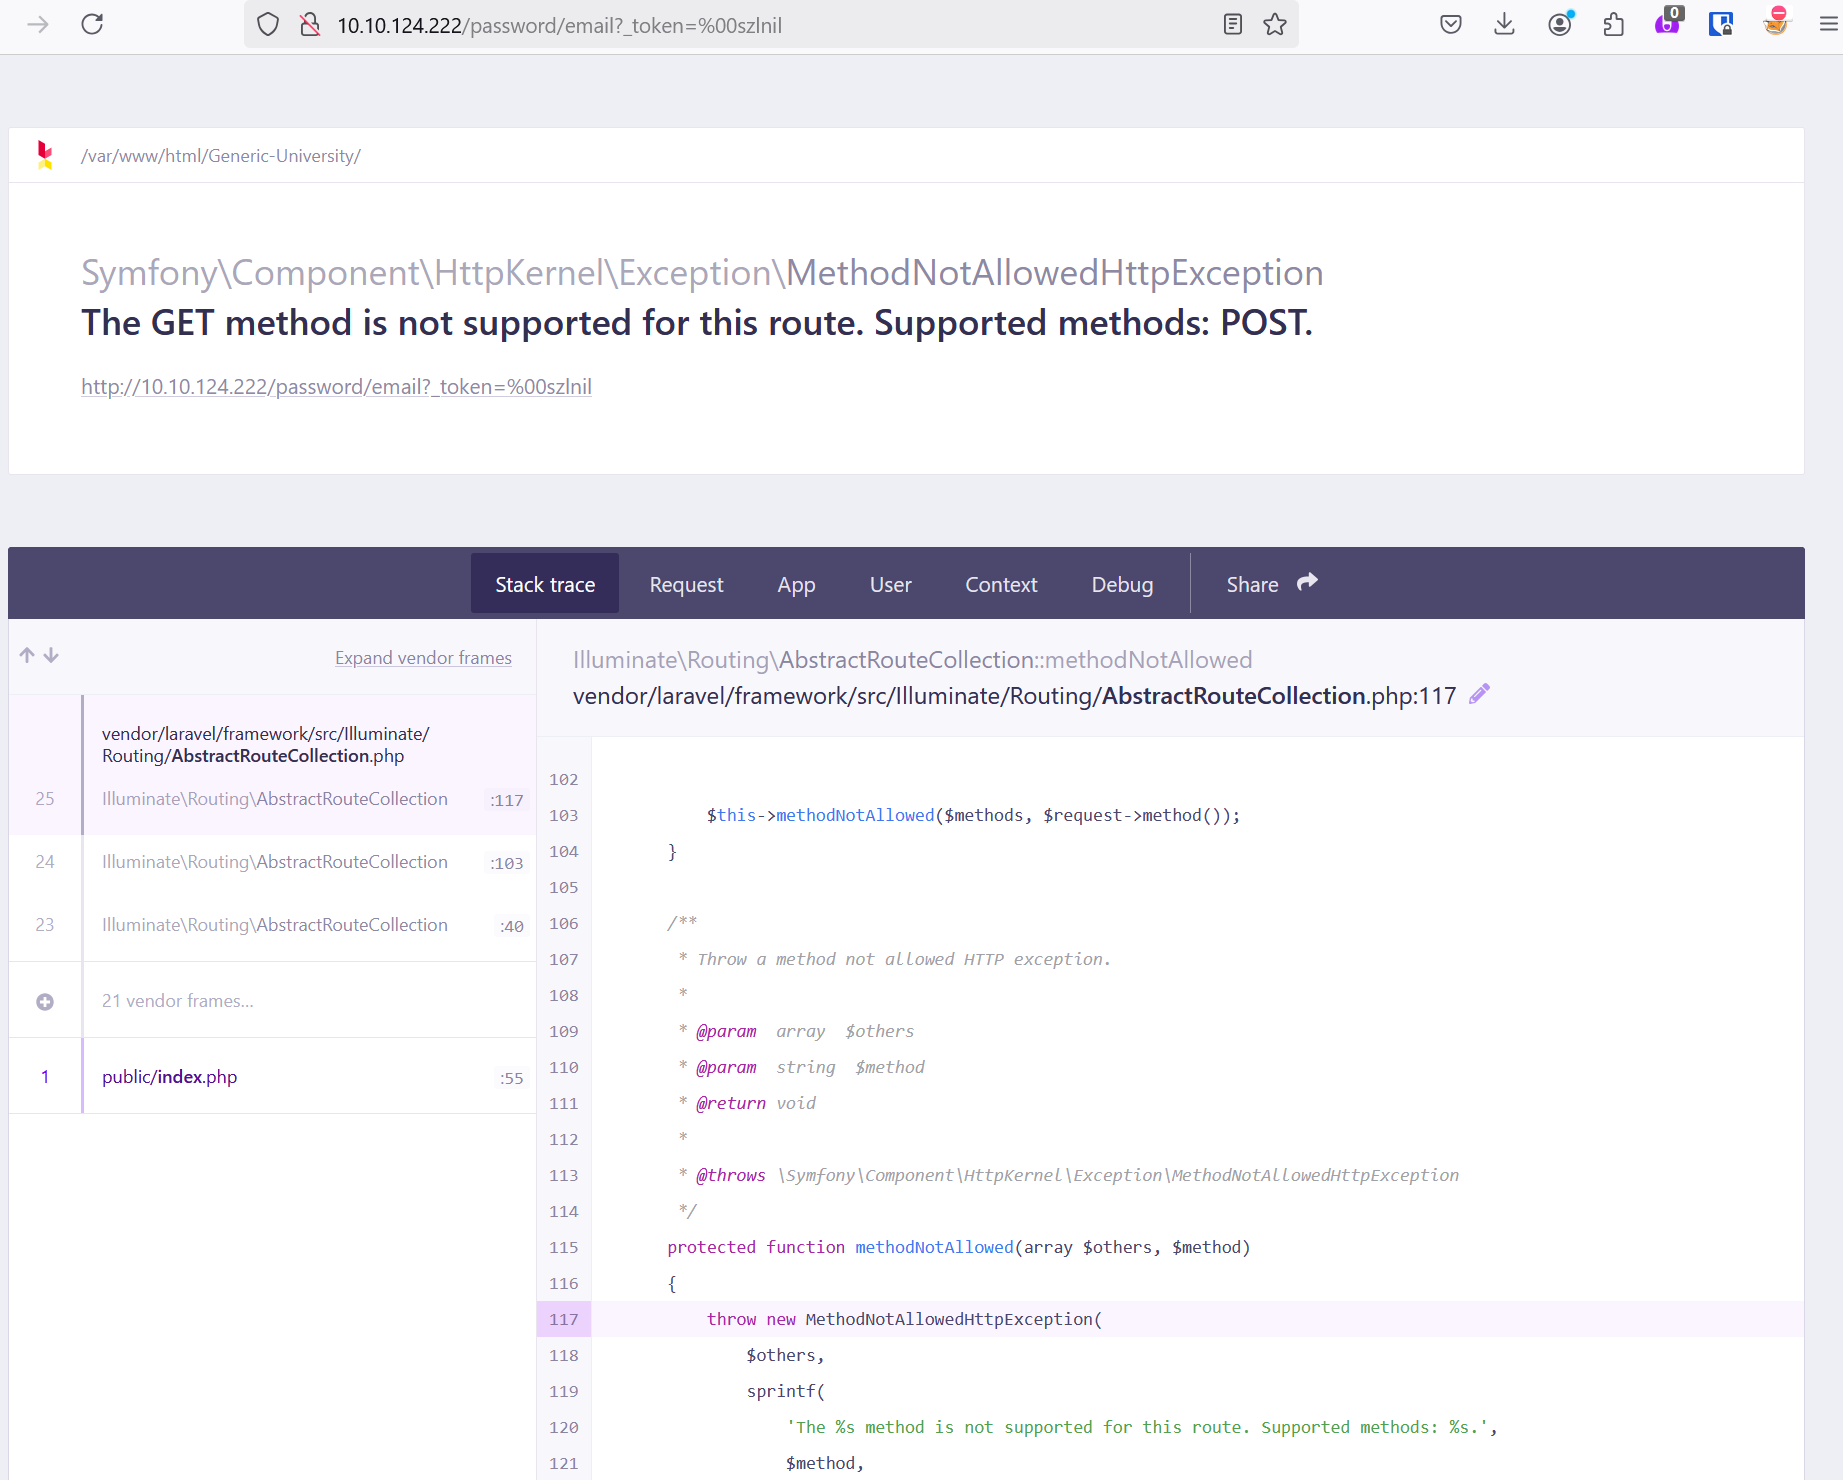
Essentially what we see here is that the is a CSRF Verification mechanism which applies to all endpoints with the exception of the api/* endpoint. So the API does not have this protection, and we need to evaluate more thoroughly to see if there is a good reason why. For now, we’re going to move on because we probably want to stand up the application to actually check this and we may get more information from the Coverity SAST tool or from the DAST sections. Let’s make a special note to check if Coverity flags this snippet of code.
Spoiler - here is the Google result when you search Generic-University:

Coverity Setup
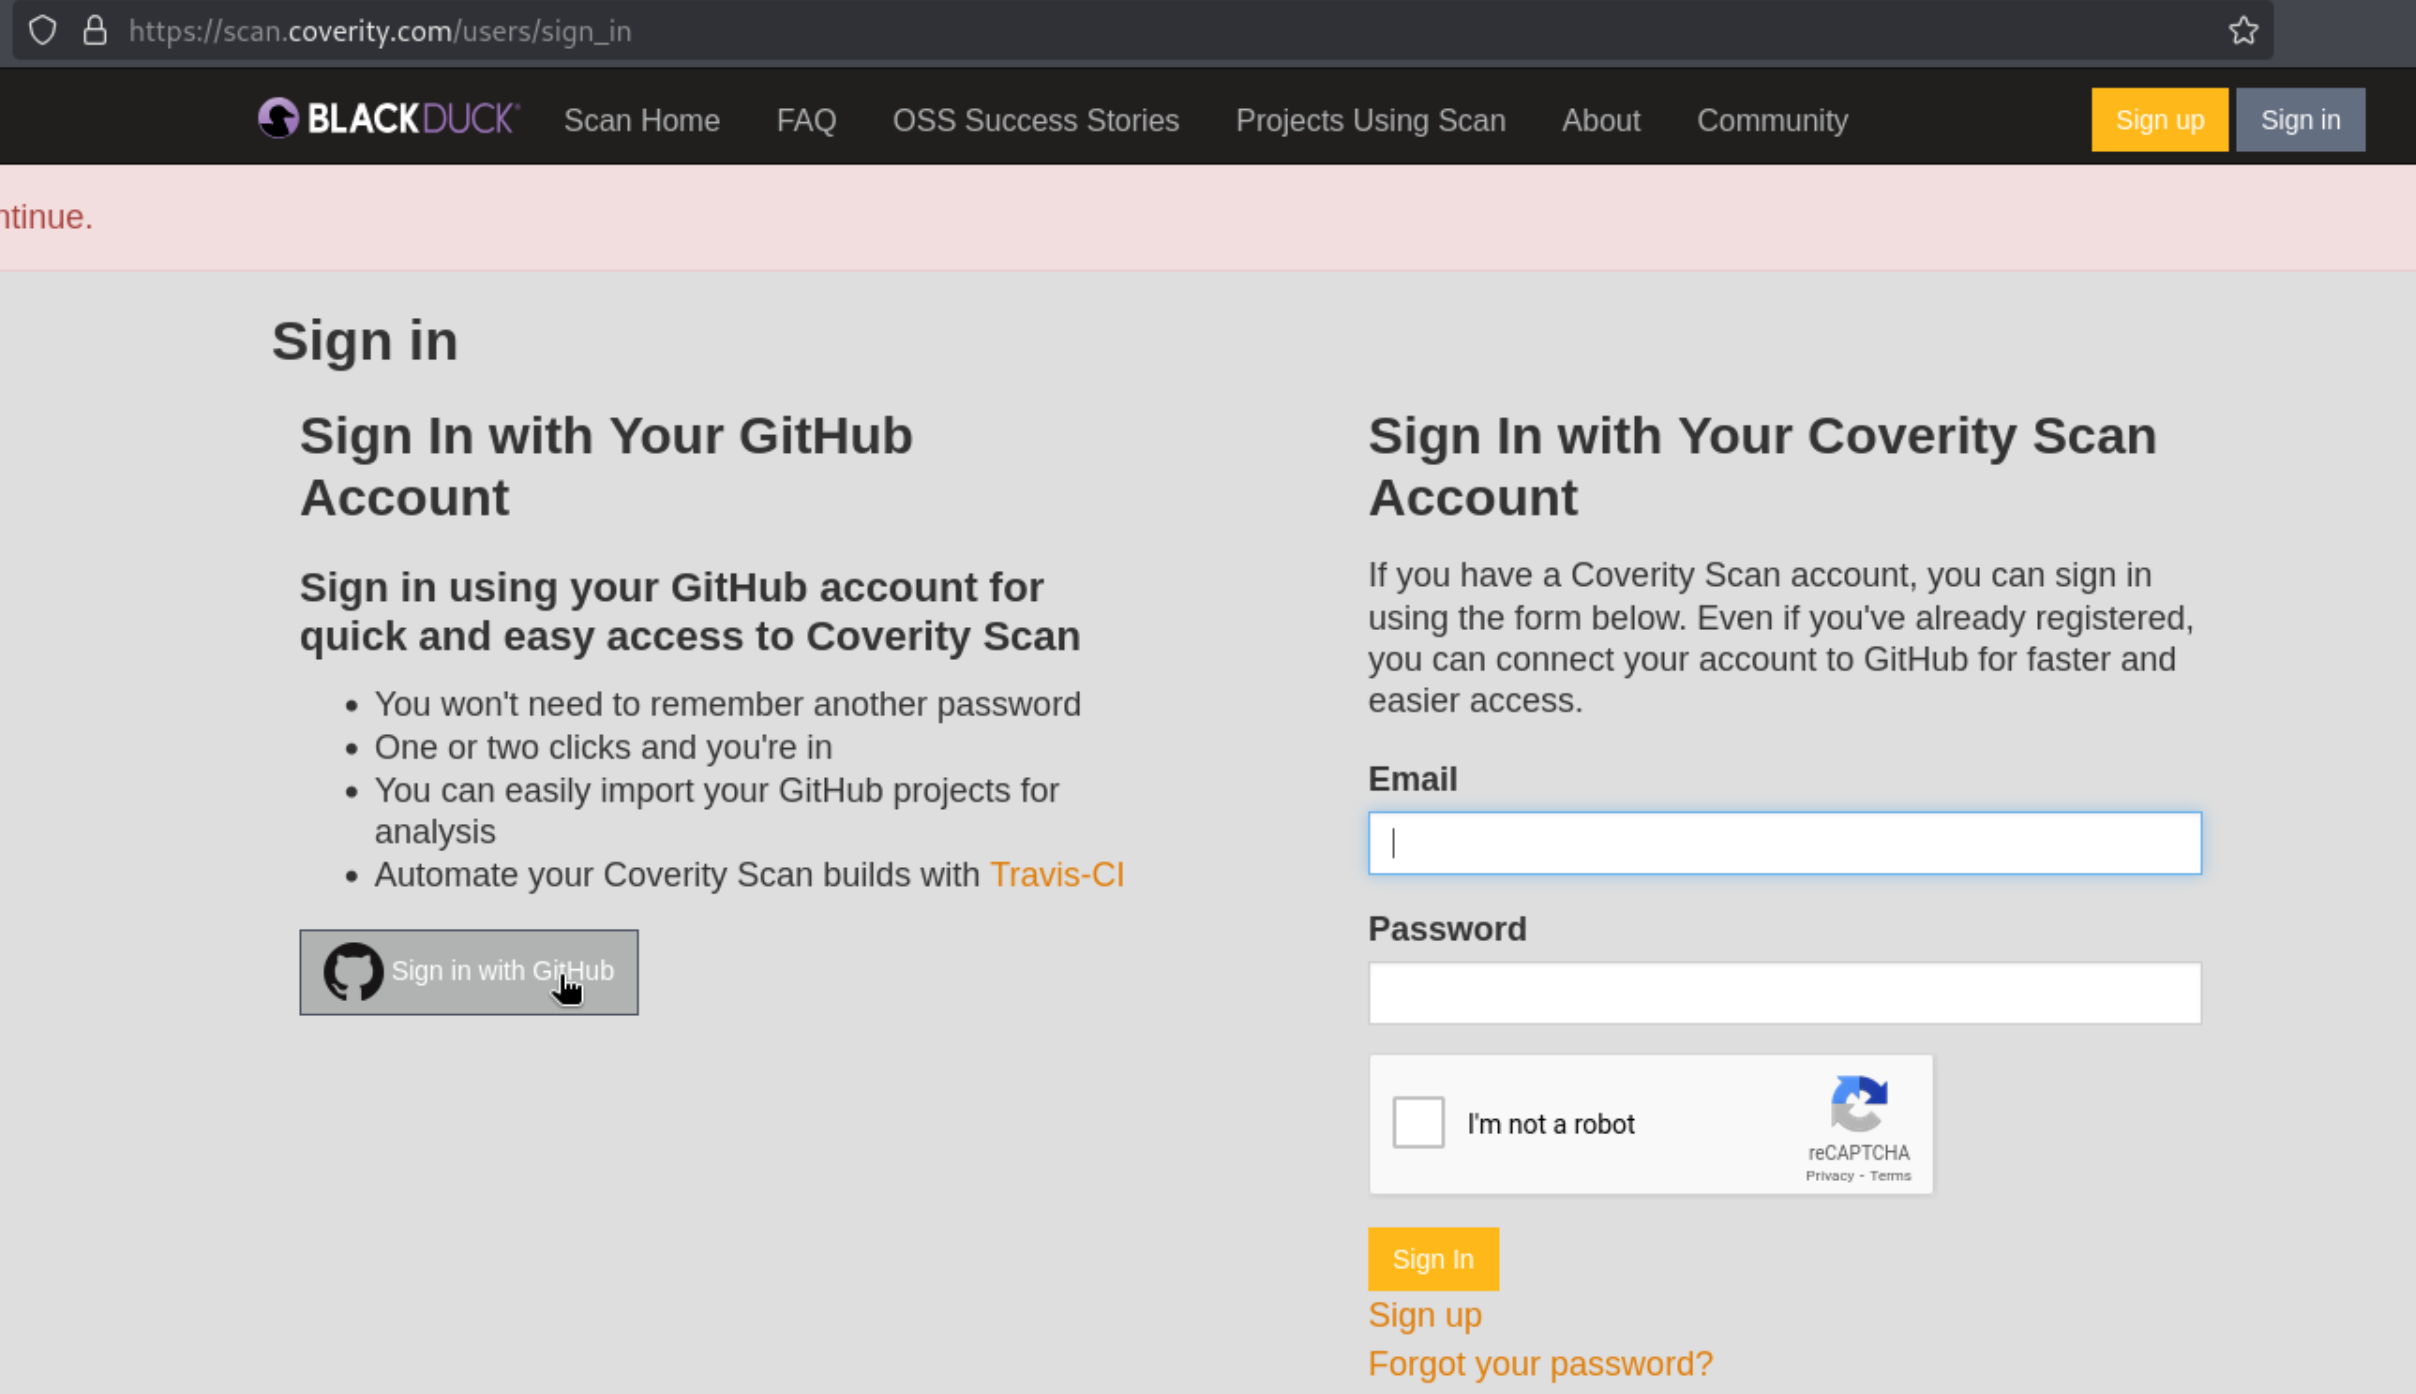
Now I want to basically perform the same analysis with Coverity. I saw this tool mentioned a lot during both my consulting and GRC days, but I haven’t had the chance to try it for myself. From their website, Coverity Static Analysis allows you to “find and fix defects in your Java, C/C++, C#, JavaScript, Ruby, or Python open source project for free.” Perfect. I’ll head to https://scan.coverity.com/ and connect my GitHub account for this project.
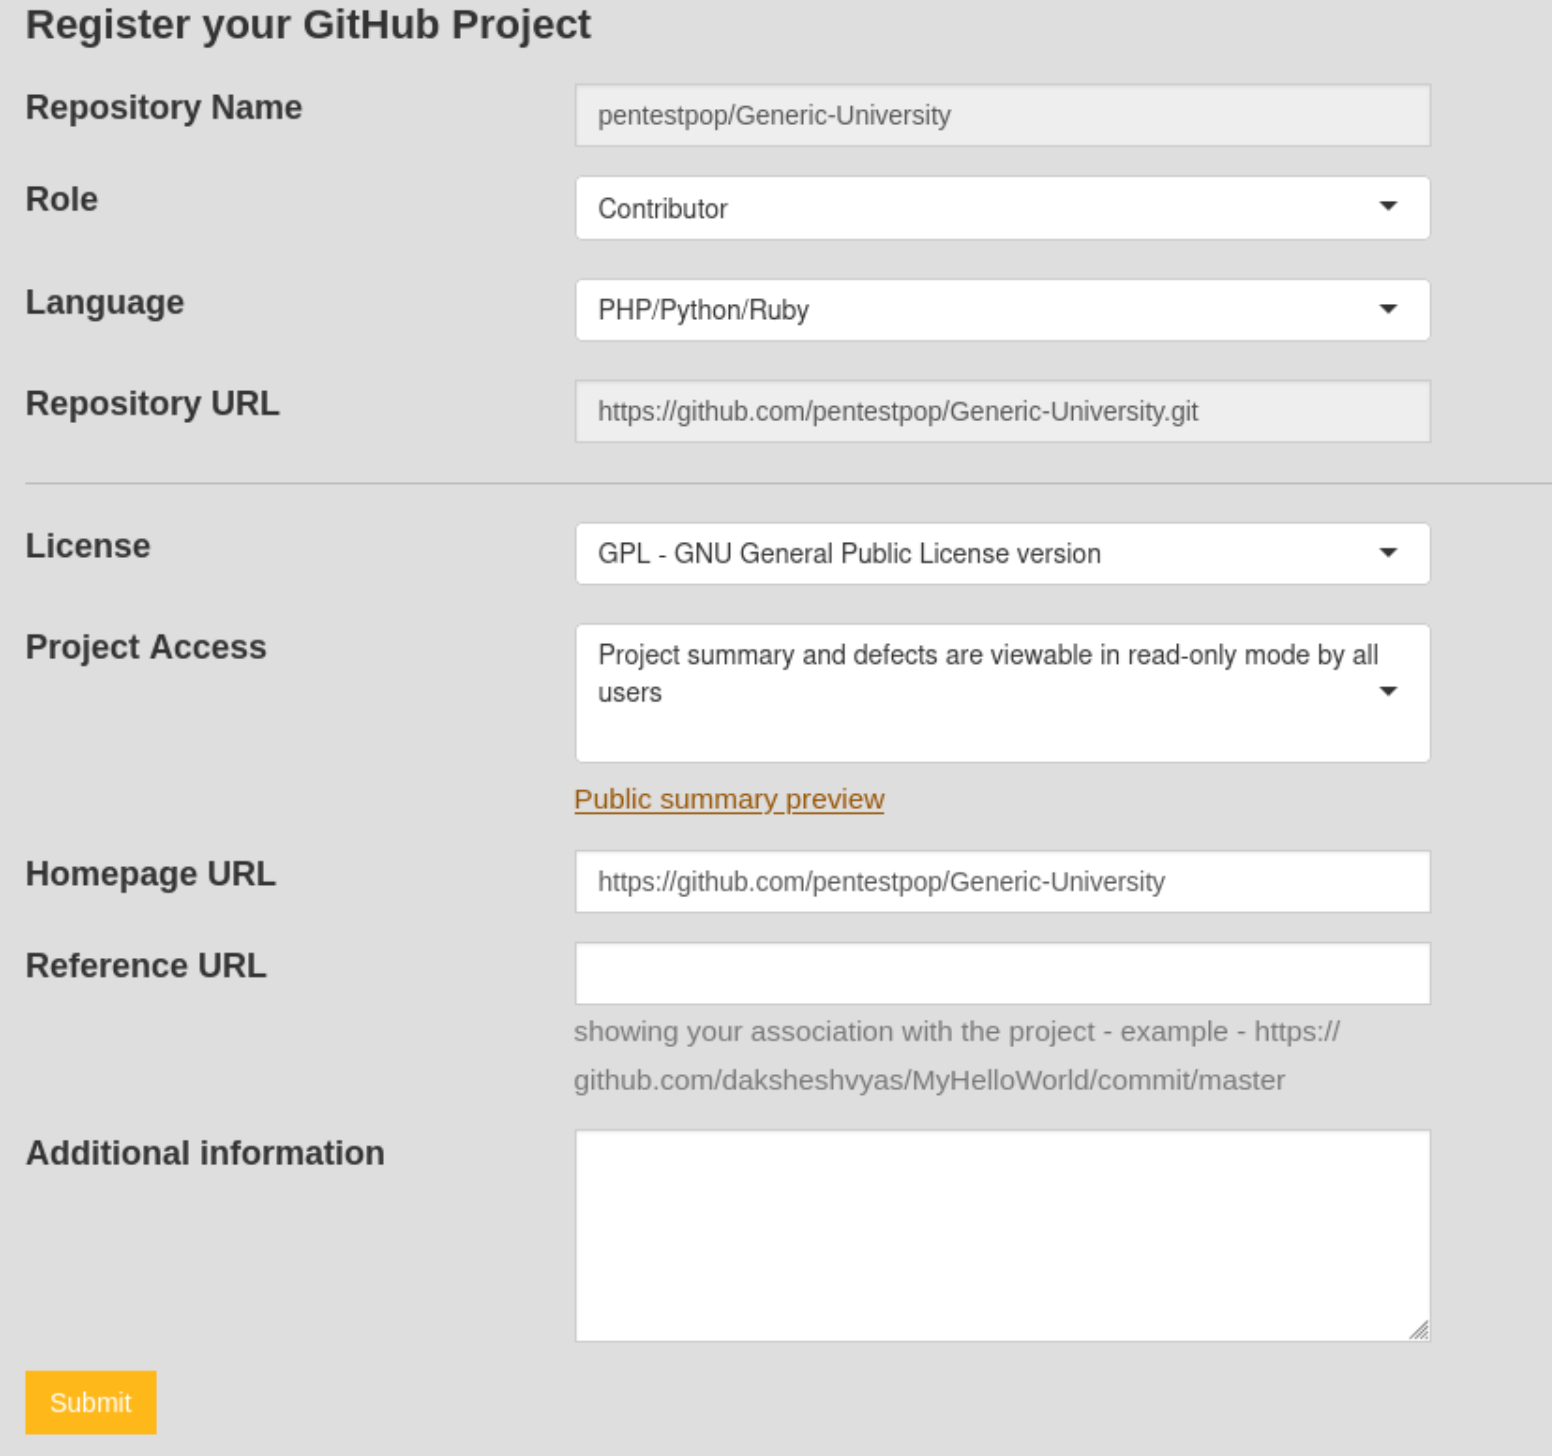
Next we Register our project.
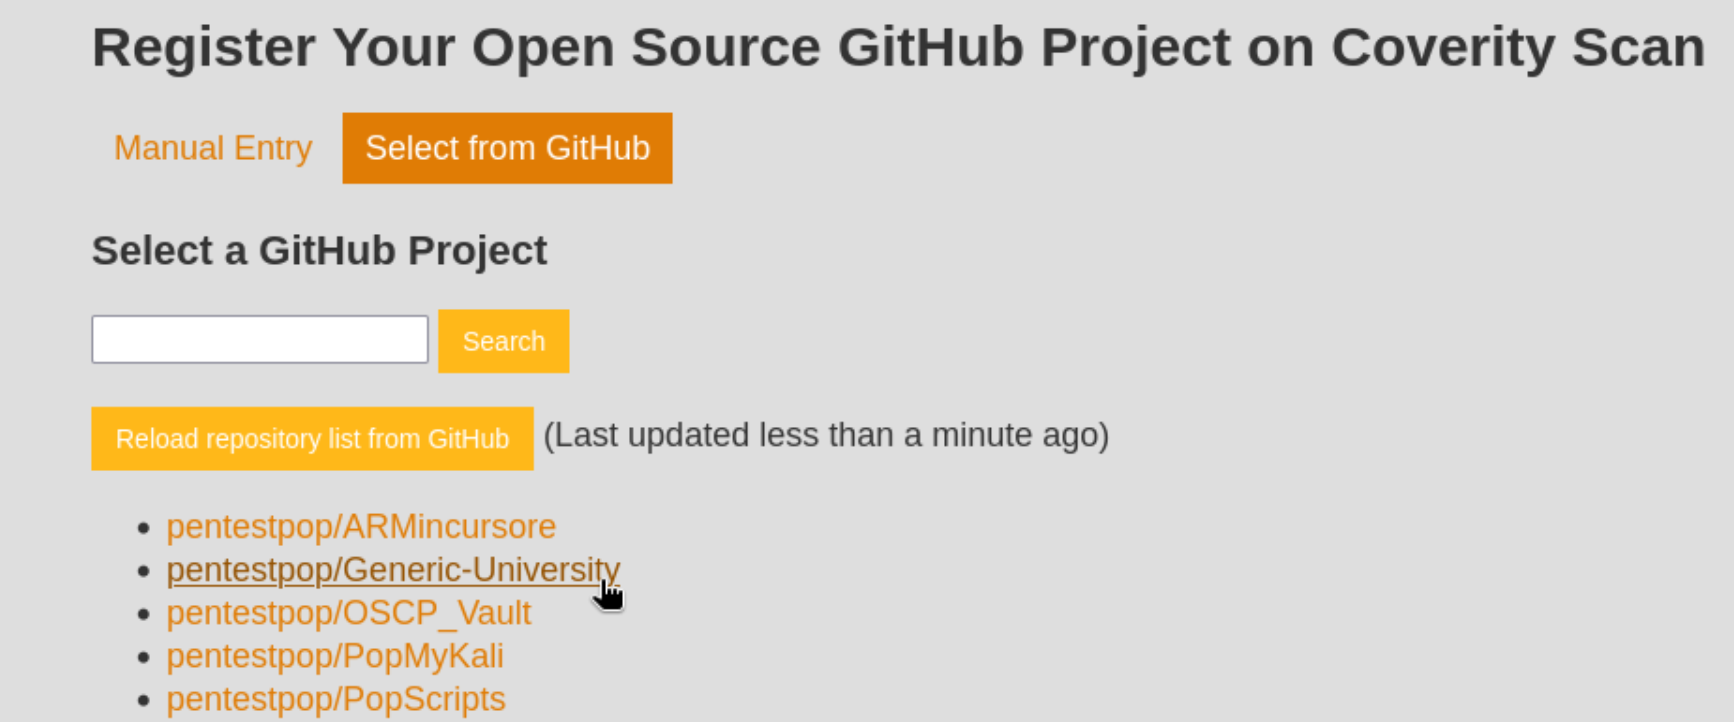
Note that we needed to select PHP here as it defaults to C/C++.
After we select Submit, Coverity will require us to build the project using their tool. Both the download of the tool and the instructions to use it can be found here. After downloading the tool, the command to run it is ` cov-build –dir cov-int –no-command –fs-capture-search <path/to/source/code>. Then compress it using sudo tar czvf Generic-University.tgz cov-int`. After that, you can upload the tar file for analysis:
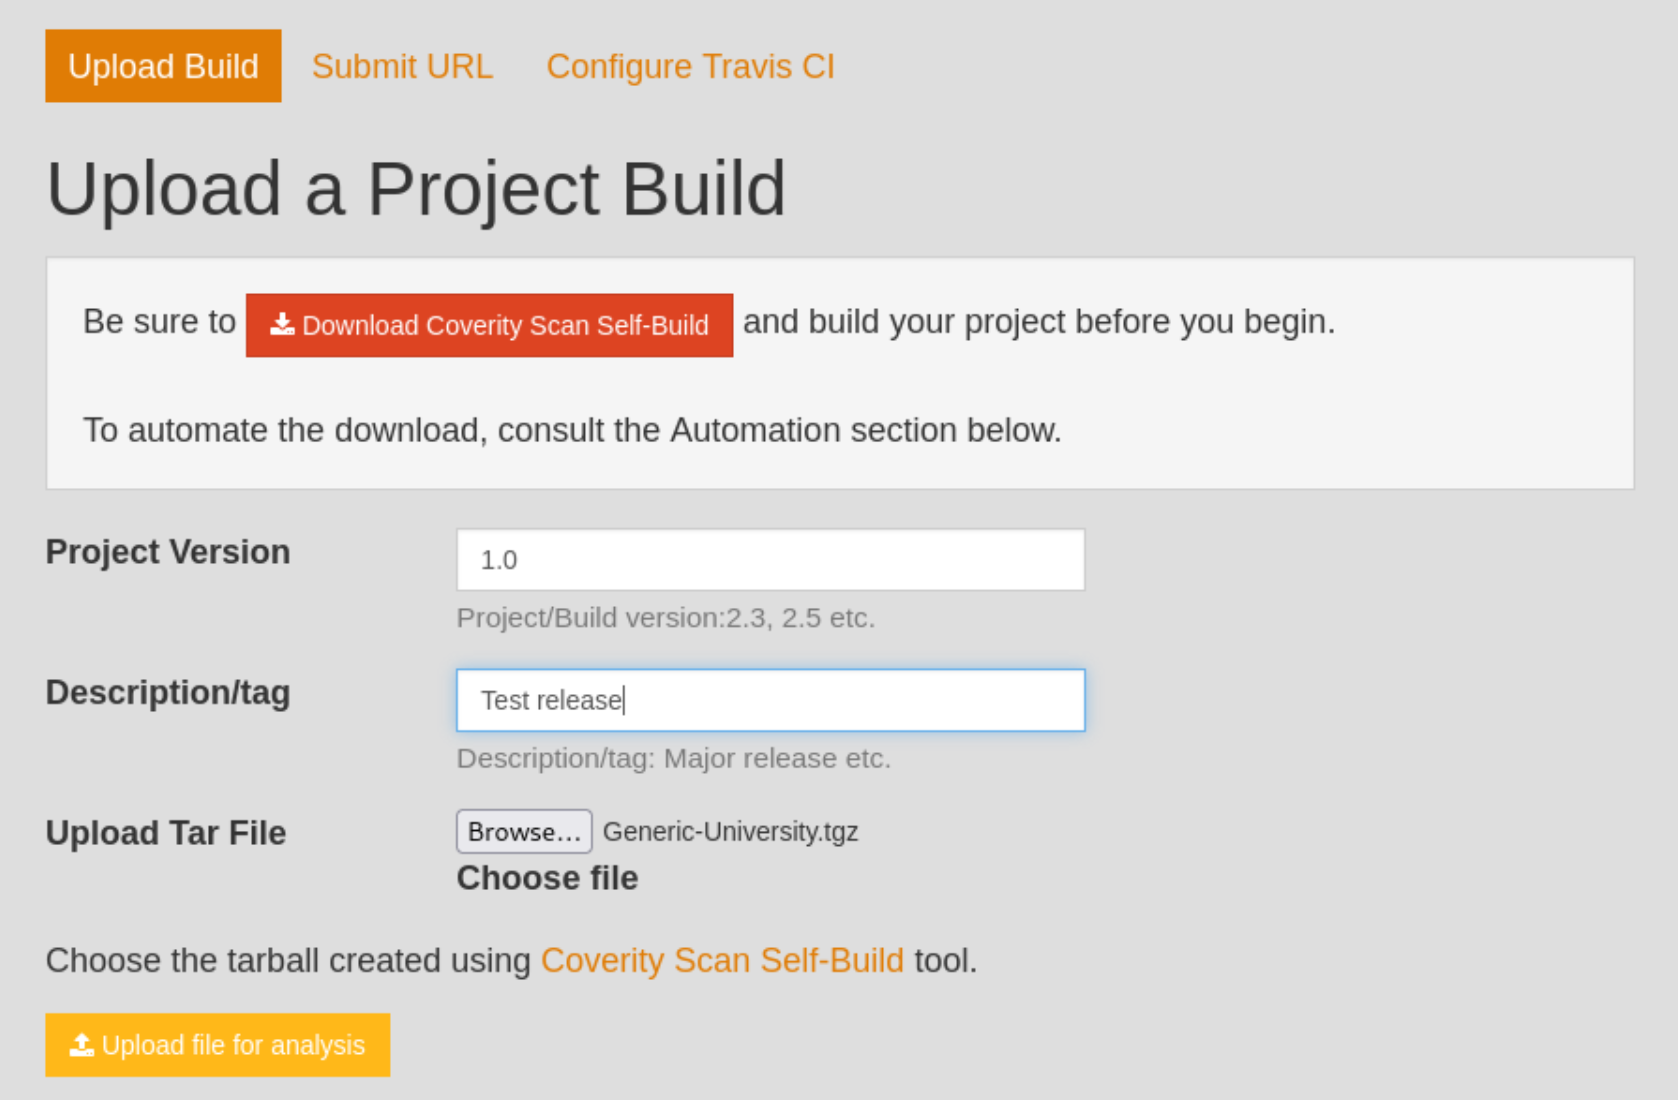
Note: Coverity attempts to review the submitter’s association with the submitted project and estimates 1-2 business days before the user is able to view the Defects in the project. So you may even have to come back in a day or so.
Coverity Results
After I get the results back, I click the Project Overview button to see what they find, which isn’t a lot, only 6 Total Defects.
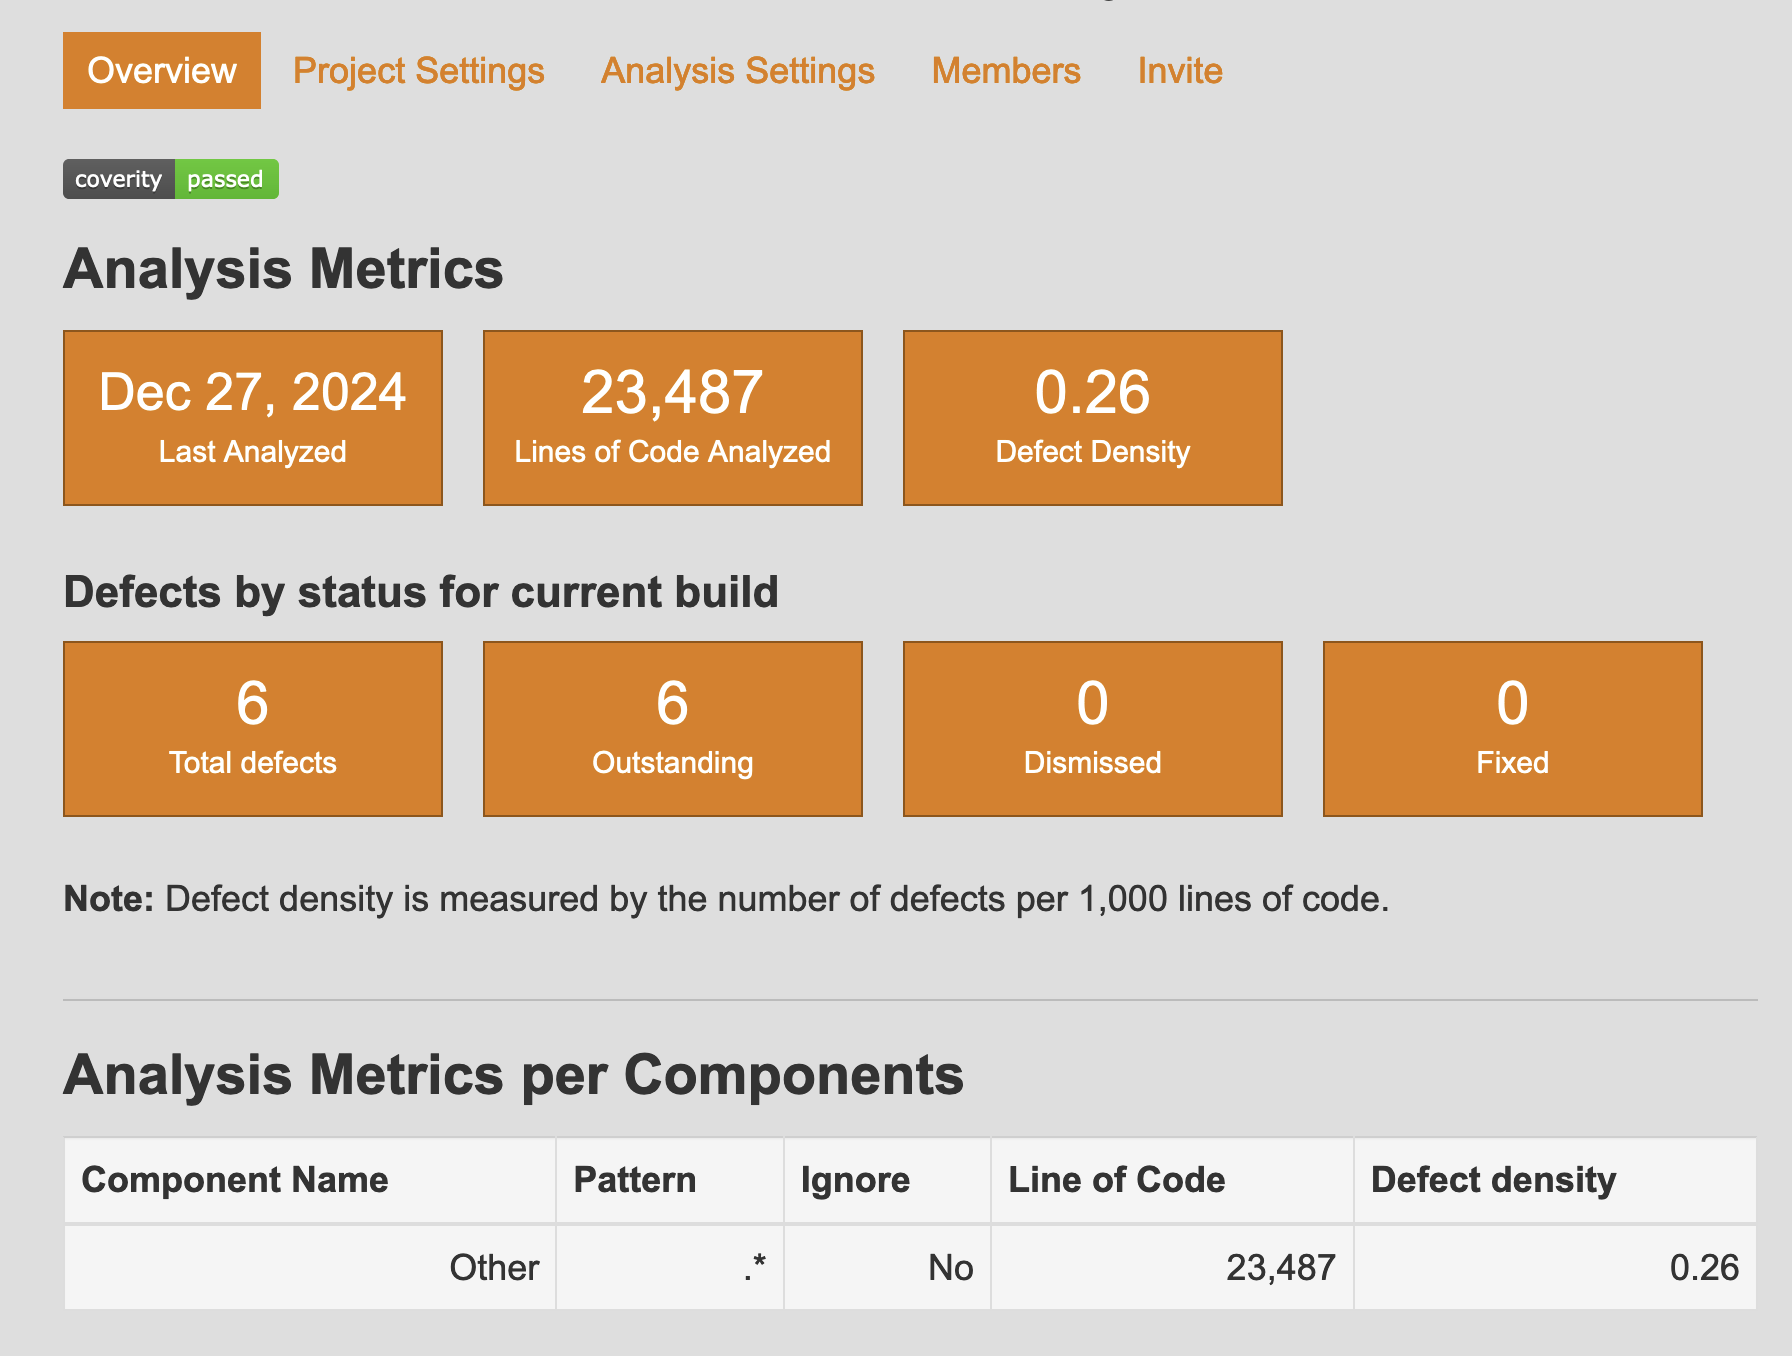
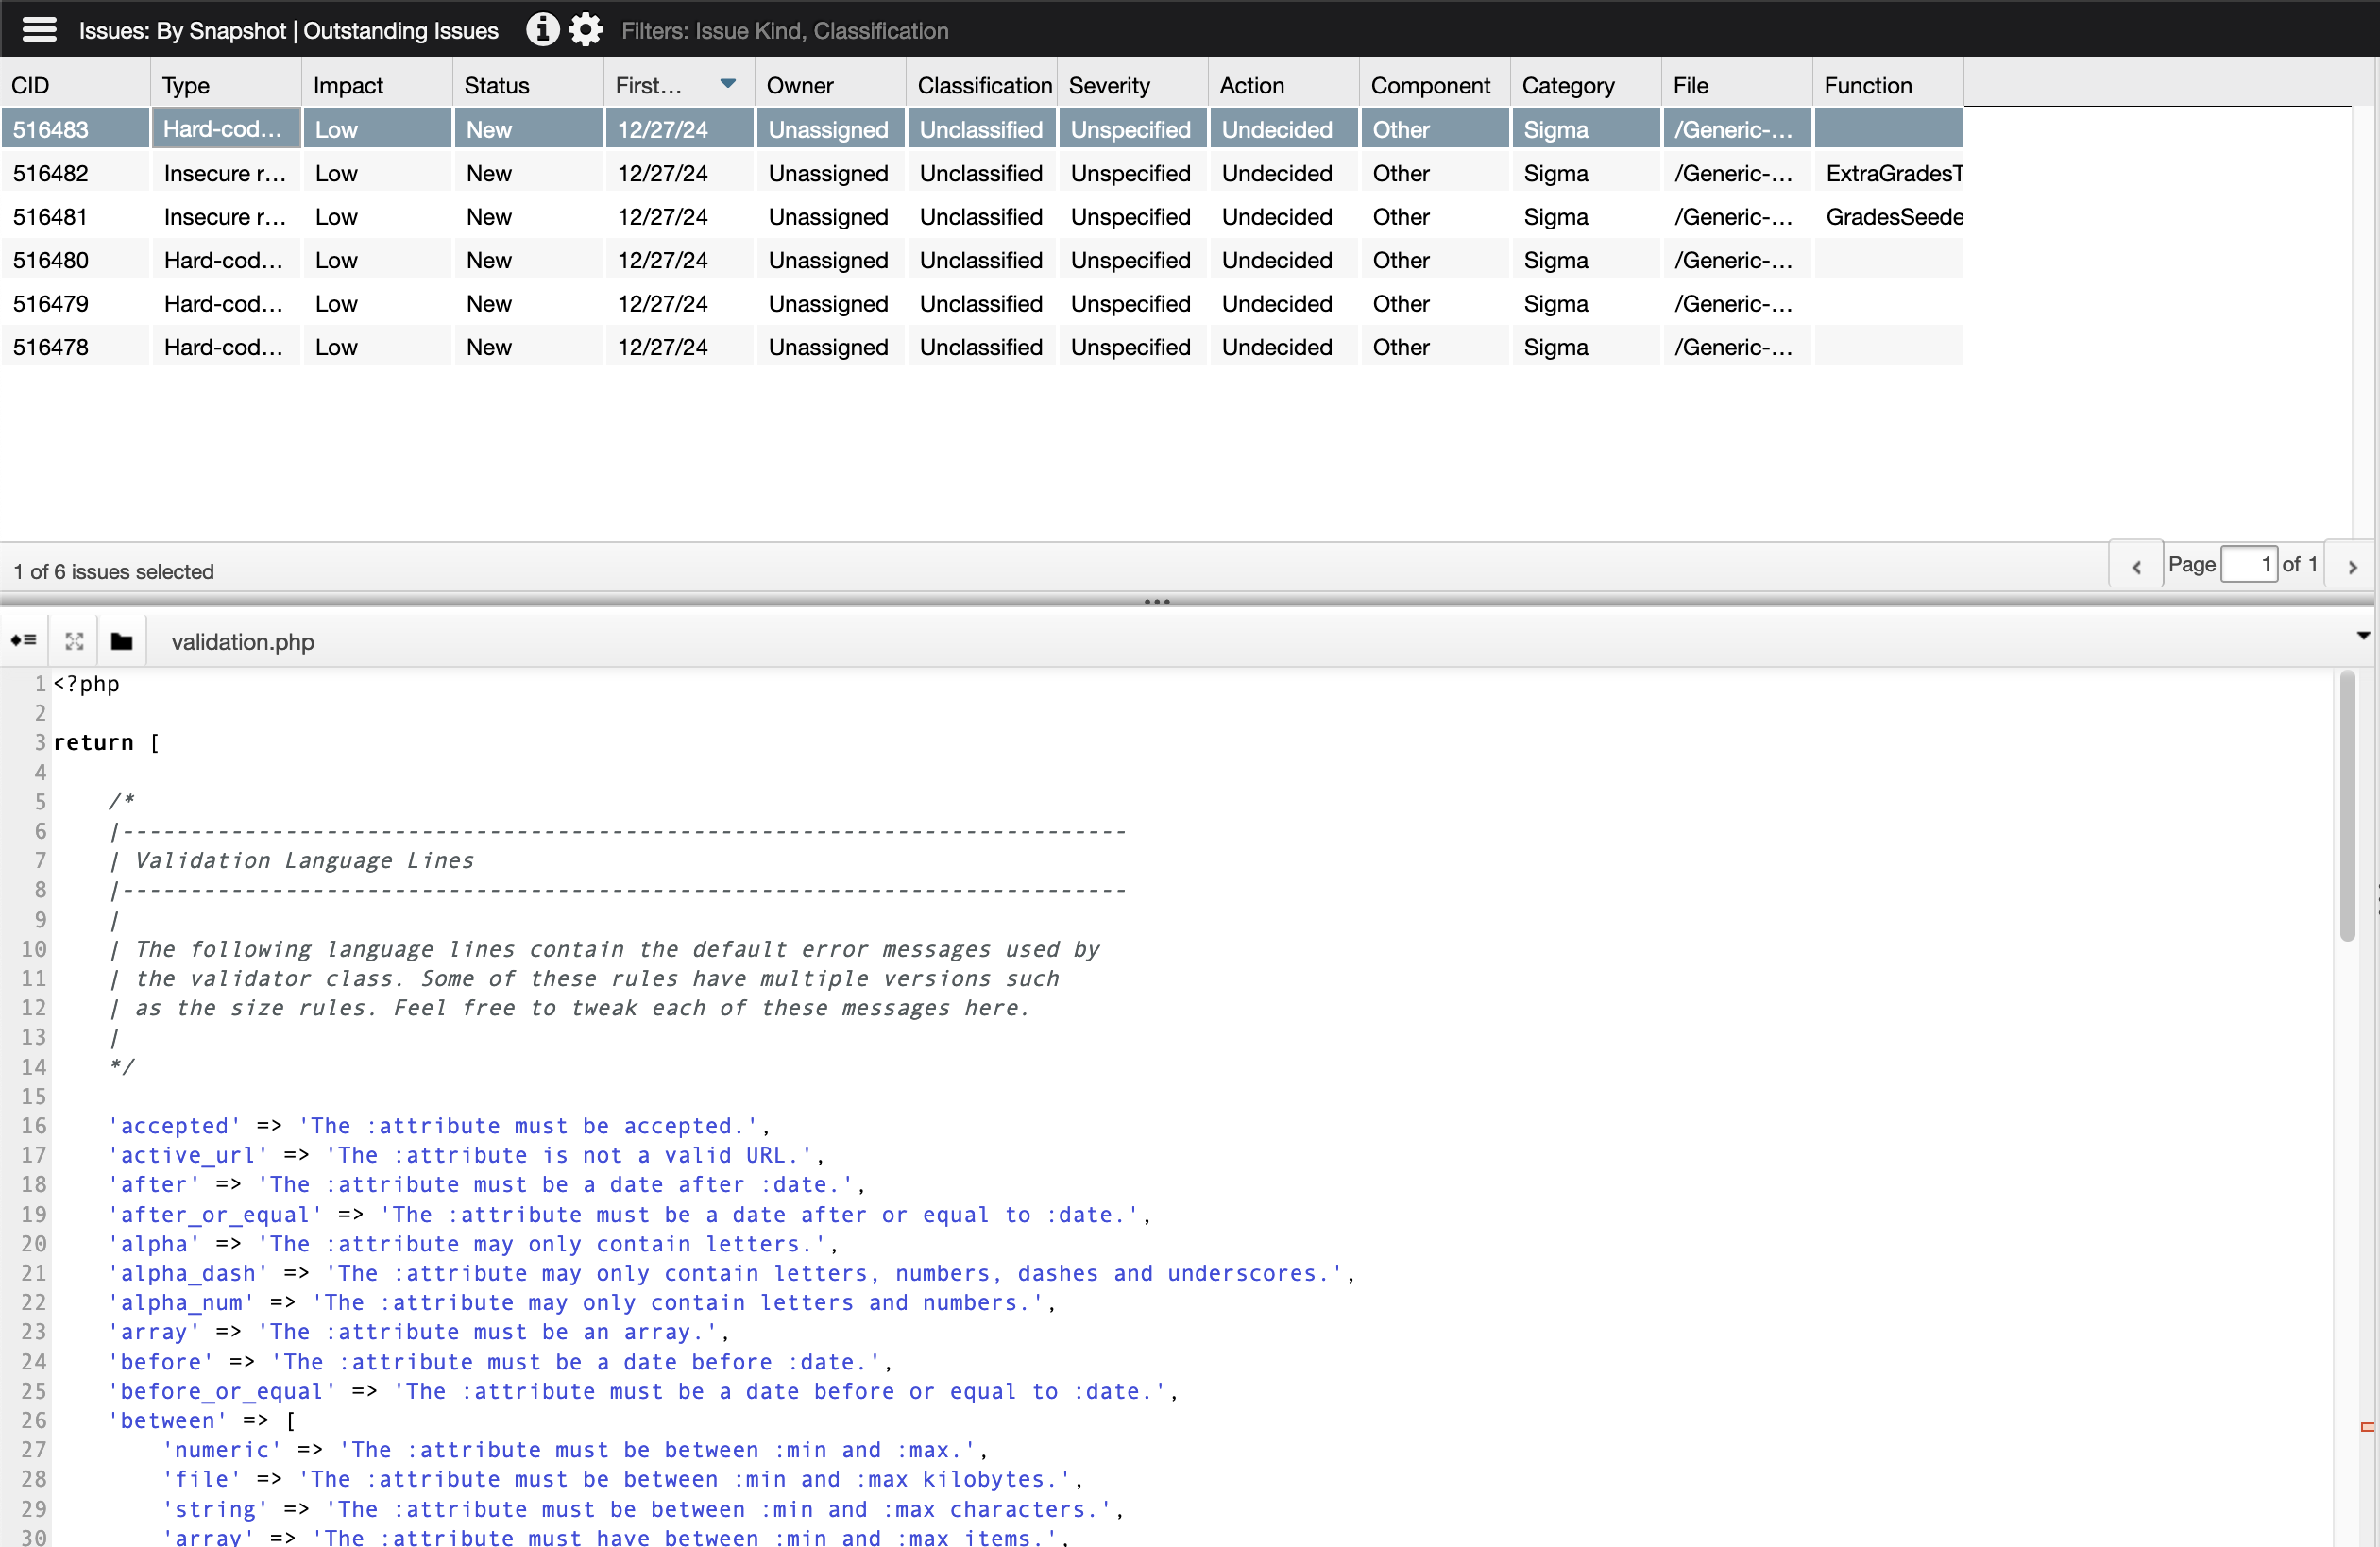
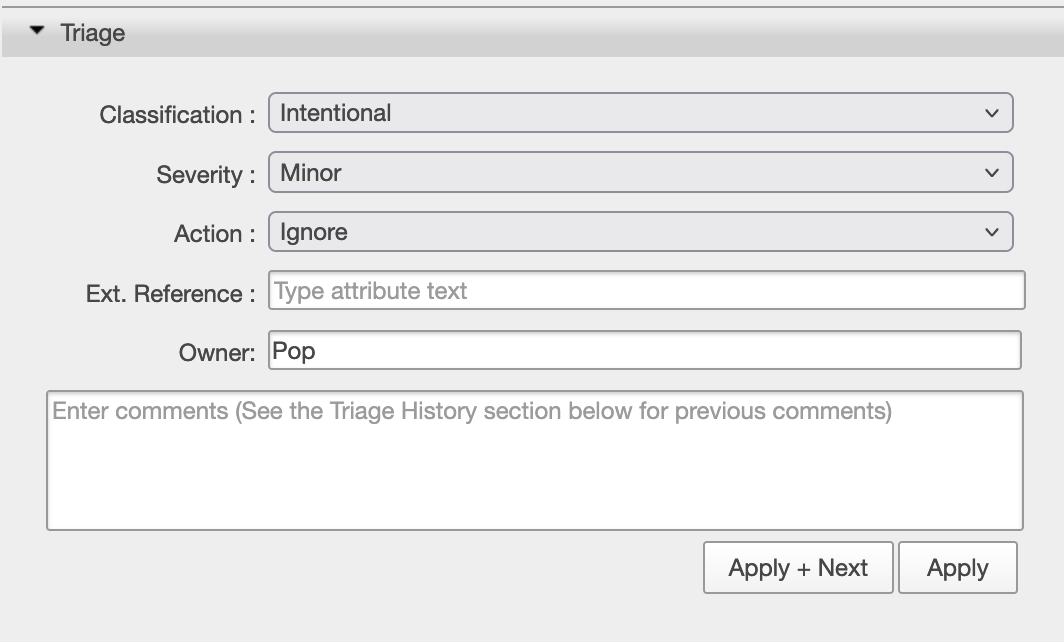
I’m not exactly sure why this is, given that the project is intentionally vulnerable, and I’ve gotten more results back at every step so far. When I check Analysis Settings, I see options to define Project Components and a Modeling File. Unfortunately, both of these options serve to reduce False Positives, which it should be able to find but would have to be among the 6 existing defect found. So I click View Defects to check them out. This takes me to a page with three windows - the Issues and Details panes:
and the Triage pane:
I would say these are pretty self-explanatory, but I wanted to call them out, because I like how they are set up. I want to make a note that Coverity does not flag the code with the potentiall CSRF vulnerability mentioned above. I will also note that all of the issues are marked Low Impact before I check them out. 4 are described as Type: Hard-coded secret, and 2 more are described as Type: Insecure random. I decide to view one of the latter.
Insecure random Vulnerabilities
In checking out the details of CID 516482, we see the function in question:
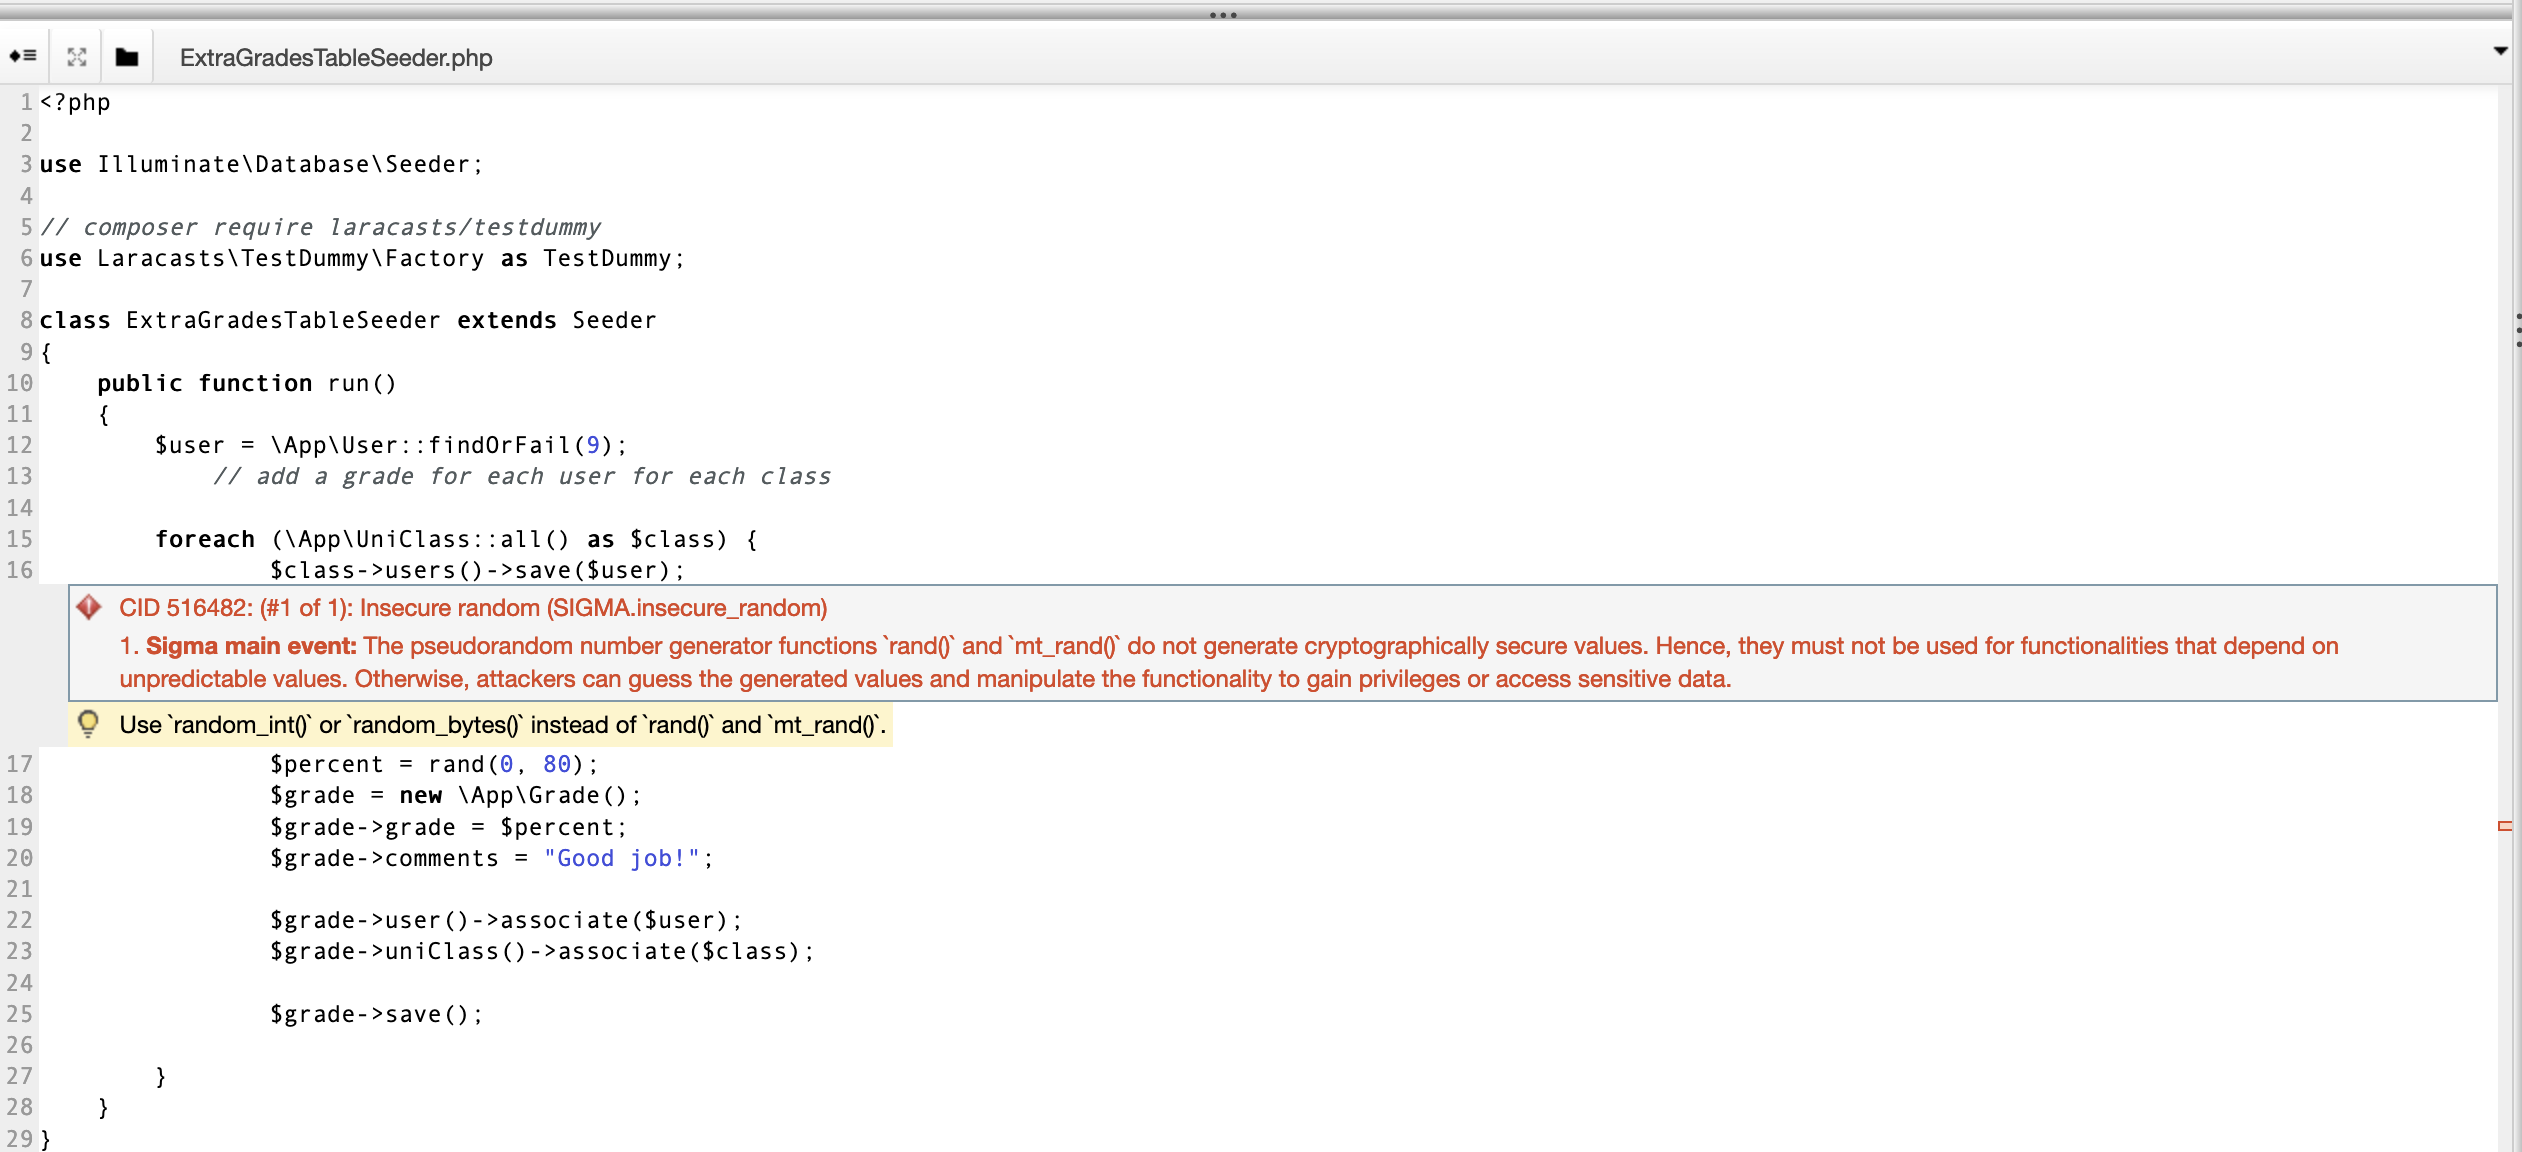
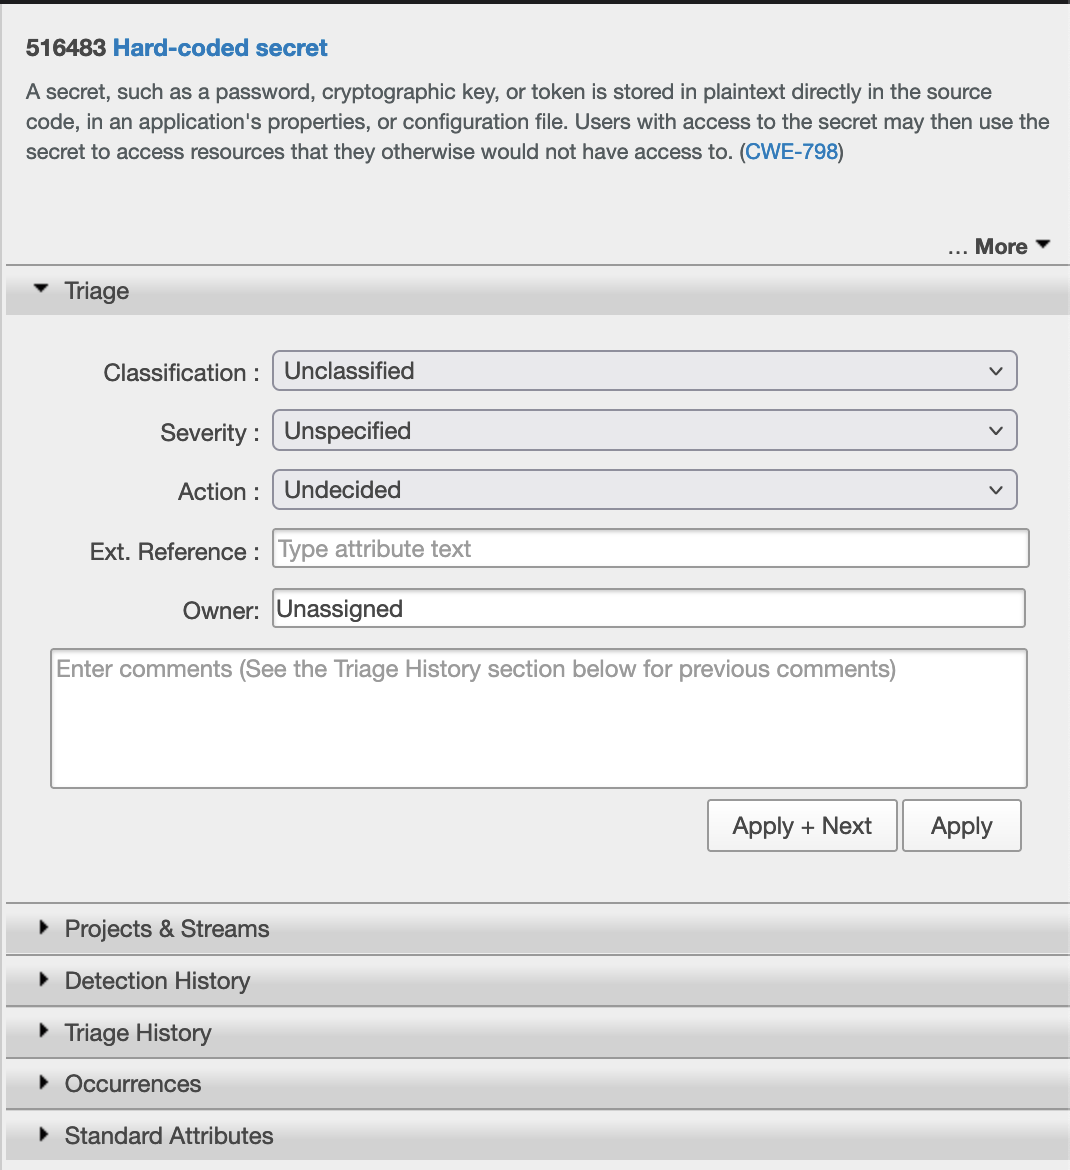
It looks like the function ExtraGradesTableSeeder.php is using a function called rand() which does not generate cryptogrpahically secure values. Coverity suggests, “Use random_int() or random_bytes() instead of rand() and mt_rand().” But after reading the code, we see a comment that says // add a grade for each user for each class. Because we know that this application is meant to be creating a Generic University web page, it makes sense that it would create a page with uses and randomly generated grades. These don’t need to be cryptographically secure; they are just there to fill the page with realistic values. We can mark the Triage Classification as Intentional and Ignore it.
This is the case for the other Insecure random vulnerability as well.
Hard-coded secret Vulnerabilities
It makes sense to look into some of the Hard-coded secret vulnerabilities as well. Here is one from the function UserFactory.php:
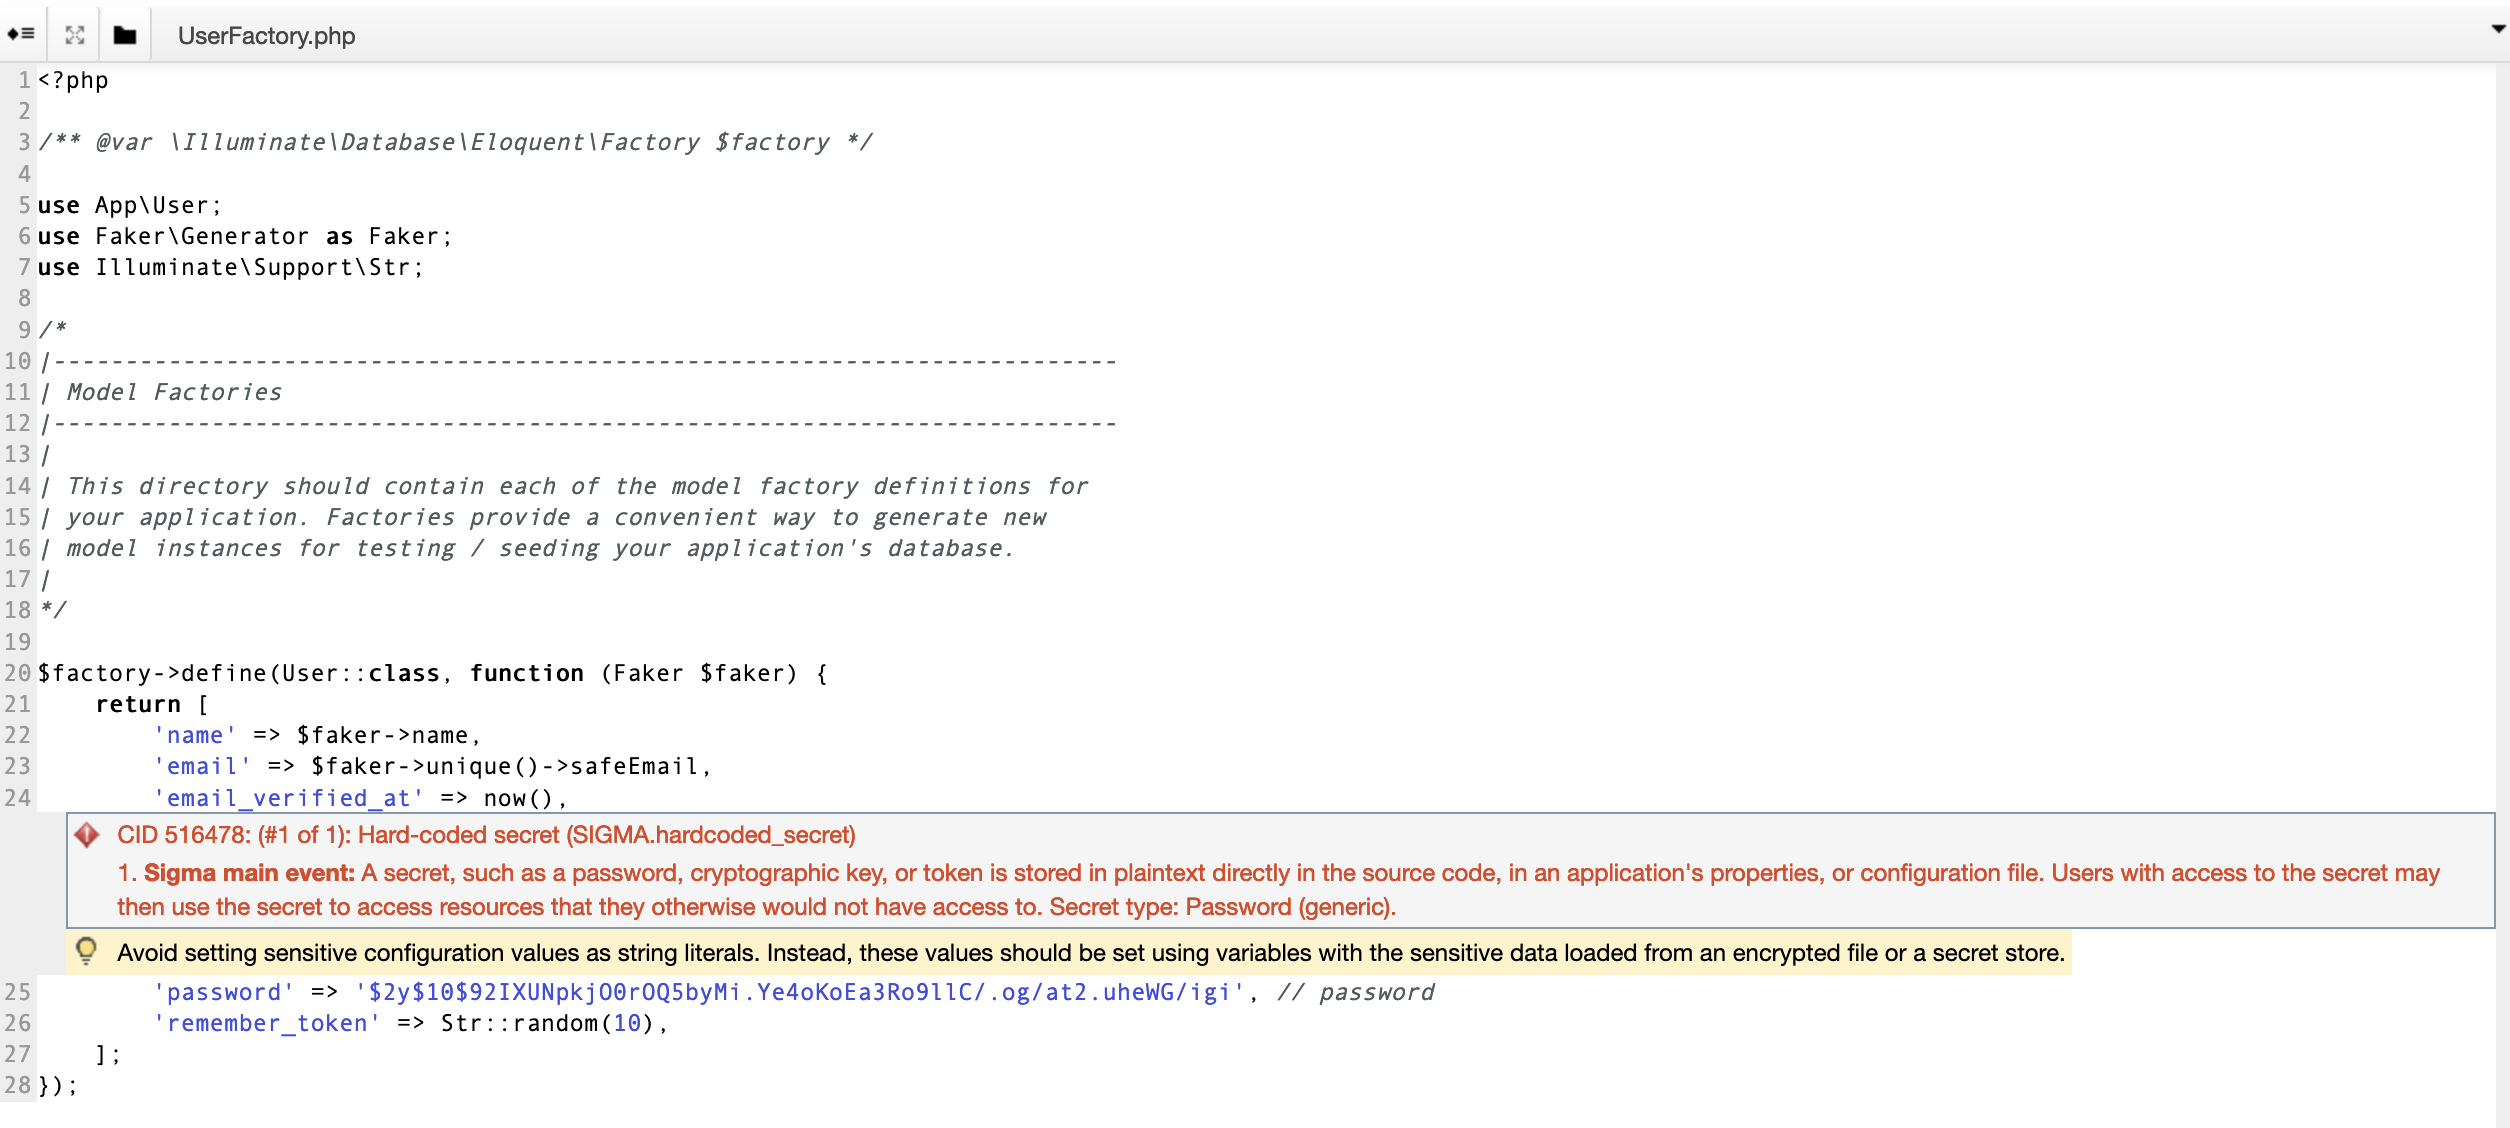
As we can see, there is a password hash in the code with a comment that says // password. (I have used hashcat to confirm that this is a bcrypt hash for password). So at first glance, this appears to potentially be a hard-coded password. But we have some additional context. For one, the Faker library is used to generate fake data, and we can see that it is being used to create the names and emails when we see 'name' => $faker->name and 'name' => $faker->unique()->safeEmail. We also see that the function is called UserFactory.php, suggesting that the function is creating users. So we can combine this context and see that this function is creating fake users and giving them the password password.
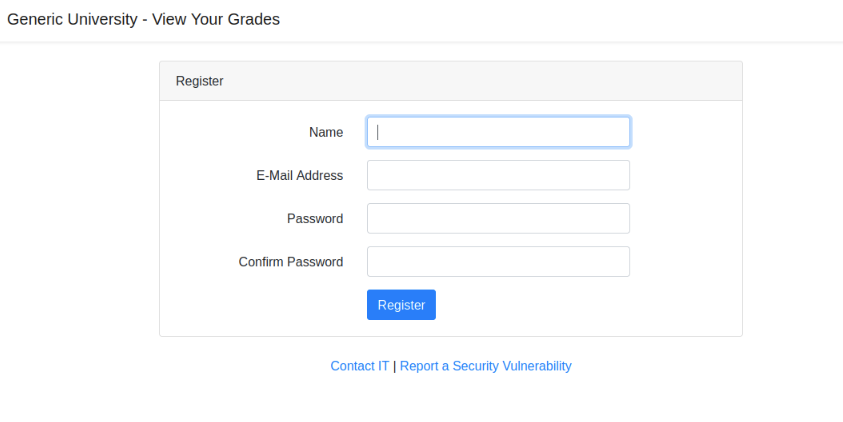
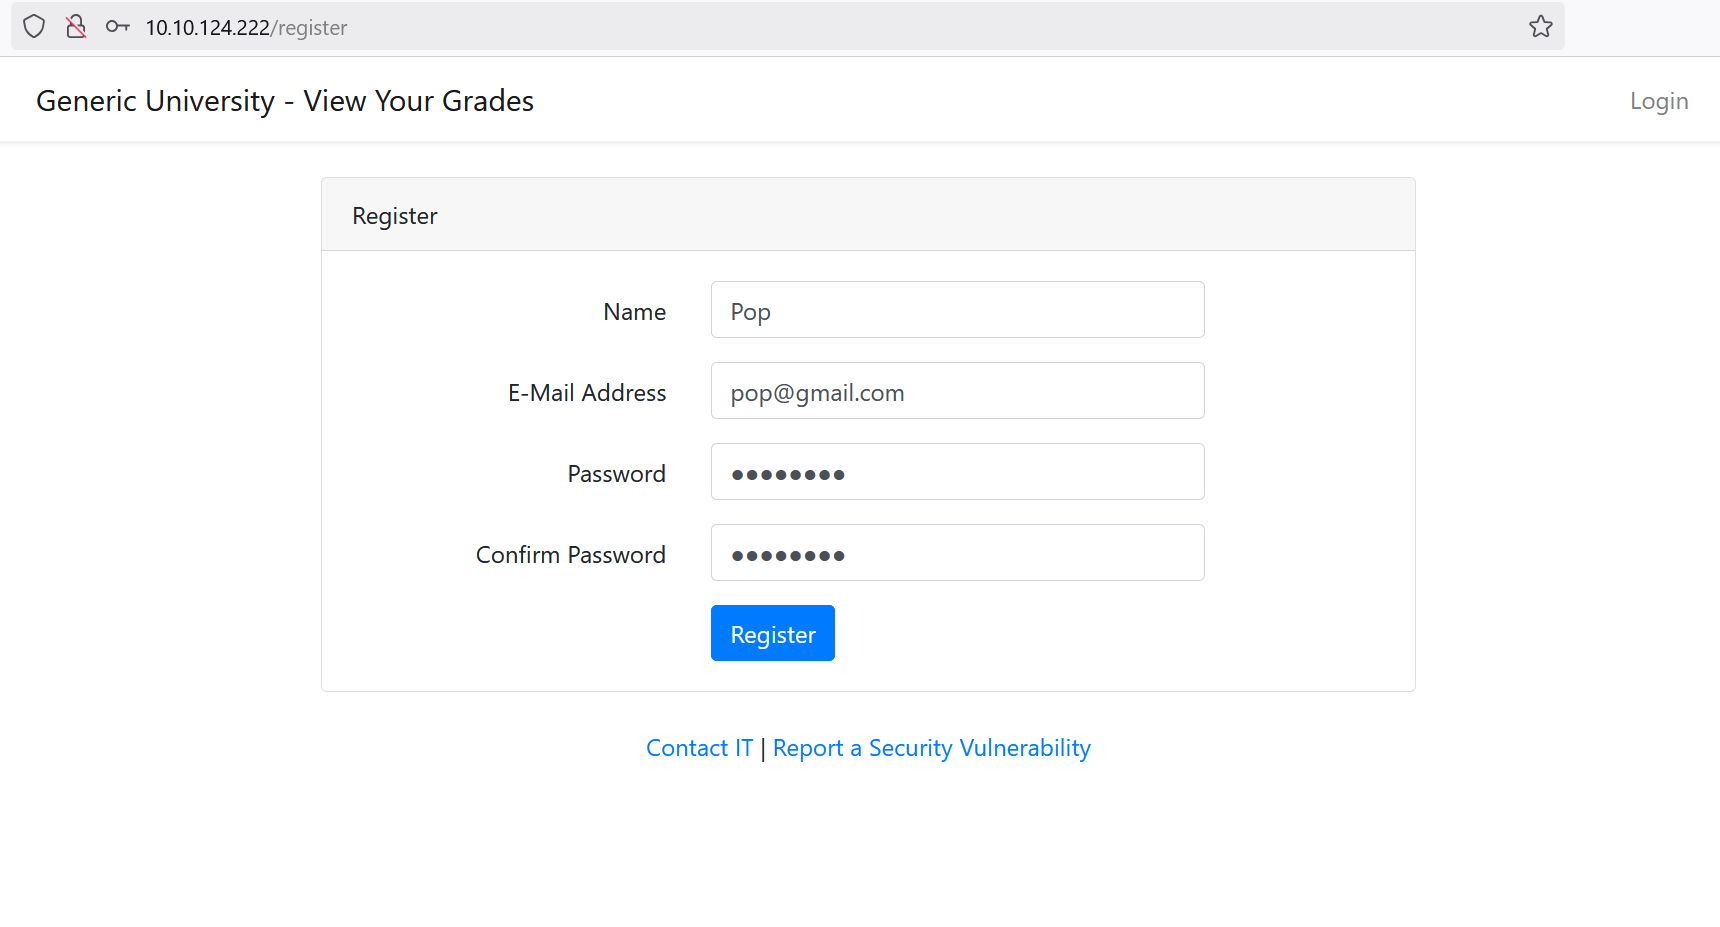
The question then becomes: “Is this a False Positive or a True Positive?” Well, it depends. These fake users are still real accounts with an insecure password, so their real accounts could still be stolen. That said, we don’t have any reason to believe they have any special privileges. If we are also able to create an account by using the application, and that account has the same privileges as these fake accounts, then really there is no functional difference. We can confirm that there is a register page by viewing the source code and seeing the /app/Http/Controllers/Auth/RegisterController.php and /resources/views/auth/register.blade.php files where the Controller file processes the form submission and the blade file acts as the view template that displays the actual HTML form. Or we can just stand the application up and go to http://$IP/register like so:
Note that if these were real users, it would be a real issue if their passwords were hard-coded into the app, but if they were real users, this function presumably wouldn’t exist.
We can mark this as Intentional and Ignore it as well.
Dynamic Application Security Testing (DAST)
The next step in the code review process is to stand up the application and then use DAST tools against it. While SAST tools check the source code, DAST tools scan the application while it is running to see if they can find any vulnerabilities. To continue the building analogy, SAST would be analyzing the plans for the design of a building, and DAST would be actually building the structure and walking around it looking for vulnerabilities. Fortunately we can set up a testing environment more easily in software than we can in architecture.
As I said earlier in the post, I ran into problems standing up the application on my machine (I really need to pull the trigger on a mini-PC), and only 2/3 of the way through this post did I realize I could just use TryHackMe. But that was by far the simplest option for me, so I just did that.
OWASP ZAP Setup
The first DAST tool I use is called ZAP for Zed Attack Proxy. While originally developed by OWASP, it was acquired by Checkmarx in September 2024. I still see it referred to as OWASP ZAP, but it is technically ZAP by Checkmarx now.
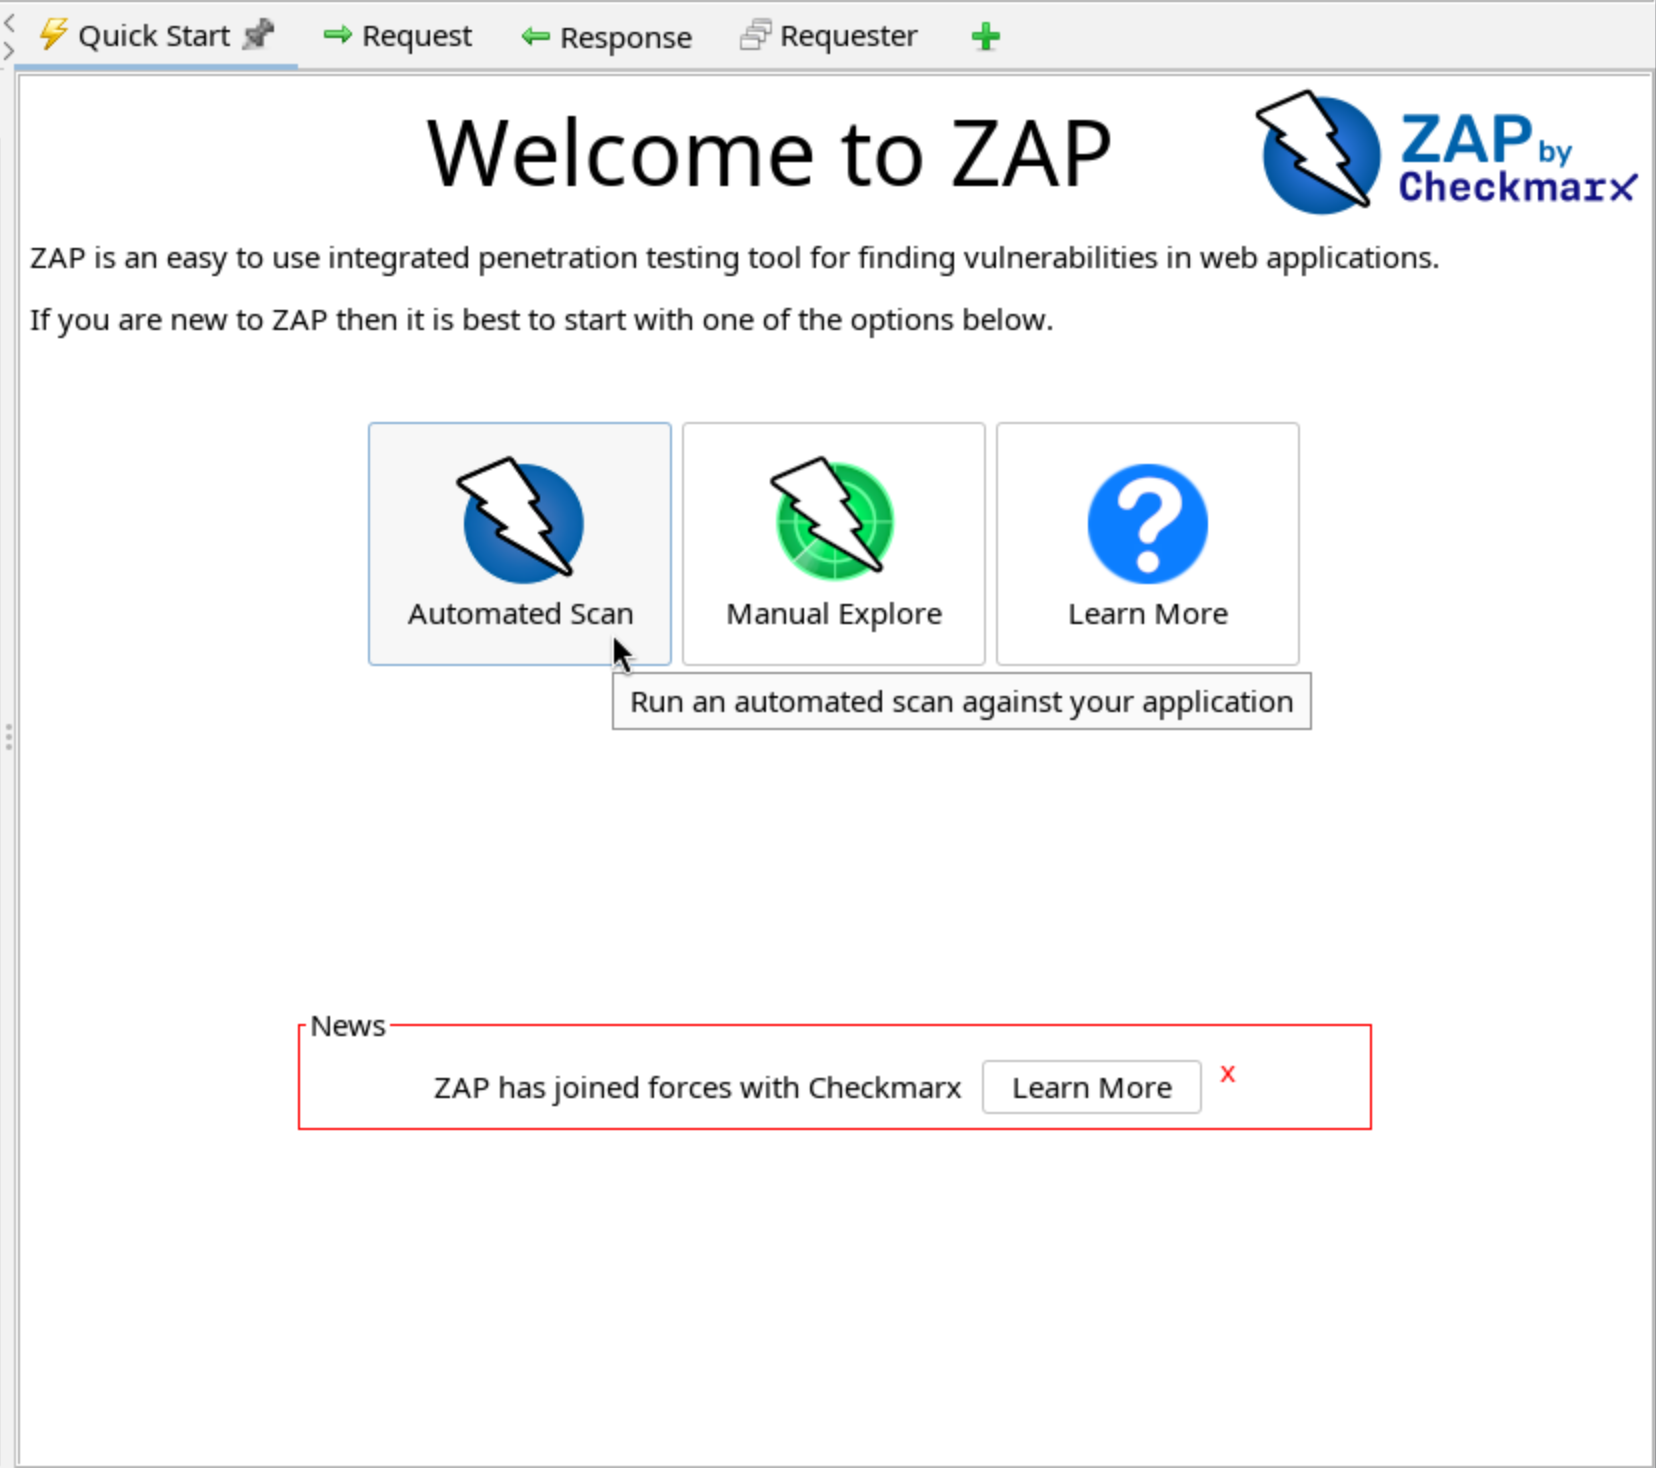
Installation is simple (for Debian distros anyway). Simply run sudo apt install zaproxy and then start the application with zaproxy. That will bring up this window, where in my case I selected Automated Scan.
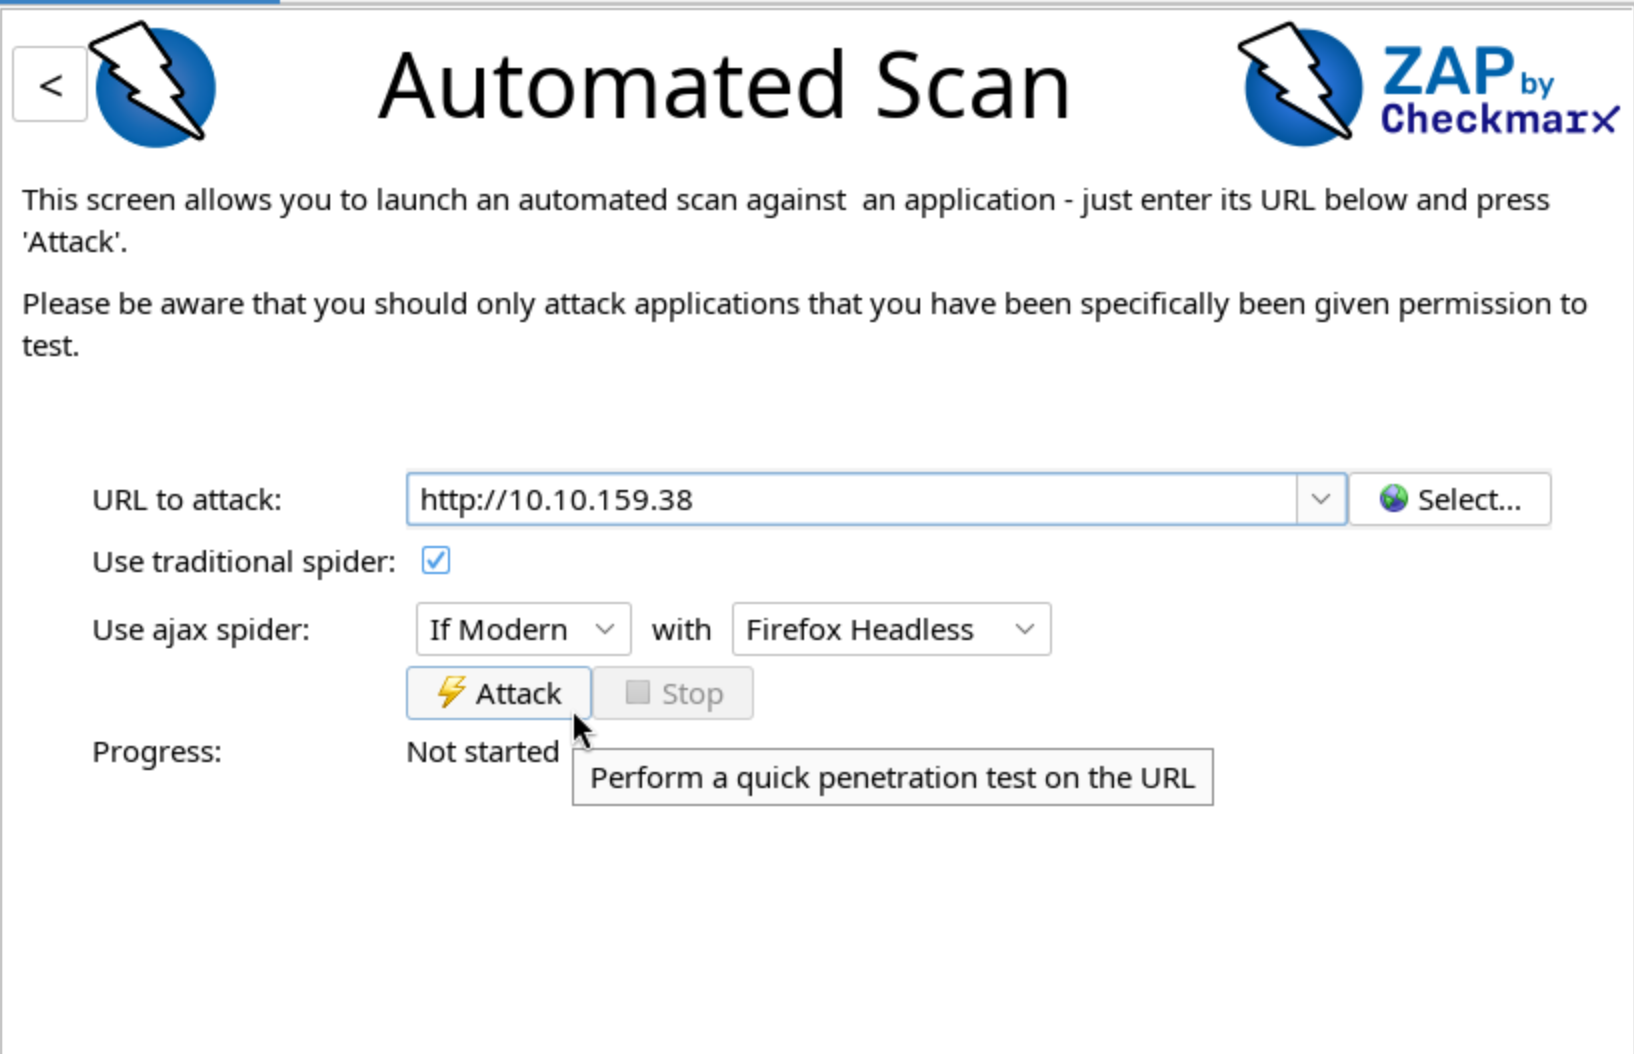
Then just enter the relevant IP and press Attack.
OWASP ZAP Results
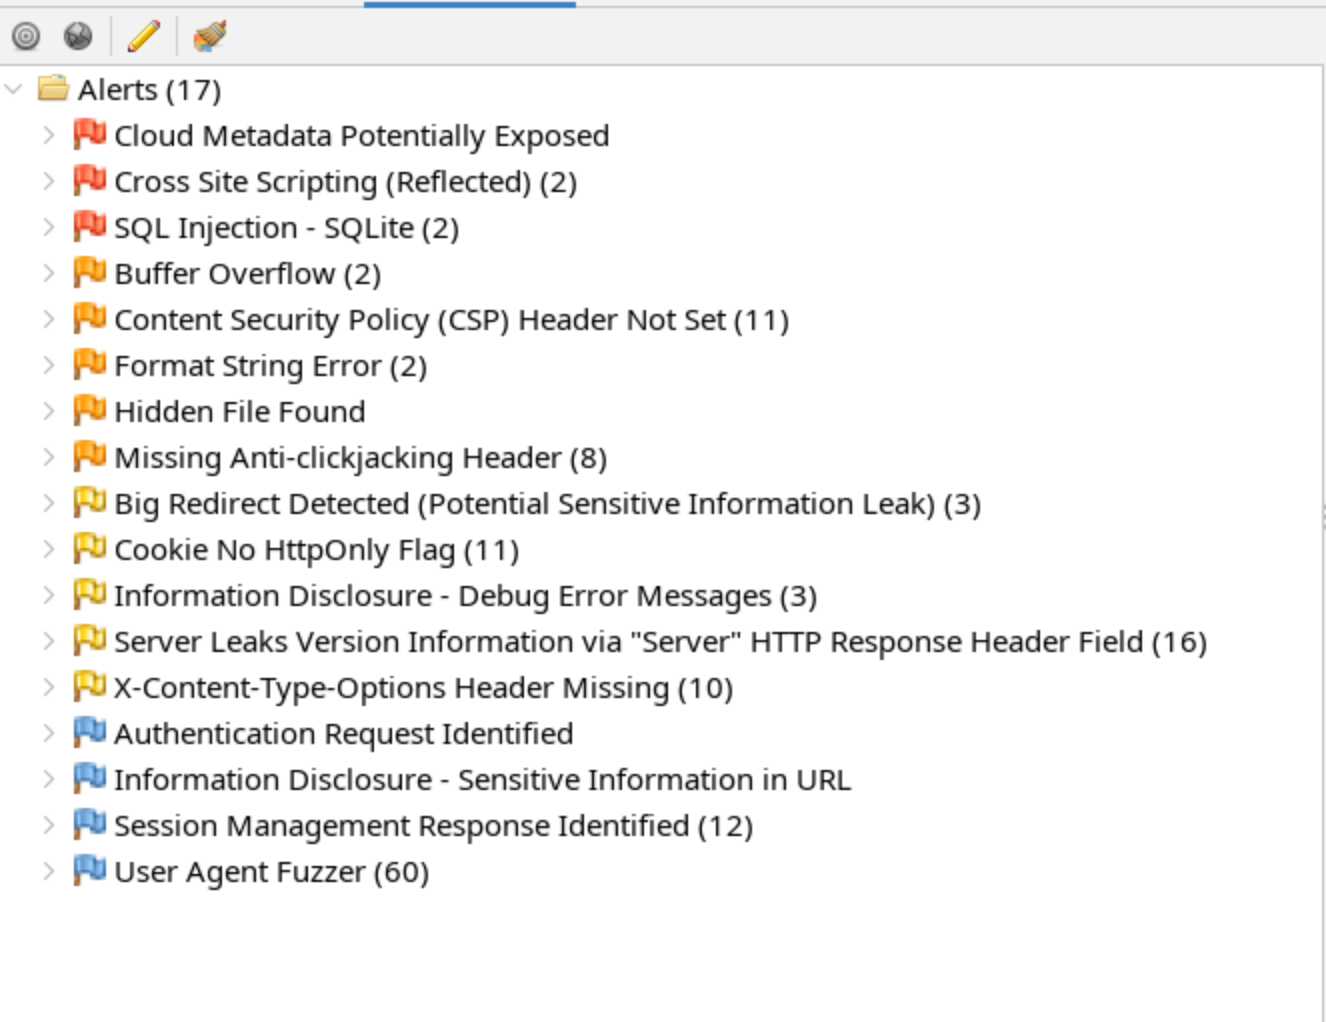
After a bit, the bottom left window will begin to populate with the Alerts found by ZAP. Here we can see three different types of High alerts.
Cross-Site Scripting (Reflected) Vulnerability
If we click into the Cross Site Scripting (Reflected) alert, we can see two examples and get some more information on each.
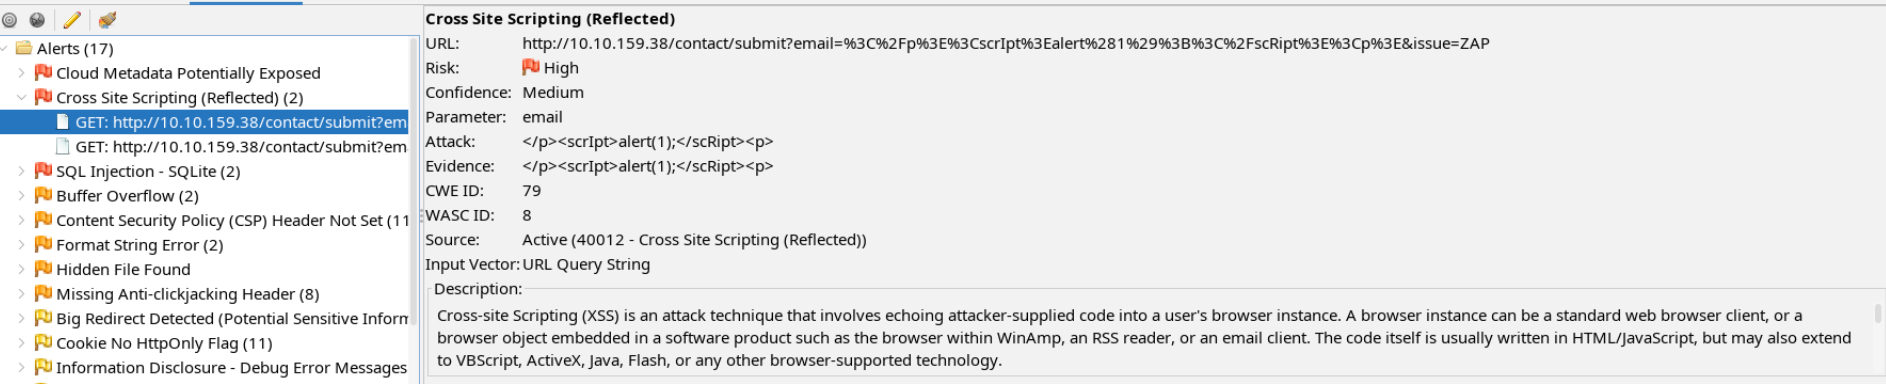
ZAP gives us a description of the vulnerability: Cross-site Scripting (XSS) is an attack technique that involves echoing attacker-supplied code into a user’s browser instance. And it also gives us a proof of concept URL.
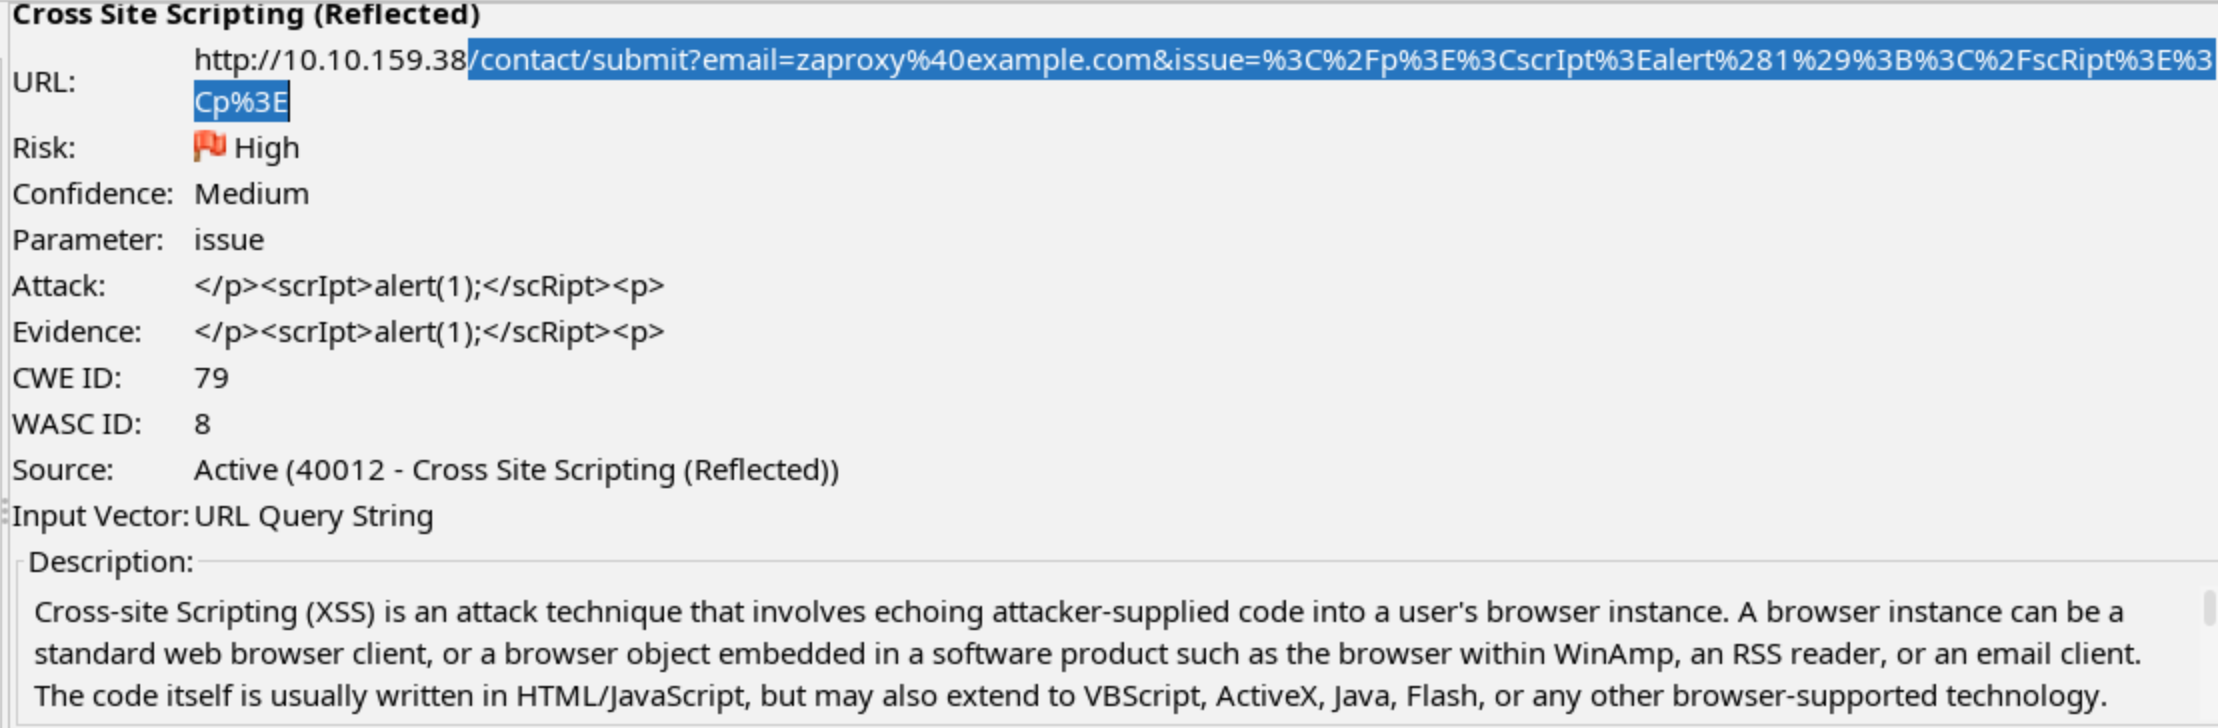
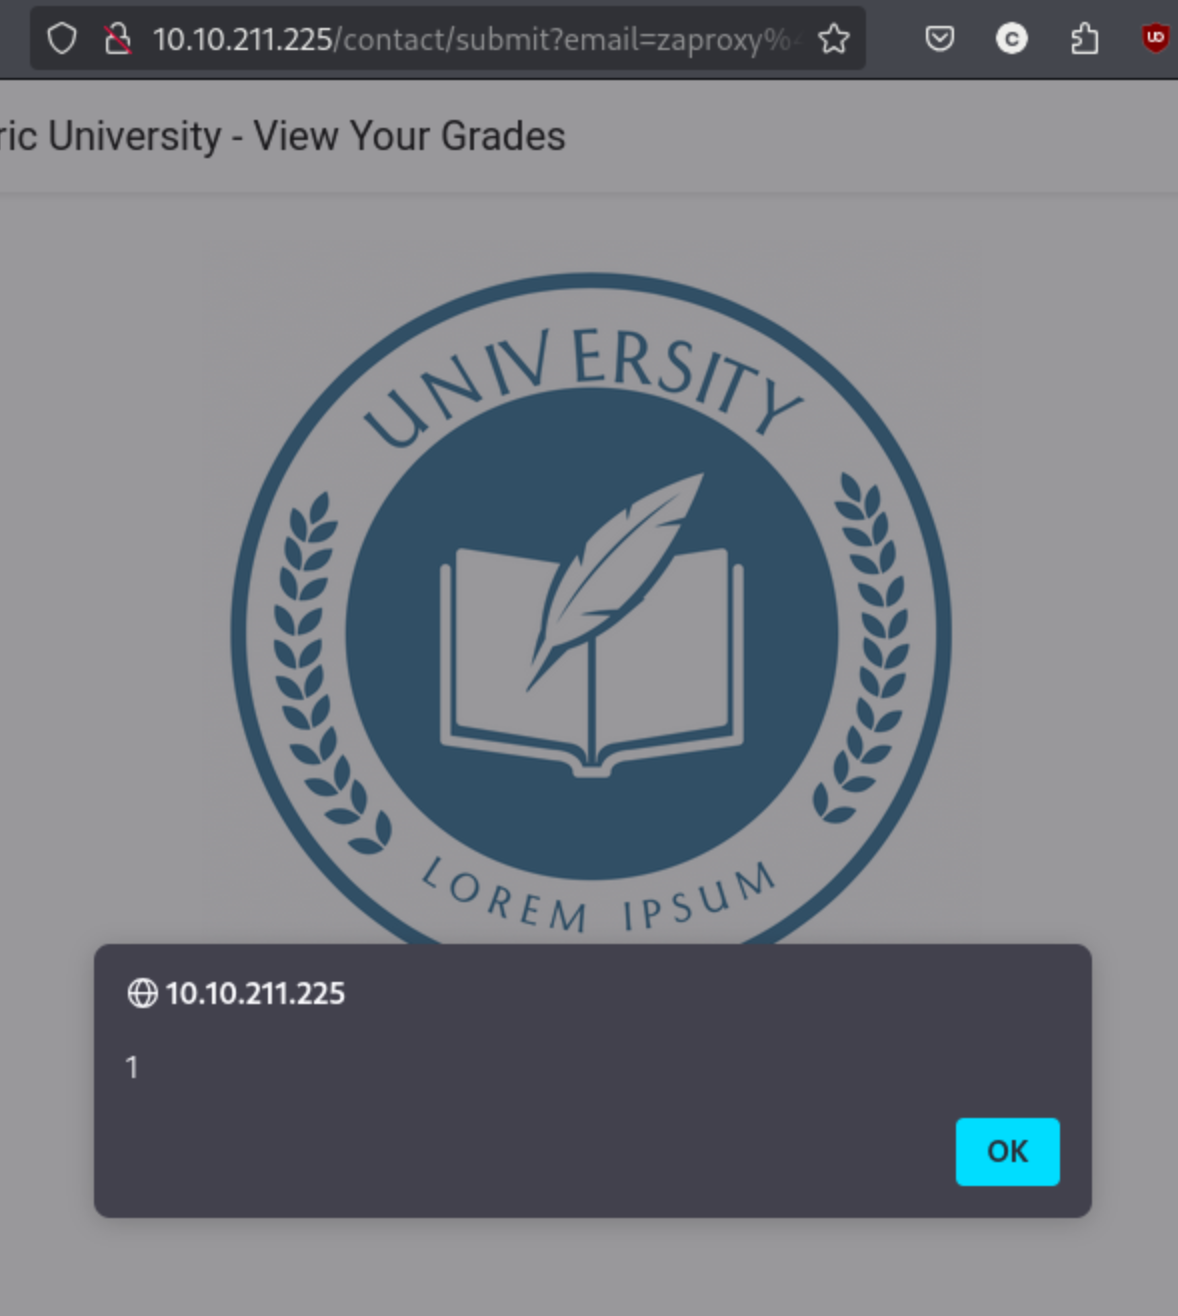
I enter the URL into the browser and see the URL pop up.
I’ll also note that the Alert returns a degree of confidence. For the XSS vulns, the Confidence is Medium. I find it a bit odd, given that we can see it is possible to perform at least a mild kind of XSS, but maybe it would be more difficult to actually exploit in a more dangerous. Unfortunately for a vulnerability like XSS, you usually need another user’s activity. In fact, I would say for several of the other alerts, it would be difficult to exploit the vulnerability in a way that it simple to show. ZAP lists two Buffer Overflow examples, but exploiting them (if possible) would simply crash the server, not provide us additional access. That said, these are vital for the security of an application even if not necessarily helpful for an individual attacker.
I’ll note that I did attempt to exploit some of them, like the SQL injections, though I didn’t get anywhere quickly, so it makes sense to move on to Nessus for the time being.
Nessus Setup
Nessus is a platform developed by Tenable that scans for security vulnerabilities in devices, applications, operating systems, cloud services and other network resources. It’s a very well-known software, so it should be relatively simple to download and install, but I actually ran into quite a few problems at this point. I wrote a brief explanation of how to set it up during each new way that I tried, but for brevity’s sake, I’m going to eliminate them and explain why they didn’t work.
Kali VM ARM Installation on VM
There are a few different ways to deploy it, but I tried Docker using this Dockerfile from j-schmied on GitHub to kick things off. Their version was out of date, but after updating the version it was simple. This did work to stand up Nessus, but unfortunately it turns out that Nessus for ARM does not support Web Application Scanning, making this attempt kind of pointless. This was the push I needed to get a Mini PC to actually start a home lab. I purchased a UN100P with 16GB of RAM, and spent a day or so setting up a Dual-boot with Linux so that I could stand up whatever x64 applications I need.
Dual-boot Installation on x64 Linux
Once I received the new machine, I decided to install Linux Mint Debian Edition (LMDE) from a USB so I could Dual-boot it. I’m not going to get into the reasons for choosing this distro here beyond that it’s pretty well-regarded for simplicity, and having already spent a lot of time in Kali, I’m pretty familiar with Debian. That said, Nessus proved extremely difficult to get running for a few different reasons. Tenable’s status page as of early January seems to suggest some issues with their plugin server, and I found a number of folks reporting the same issue, some even going back to October for Debian Nessus in particular. I spent a ton of time troubleshooting this, I got nowhere, I decided to try from Windows.
Windows Installation
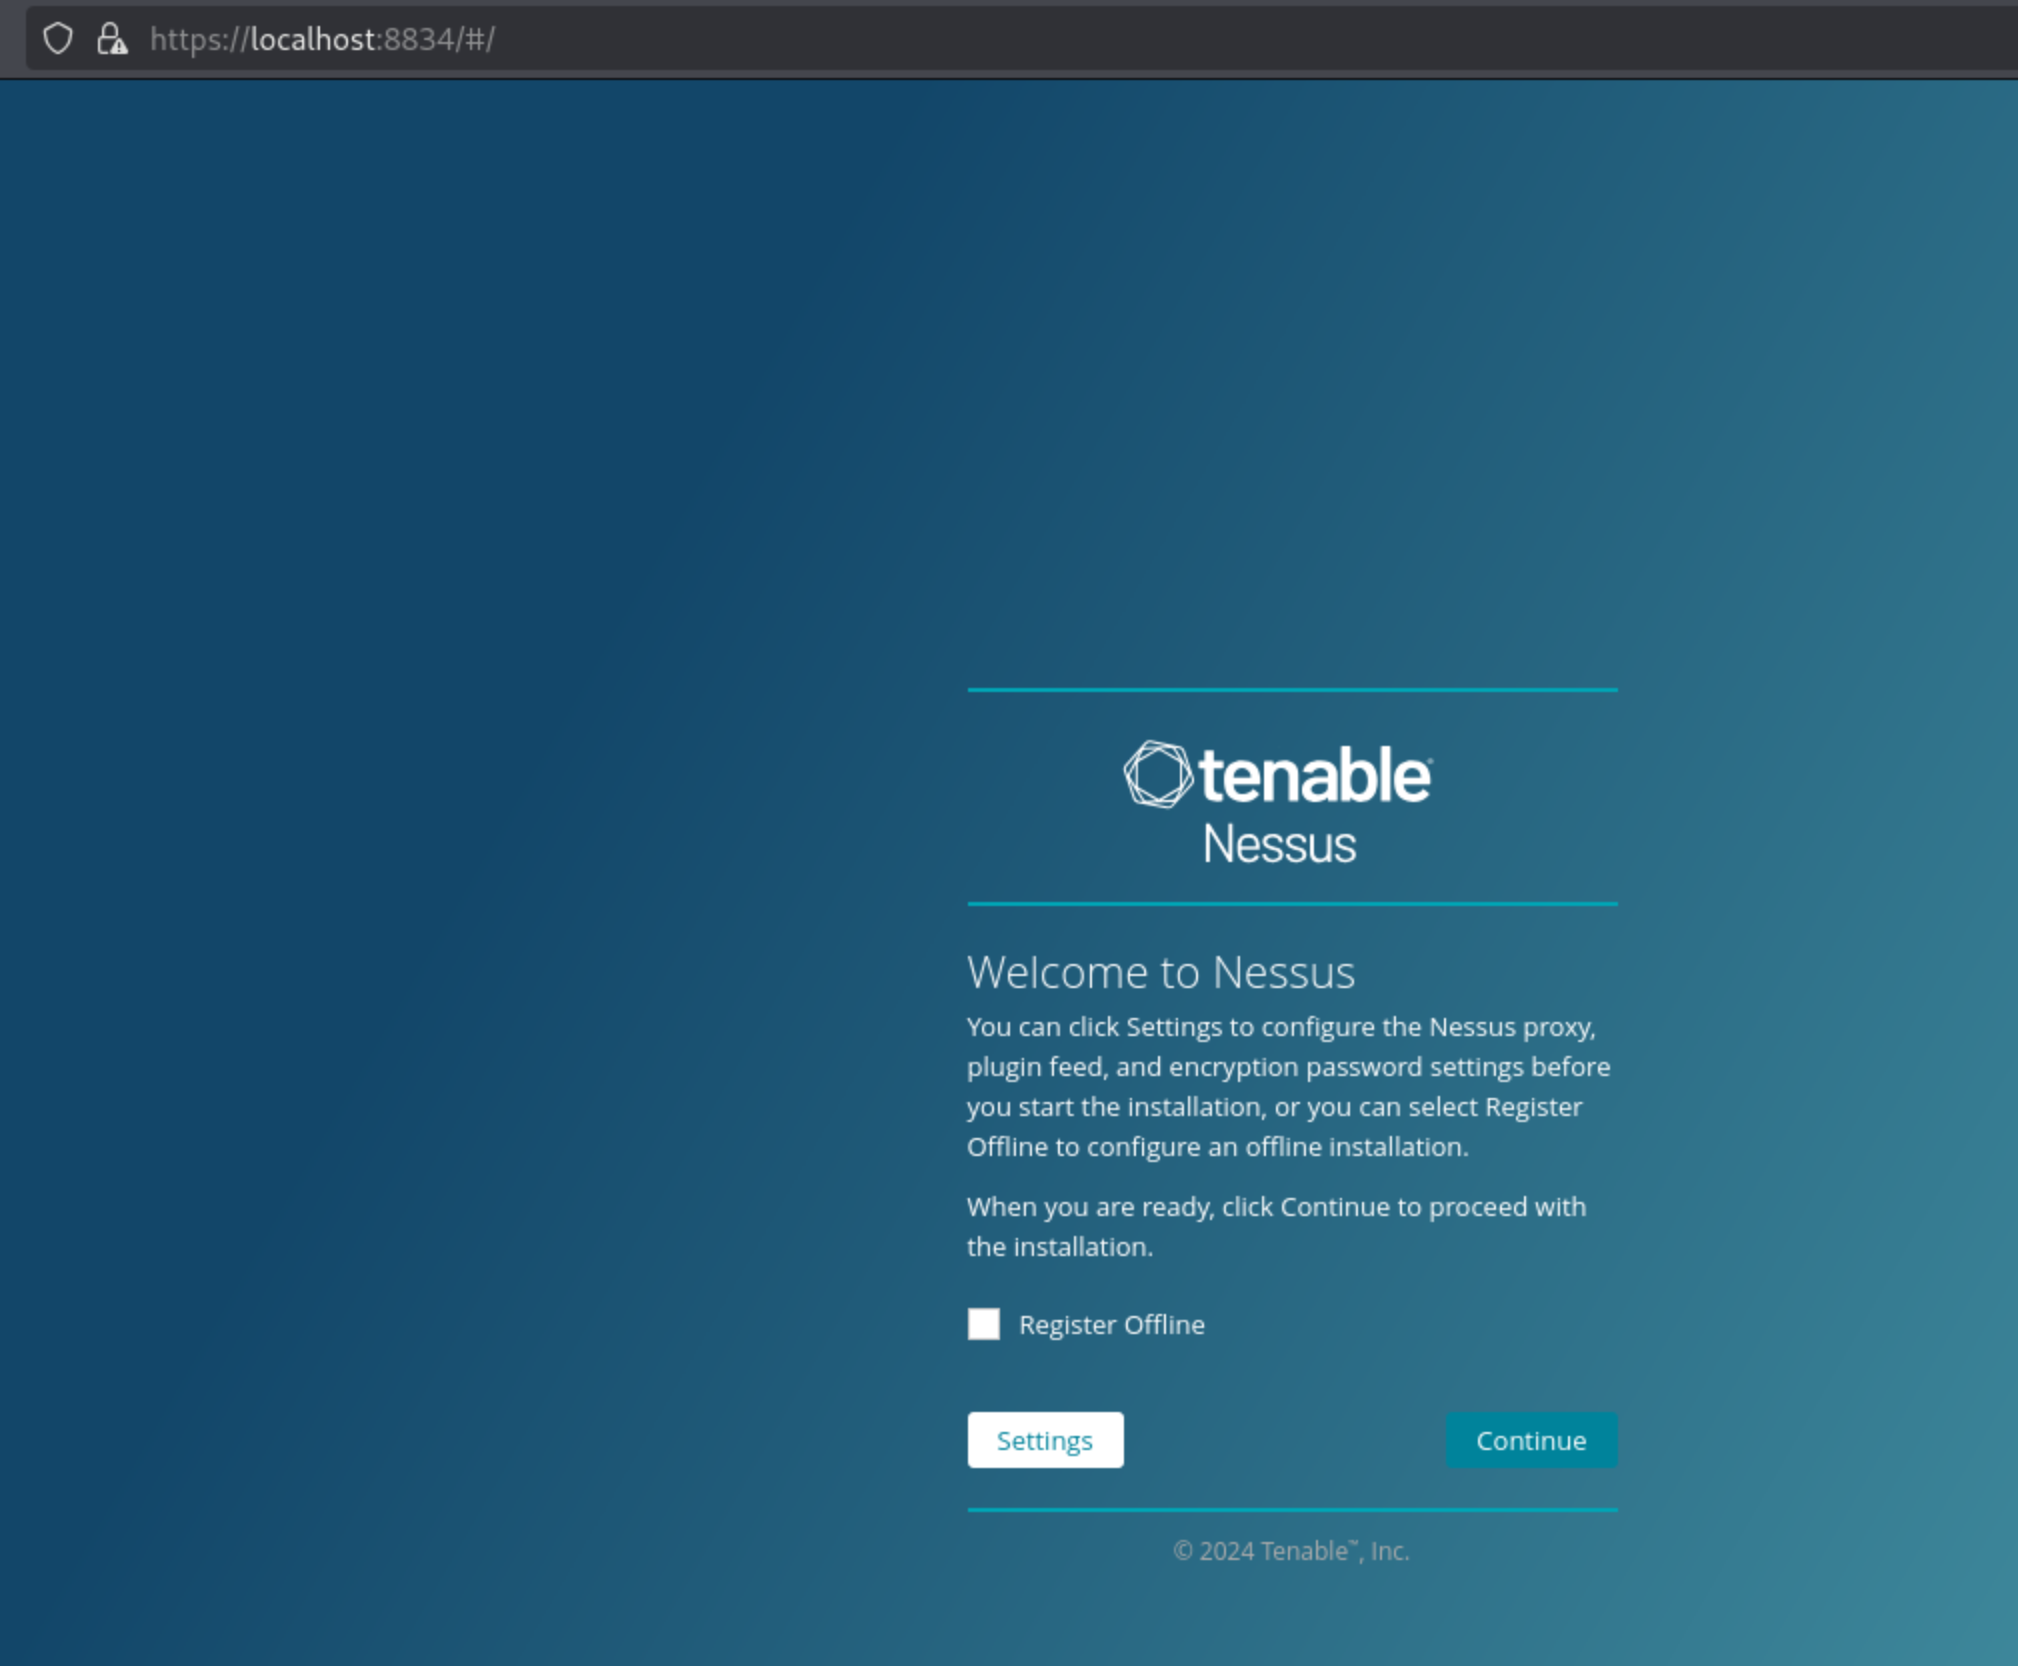
This just worked. You can simply download from here, run the installer, and it will automatically stand up, so you can just head straight to https://127.0.0.1:8834/. You will have to register to get a key, but Nessus Essentials is a free version for educators, students, and hobbyists:
For me it took quite a while to download and compile plugins (never happened for the previous attempts), but eventually you get in and are able to click New Scan:
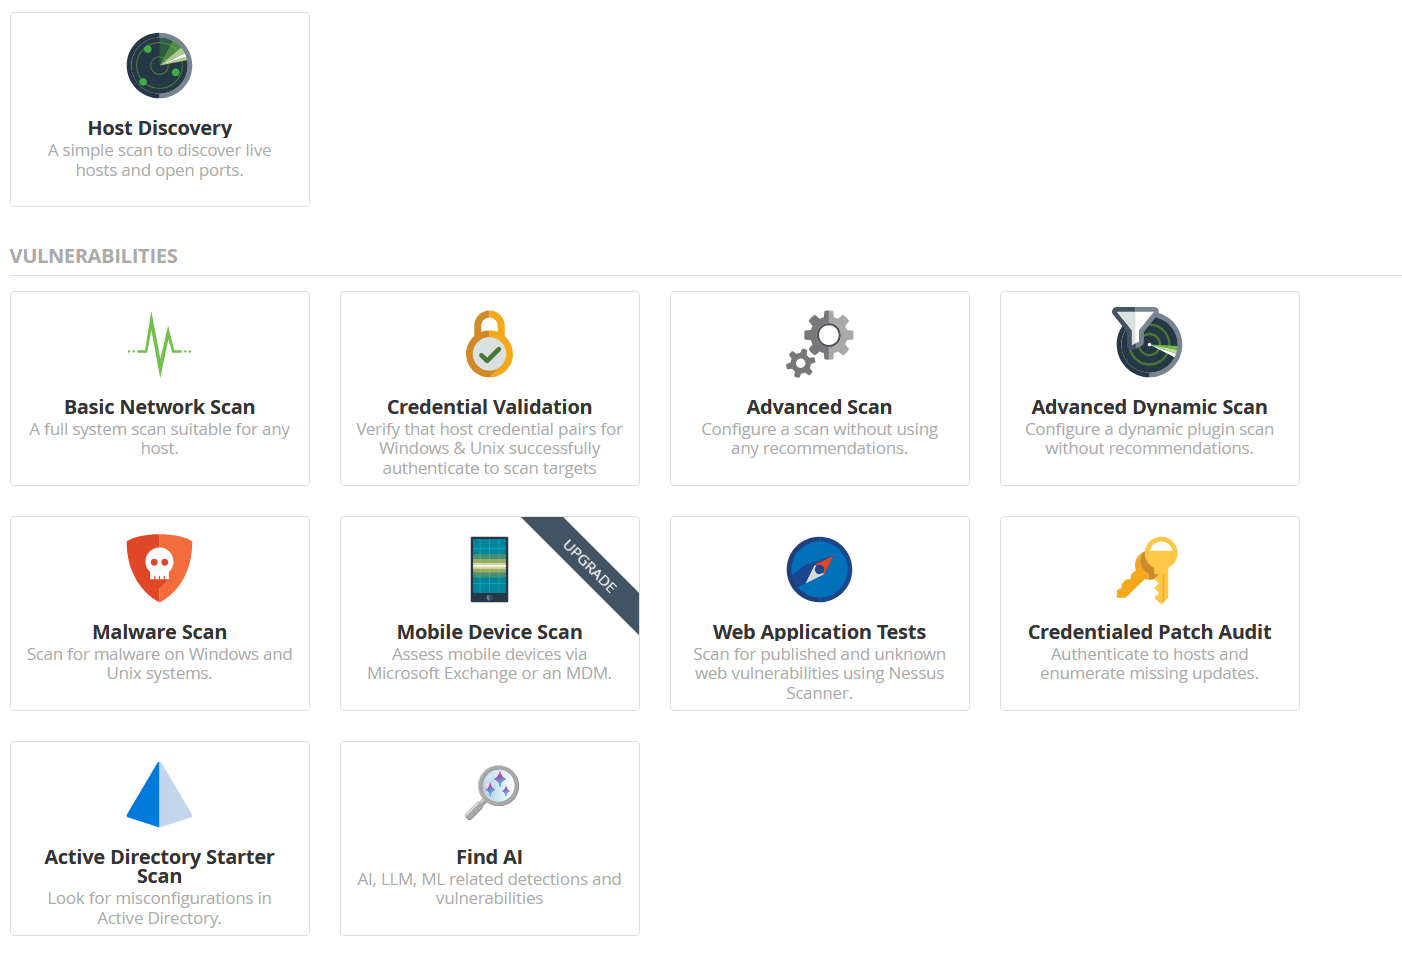
Select Web Application Tests:
Add the relevant IP and information:
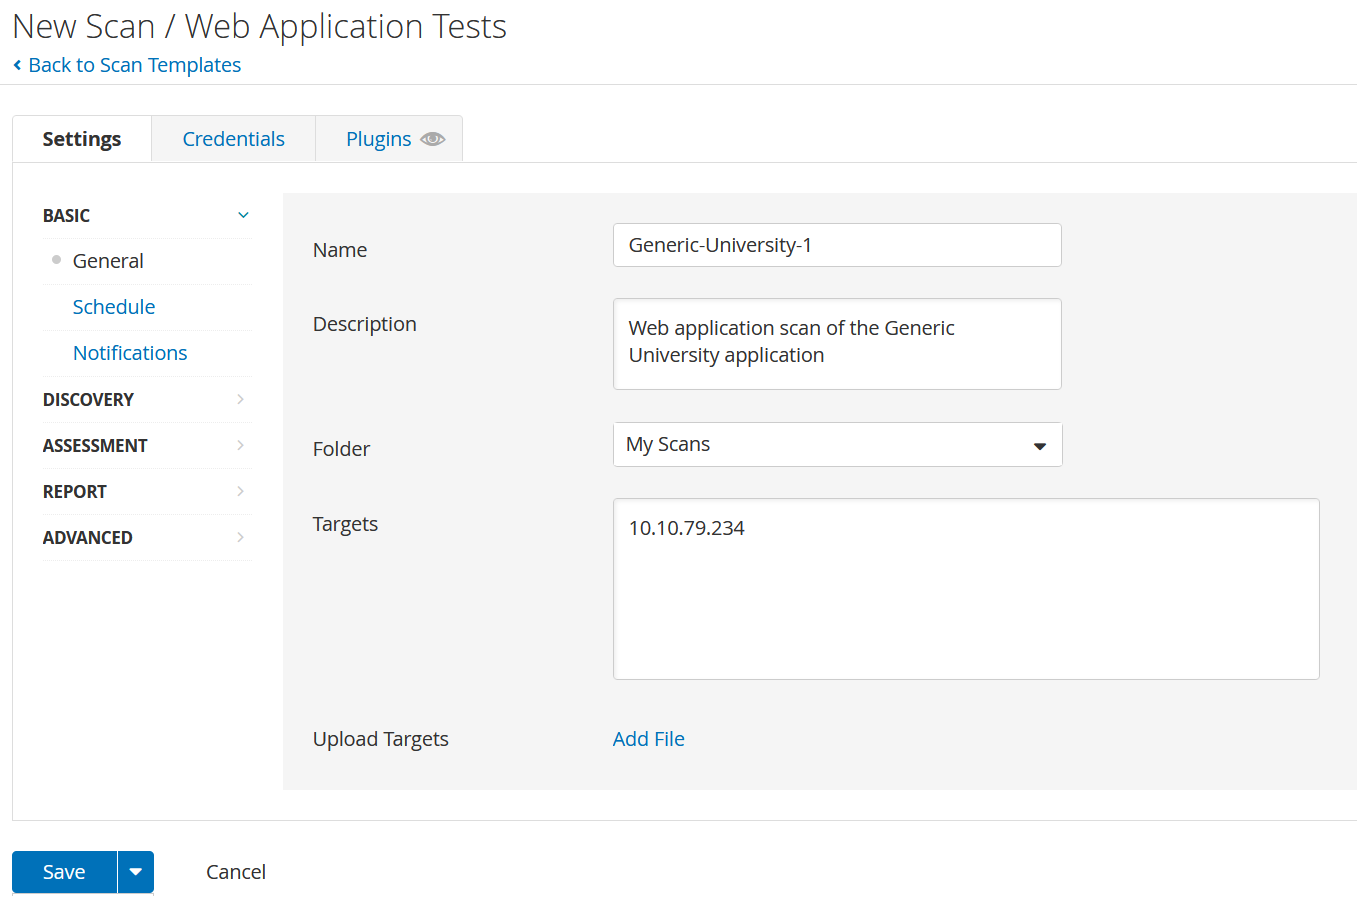
And hit save. It should run automatically, but if not starting the scan is trivial. After that, you should get results.
Nessus Results
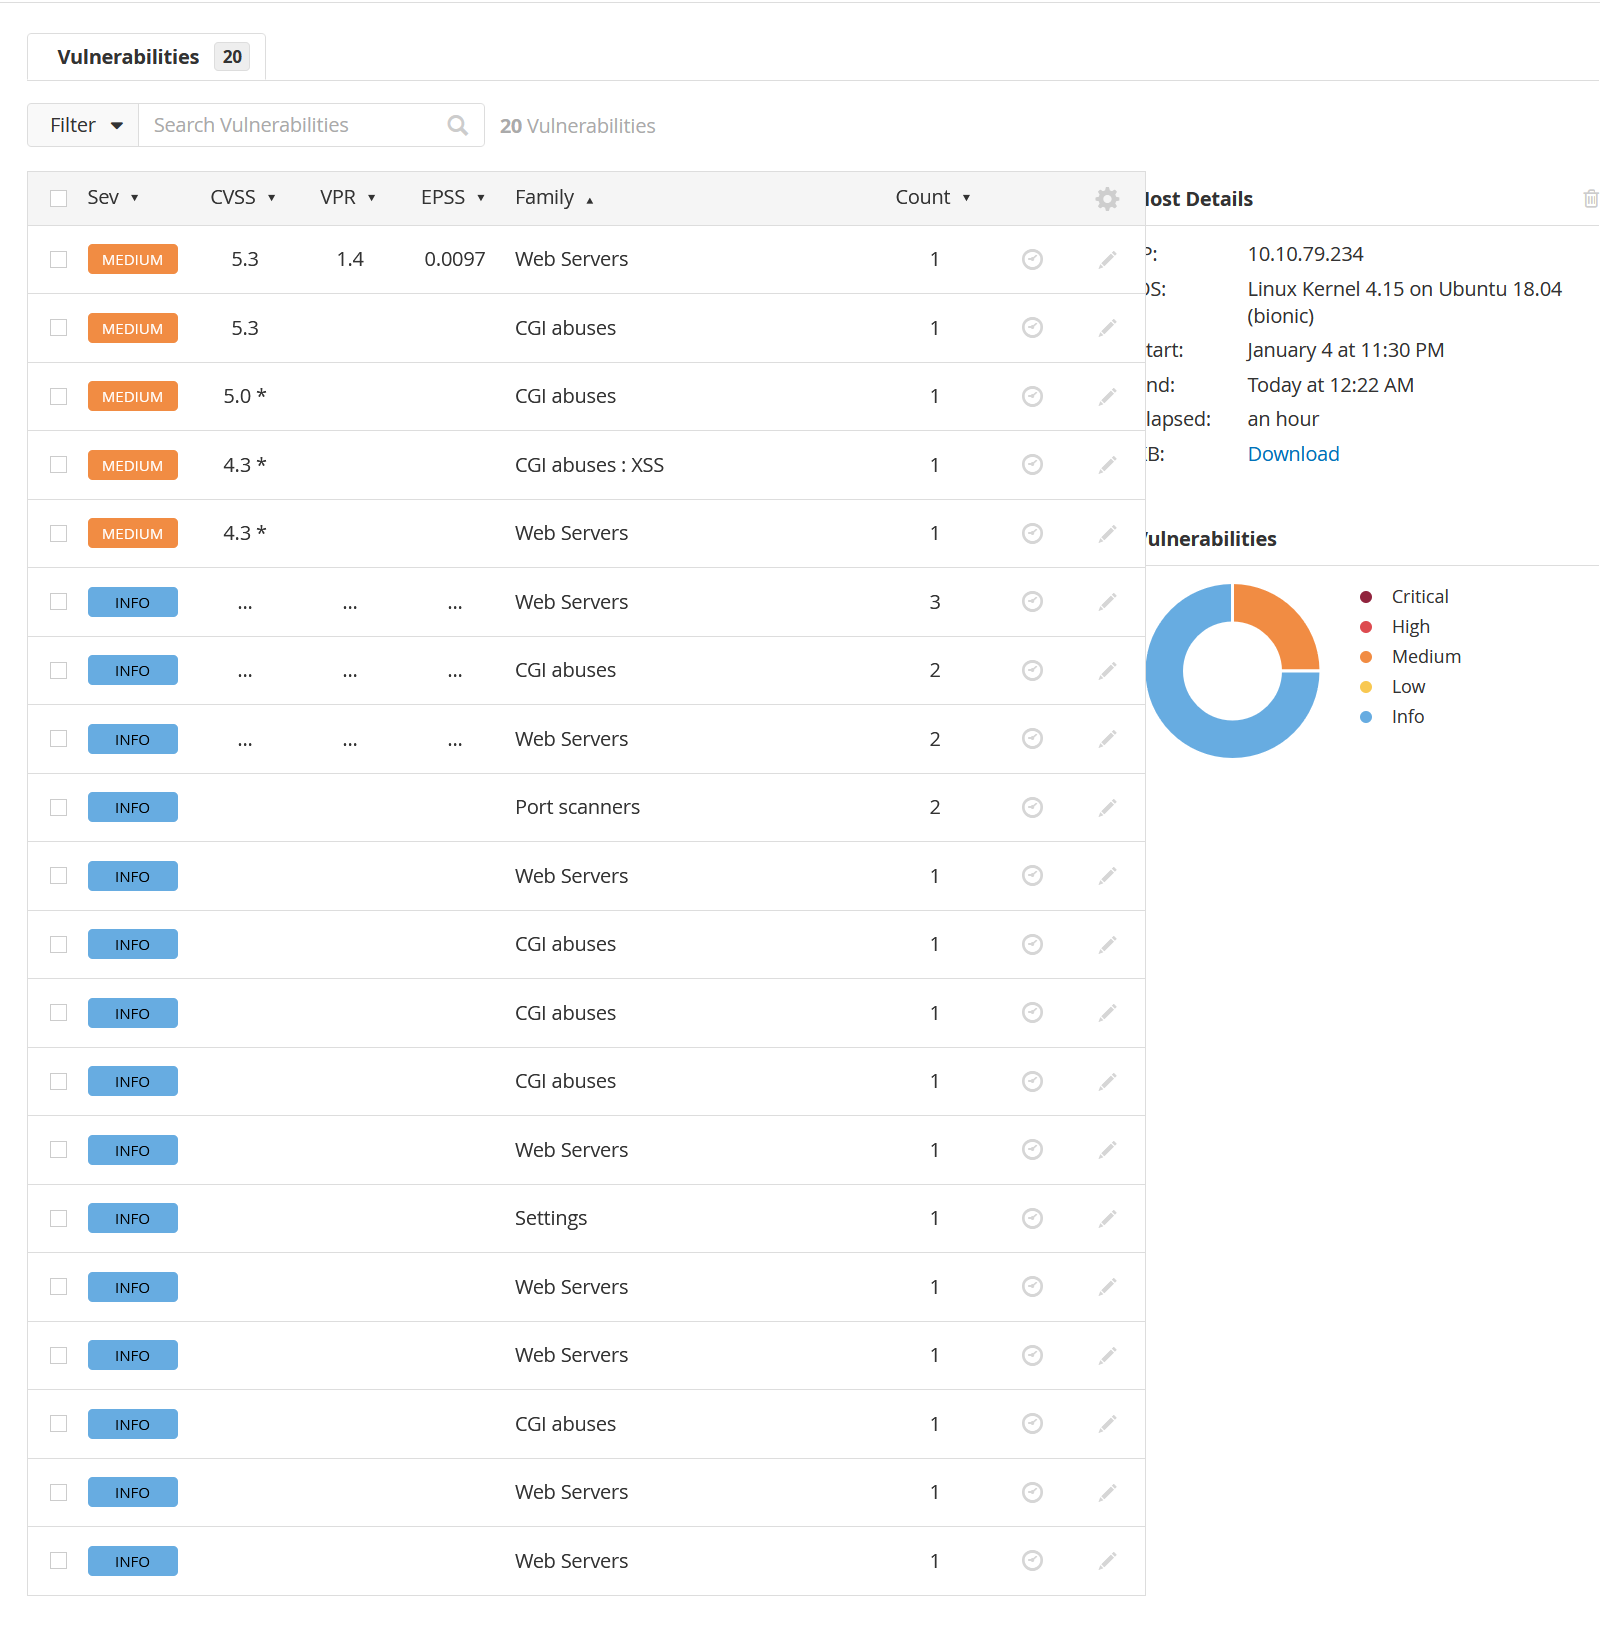
And it looks like we get significantly less than we did for the ZAP scan, though some of the results seem to simply be rated lower than they were for ZAP.
Information Disclosure Vulnerability
This one for example was rated High for ZAP:
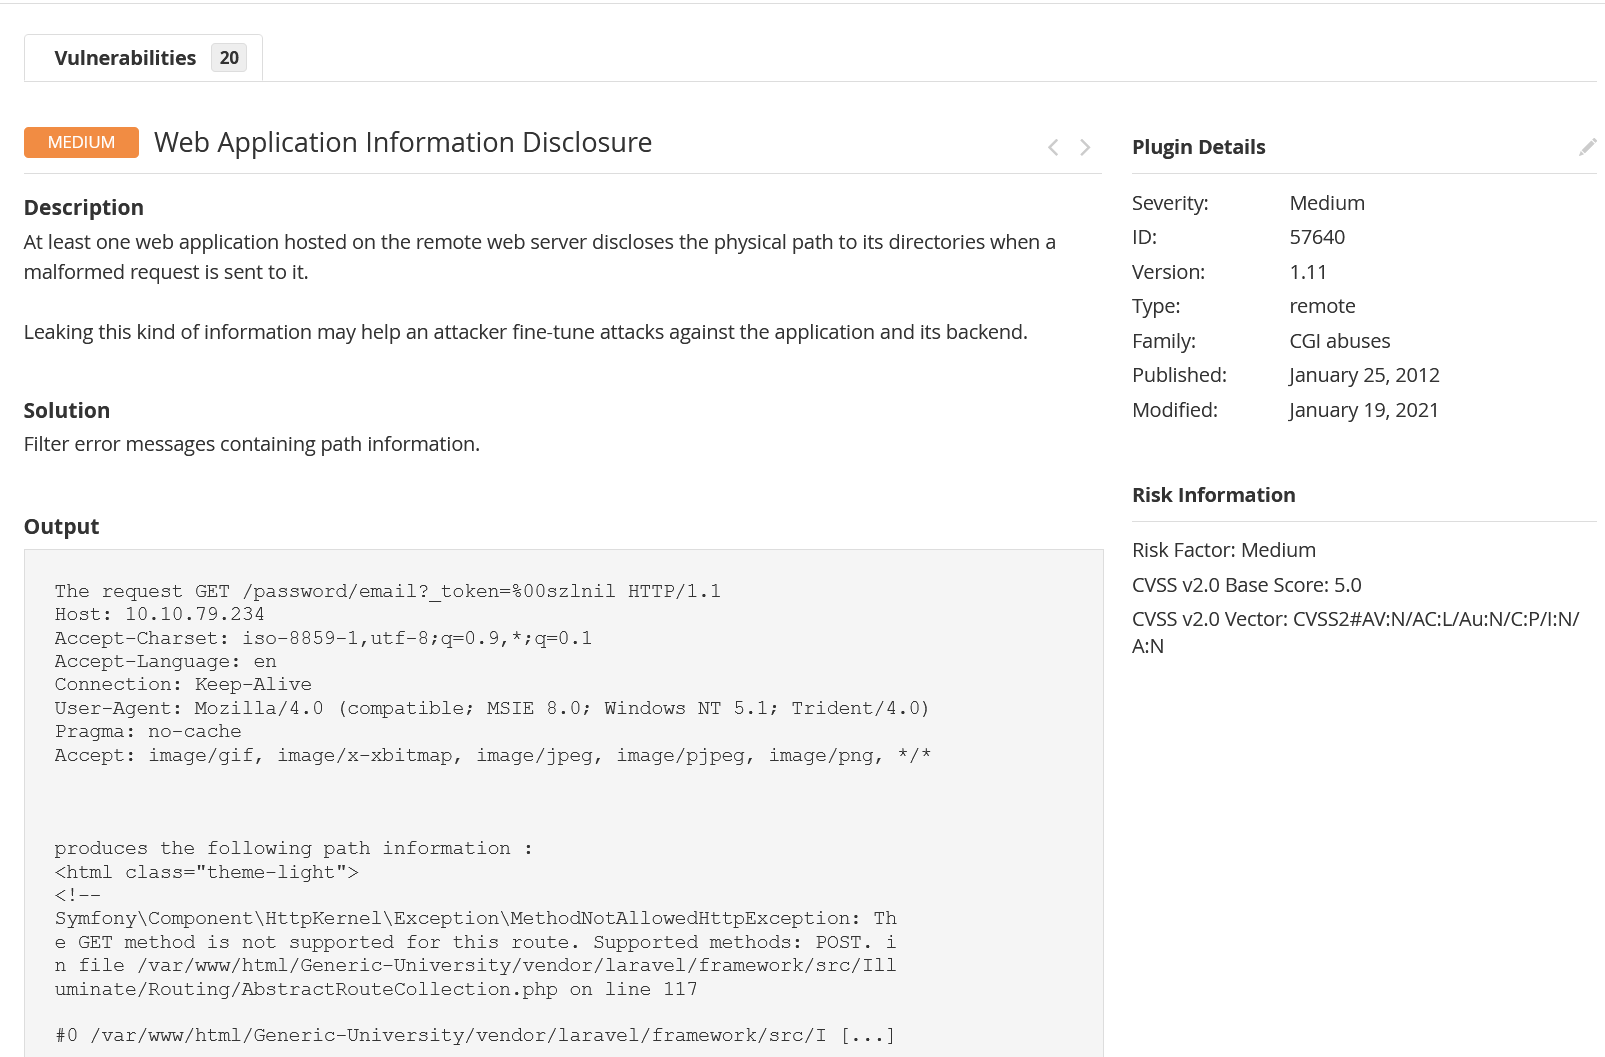
Because I had the application stood up, I was able to visit the PoC link and find that metadata is actually exposed here:
I would consider doing more research on what we could do with metadata beyond the scope of this post, but depending on what we could find, and what kinds of public exploits might be readily available, this page could turn out to be very valuable.
Authenticated Scan Options
I do want to call out one other option which is to create an authenticated scan. As I mentioned in the SAST section, it is possible to create an regular user account quickly, so we can run the scan again.
After creating the account, we need to go into the scan options and fill in the relevant information. I had to capture the request with Burp Suite so I could make sure to fill in the Login Parameters correctly.
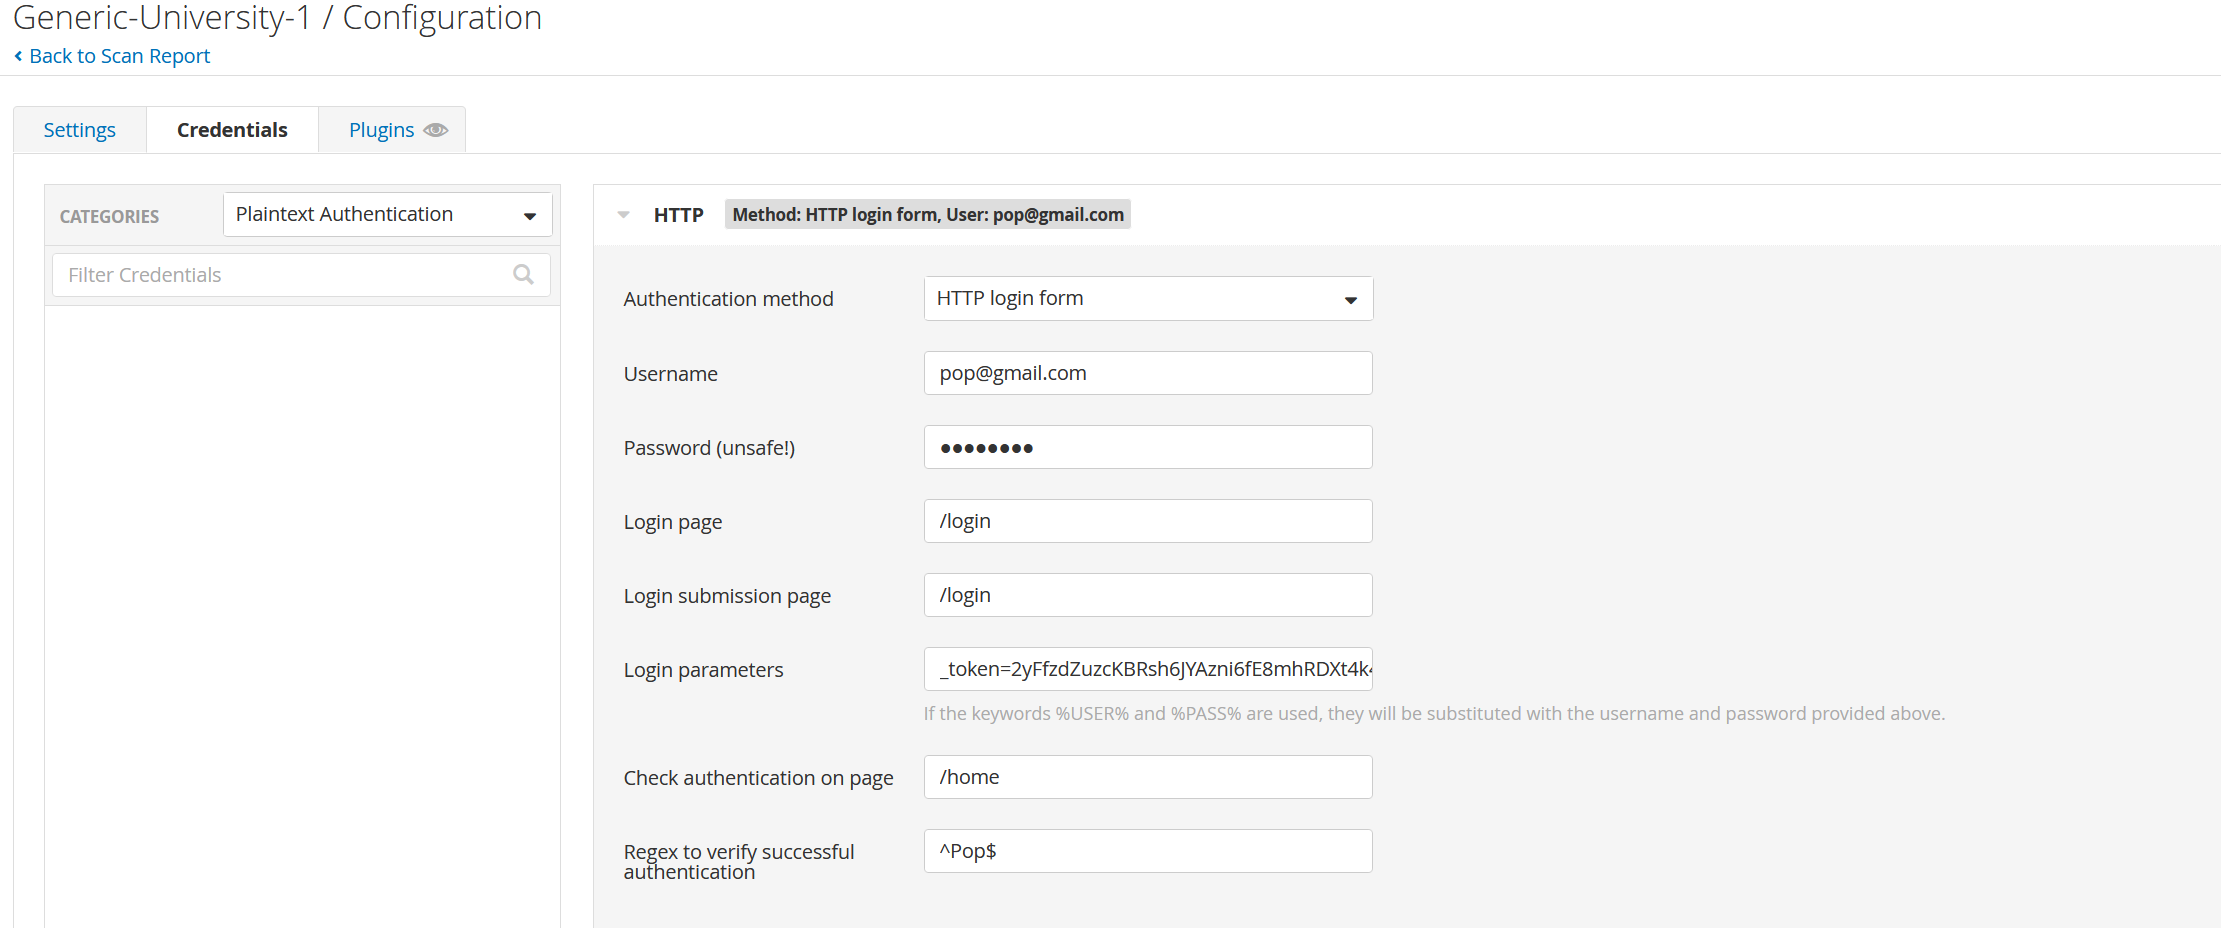
I also want to note here that the options require both a “Login page” and a “Login submission page”. I imagine these might be different for some applications, but for this one, it did not appear that there was another page for this. The reason for this may be that the application was just ultimately very simple, a perfect choice for a post like this, but not necessarily representative of live web app.
After adding the Authentication options, I scanned again and found nothing new. The reason for this is that the application doesn’t really do a whole lot, and it doesn’t change much whether you are logged in or not. There is no User Dashboard or anything like that, so logging in does not provide us access to any new links or apparently access of any kind. In a real application, you might expect a Student dashboard which links to their grades or classes, but that does not seem to exist here. That said, I wanted to mention the option because I didn’t configure it with ZAP.
All in all, I spent much longer trying to set up Nessus than any other step of this process, except maybe waiting for Coverity results, and it didn’t exactly seem to provide any new information. I suspect that it regarded some of ZAP’s findings as false positives, but I can’t be sure without actually testing the application, which I would consider to be outside the scope of this already lengthy post.
Conclusion
Phew, that was a lot of information, but it was very helpful for me to learn some of it. I’ve used some of these tools in previous labs and posts, but it’s nice to be able to try them all on the same application. I considered trying to compare the relative values of each of these tools and provide some kind of conclusion about them individually or with some kind of FOSS vs. commercial spin, but I suspect any conclusion would be premature. There a ton of a reasons you might choose one or the other, and I really didn’t have time to get into most of them. You might use Snyk over Dependency-Check because of its Visual Studio extension or even its SAST capabilities. I’m certain that Tenable’s extensive library of [Plugins] has some people choosing Nessus, but those already familiar with Checkmarx might prefer ZAP. Of course, some prefer the FOSS option on principle. Regardless of which option you choose, make sure to dig in and get comfortable because I was really only able to scratch the surface of their individual functionalities, but hey that’s part of the fun. At some point, I’ll make another post actually exploiting the app, but for now, thanks for reading!